
I am very grateful to note that the dryer, hot water tank, chimney and furnace I mentioned in my last post have all been repaired and/or replaced. Yay!
But my sewing machines, fabrics, and tools have yet to be unpacked and sorted out. (They will be soon – I just haven’t had time!) Meanwhile, I have been in some serious need of quick creative therapy…
Happily, I came back from my recent trip to New York to see my sister all jazzed up and inspired by her very patient and very inspiring hands-on demo of acrylic pours. I love messing around with paint, but this technique was new to me. In retrospect, I kind of wish we had gotten the paints out at the beginning of the visit instead of detouring into the art room at 10:30 pm the night before we were to leave first thing in the morning, but sometimes things just happen that way. And honestly, there’s nothing we did during our visit that I would have wanted to miss; so on second thought, I’m tickled pink about my late-night introduction to acrylic pours – even though I did come home with paint on my favorite robe 🙂
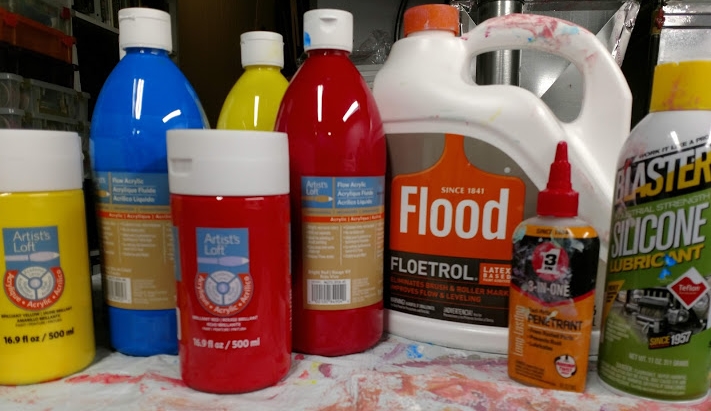
Also happily, when we popped into Michaels after our trip, acrylic paints and packaged sets of 10″ x 10″ canvases were on a huge sale, and I had another stackable coupon on my phone for an additional 20% of the entire purchase. I took it as a sign and loaded up on inexpensive materials I wouldn’t worry about using up.
The basic concept Amy showed me was very simple. We mixed individual small plastic cups of white acrylic paint and a few additional colors with an extender to make them flow more easily, added just a bit of silicone, and then filled a larger plastic cup with a layer of thinned white paint, then a color, then white, and so on. Then we placed a canvas on top of the cup and flipped the whole thing over, pulling the cup away to allow the paint to spread out over the canvas. This is very messy, so plenty of newspaper, paper towels and plastic garbage bags were extremely helpful. She also lined a large box with plastic to contain the paint that ran off the edges of the canvases.
But it’s also surprisingly complex!
Although a certain amount of serendipity certainly is involved, you also can interject a surprising amount of control by manipulating variables such as
- how much you thin down each paint (heavier paints will tend to sink, while lighter ones will tend to float)
- how much silicone (if you use silicone) to encourage the formation of cells
- how you layer the paint in the cup – I experimented with partial layers, stripes, swirls, cutting through the layers with a popsicle stick before pouring the paint out, mixing colors, etc.
- how you dump, pour, slide the upended cup around or otherwise get the paint onto the canvas
- whether you do more than 1 pour on a single canvas
- how you tip, turn, and tilt the canvas to encourage the paint to flow off the edges
- whether or not you use a butane torch – I skipped this at home, since I remembered how how Amy tensed up when I kept getting the flame too close to the canvases… I decided it wasn’t worth the fire risk 😉
You get the idea!
By the way – we’re just scratching the surface here; there are lots of tutorials and recipes online if you are interested in doing some experimenting of your own.
Any way, here are my initial results:
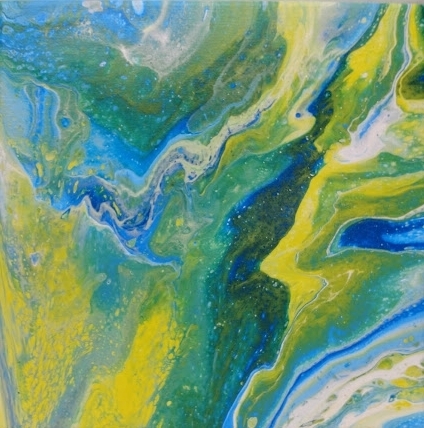
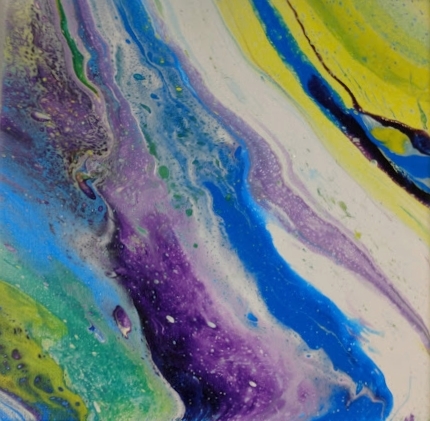
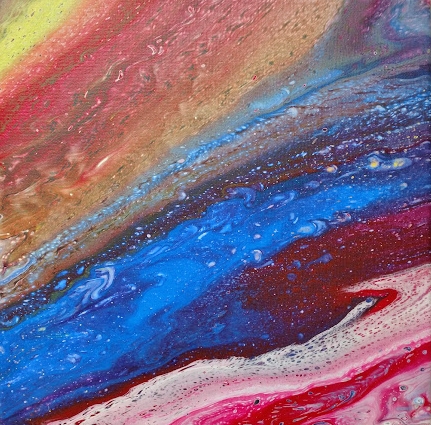
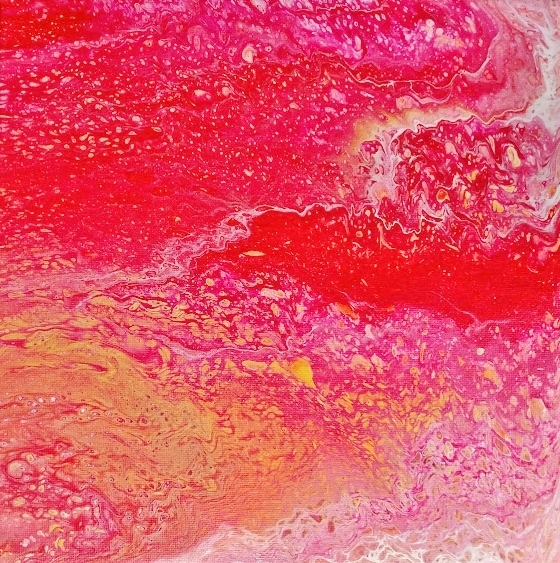
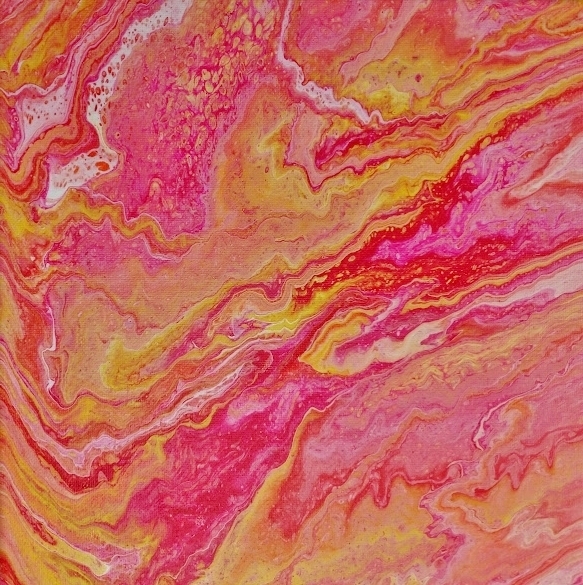
Right now, I don’t consider any of these finished works. I intend to continue playing with them; trying out different glazes, sealers, maybe adding additional layers. Who knows?
There may be some new fabric designs coming out of this eventually… Thank you, Amy!
Hi Beth Ann! You are an inspiration! Thanks for the paint pouring blog. I have been wanting to try it too!
Love and hugs!
Julie Westmaas
Thanks so much, Julie! The acrylic pours are a ton of fun. I encourage you to try it and let me know what you think. Knowing you, I’m sure you’ll come up with all kinds of creative variations on the process. 🙂
Love & hugs right back to you!
Beth Ann