I’ve always been fascinated with the interplay of color, value and visual texture of mosaics, especially those created by artists such as Sonia King. Back in 1997, a book called Machine Embroidery: Stitched Patterns by Valerie Campbell-Harding was published by Quilters’ Resource Inc. The cover photos fascinated me – mosaics in fabric!
There wasn’t a lot of info about this specific technique in the book – the emphasis is on giving TONS of inspiration and jumping-off points for further exploration – but there was enough to point me in the right direction. I’ve been playing with what I refer to as “Mosaic Fabric” off and on ever since.

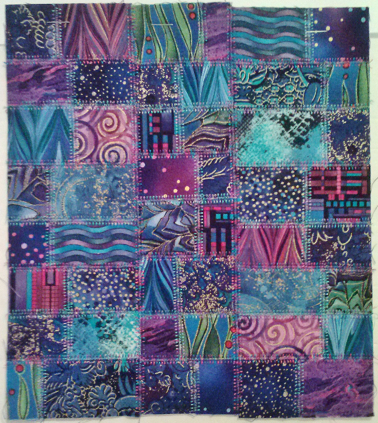
Below is a brief tutorial I prepared for the Lakeshore Fiber Artists back in August of 2008.
This is an exercise in combining colors and textures.
One of the keys to a pleasing result is to have a unifying principle around which to build your collection of fabrics – a reason that these fabric belong at the same party.
By the same token, diversity is necessary in order to keep the party interesting.
Color, value, saturation and visual texture are all elements that can be used to build unity and diversity.
The resulting fabric can have high internal contrast or low internal contrast, depending on the fabrics that you have used.
If this is new to you, analogous colors (side-by-side on the color wheel) will be easiest to work with, but feel free to mix it up!
Thread choice can also have a lot of impact. I enjoy the sheen and ease of use of high quality trilobal poly such as Isacord Machine Embroidery Thread or Rainbows (variegated) from Superior Threads. Metallic thread may also be quite striking, but it can be tricky to use.
- Cut lightweight gridded fusible interfacing a couple of inches larger than you need your finished piece of fabric to be. If desired, Pellon Décor Bond (does not have a grid) can be used for greater durability. A grid is not mandatory, but I’d advise drawing a least a couple of guidelines to help keep the fabrics aligned.
- Lay the interfacing down so that the fusible side is up–the grid will be facing away from you, but you should still be able to see the lines. Slide some white paper underneath the interfacing if your table is so dark that the lines don’t show through.
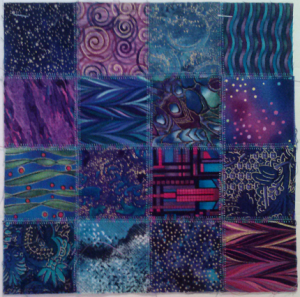 Stitch over the raw edges between all the rows of squares, creating a vertical and horizontal grid of stitching.
 - Using the grid as a guide, cover the interfacing with squares of various coordinating fabrics, all cut to the same size. I generally base my designs on 2”, 2 ¼”, 2 ½” or 3” squares; all squares in a given piece of my mosaic fabric start out the same size.
- Check to make sure the entire surface of the interfacing has been covered; the squares should meet edge to edge, with little or no overlap. The lines on the interfacing should help keep you working in straight rows.
- With a dry iron, fuse the squares in place. Don’t worry if you occasionally see a sliver of interfacing.
- Set your machine to auto-lock your stitches, if possible. With a multi-step zigzag set at a width of 6.0 and length of 2.0, stitch over the raw edges between all the rows of squares, creating a vertical and horizontal grid of stitching. Note: you are not sewing a regular seam; instead, the stitching should straddle the butted edges of the squares.
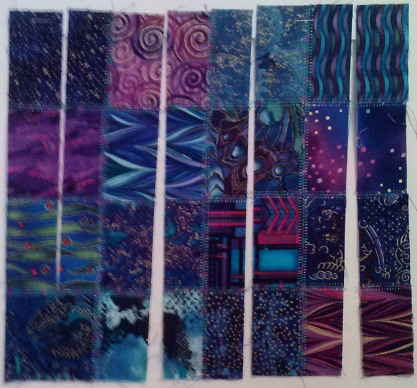
 Cut down through each vertical row of squares.
 - Cut down through each vertical row of squares. This cut can be through the middle of the squares, or it can be an asymmetrical cut. Keep all cuts parallel to the vertical lines of stitching.
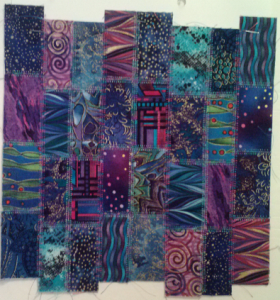 Shuffle and stitch the vertical rows together with the same multi-step zigzag you used before.
 - Shuffle the vertical rows. In addition to shuffling their order, you may wish to off-set the tops and bottoms of each row. This will create a little waste, but it makes an even more interesting pattern. Try not to offset the rows by more than ¼ the width of the original squares. Alternate directions when off-setting; don’t make stairs.
- Stitch the vertical rows together with the same multi-step zigzag you used before, butting up the raw edges against each other and centering the zigzag where the raw edges meet.
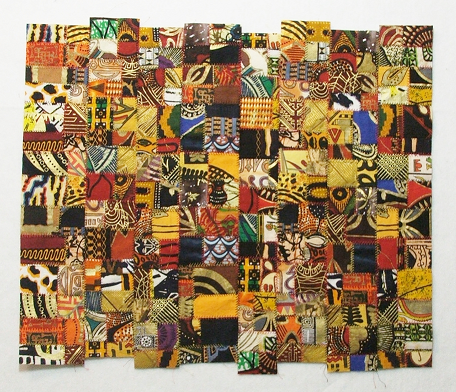
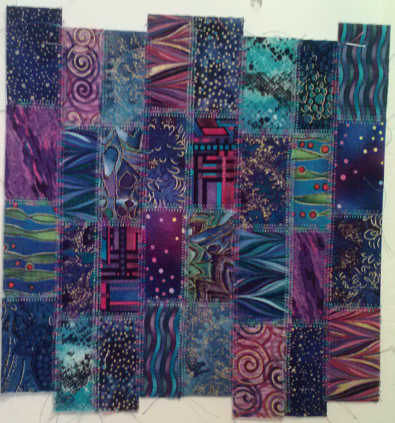
 Trimmed Mosaic Fabric – ready to use!
 - Square up the irregular edges, and repeat steps 7-9 in the horizontal direction: cutting, shuffling, and stitching.
- Trim up the edges of your newly constructed mosaic fabric and enjoy the fabulous results!

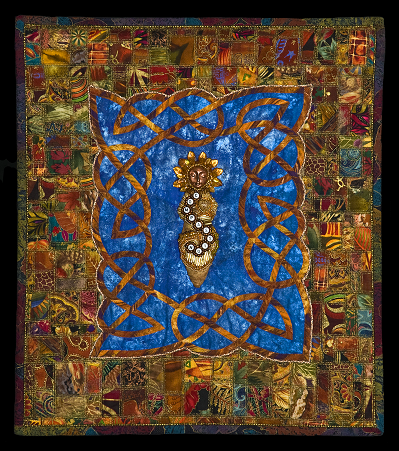
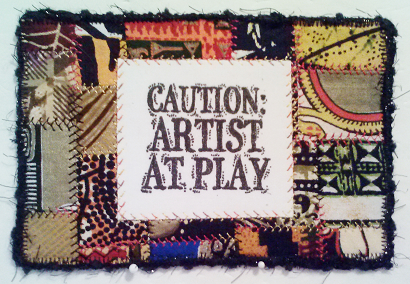
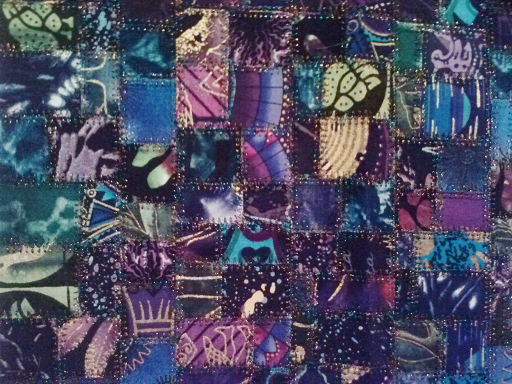
The finished fabric is fun to use in all kinds of projects. Here are just a few of the ways I’ve used it: