I like to have lots of different projects going at different stages at the same time, so I always have something interesting to work on. But sometimes there’s a bottleneck, and I have a bunch of projects that are all at the same step. That’s what has been happening to me lately – a pile-up of quilts just waiting to be bound.
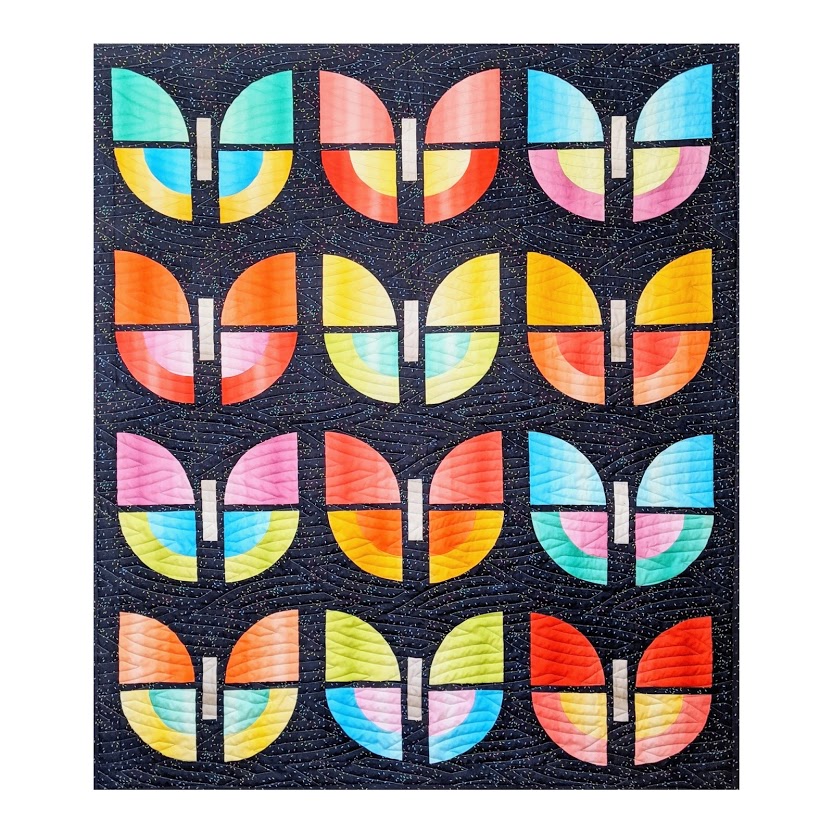
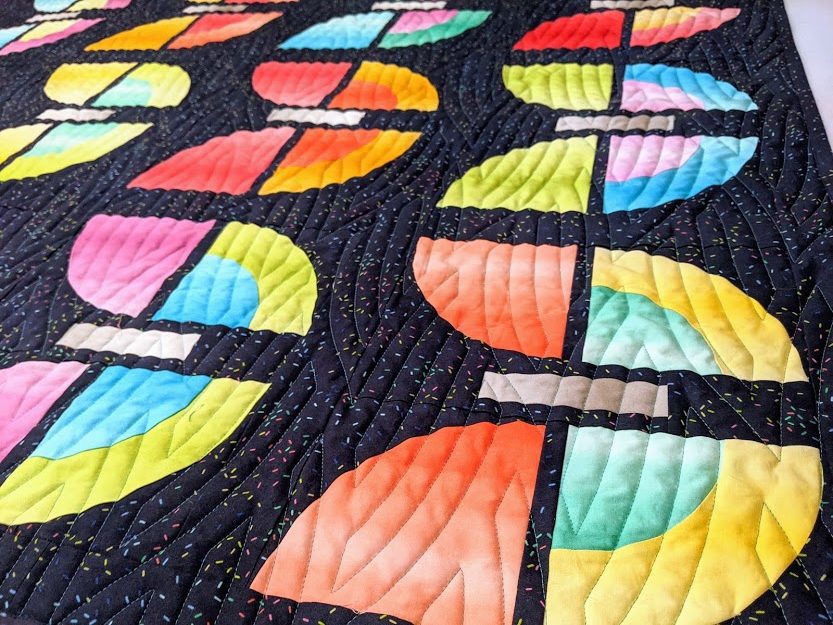
Butterfly Bouquet quilt (pattern by Simone Quilts), made by Beth Ann Williams and quilted by Terri Watson of ThreadTales Quiltworks
For years and years, I bound all of my quilts with a double-fold binding machine-sewn first to the front of the quilt, and then wrapped around and hand-sewn to the back of the quilt. I love the beautiful, clean finish this method provides, but it does take time! Over the past couple of years, I’ve been experimenting with alternatives. (I know I could always just straight-stitch the binding; but I find it can be tricky to keep absolutely perfectly lined up with the edge of the binding, and I’m not especially crazy about how it looks.)
Church Window quilt made and quilted by Beth Ann Williams (pattern by Lo & Behold Stitchery), finished with a flange binding.
But not every quilt needs a piped binding (faux or otherwise), and my collection of quilts waiting for bindings was piling up. So I returned to another technique I’ve experimented with before – sewing the double-fold binding first to the BACK of the quilt, and then wrapping the binding around the the front, and stitching it down with my favorite “invisible” machine applique technique.
Here’s what it looks like:
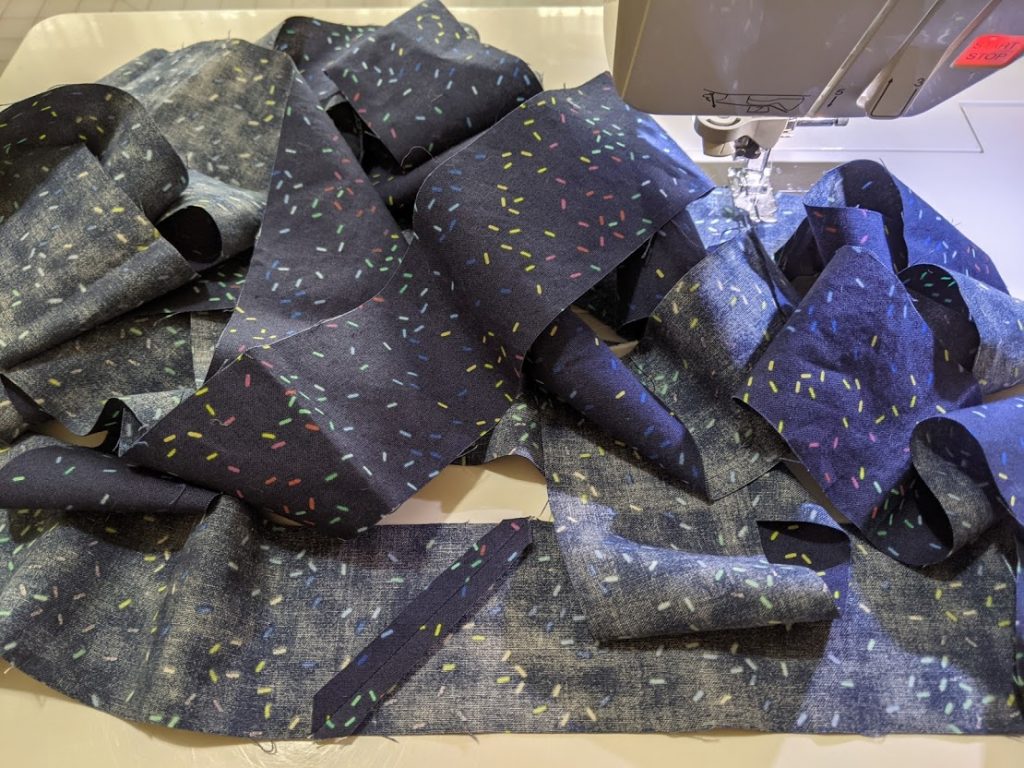
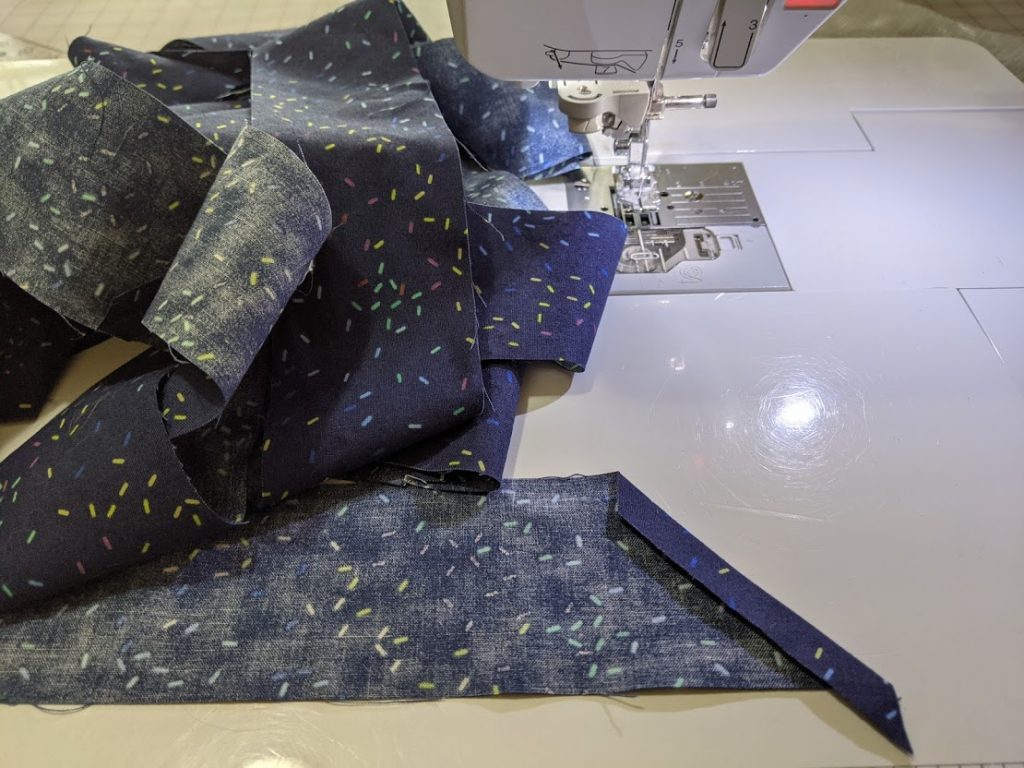
I cut my binding strips 2 1/2″ wide and joined them with diagonal seams.
UPDATE 9/17/21 – I have recently switched to using a strip width of 2 1/4 and find that I generally prefer the slightly narrower look 🙂
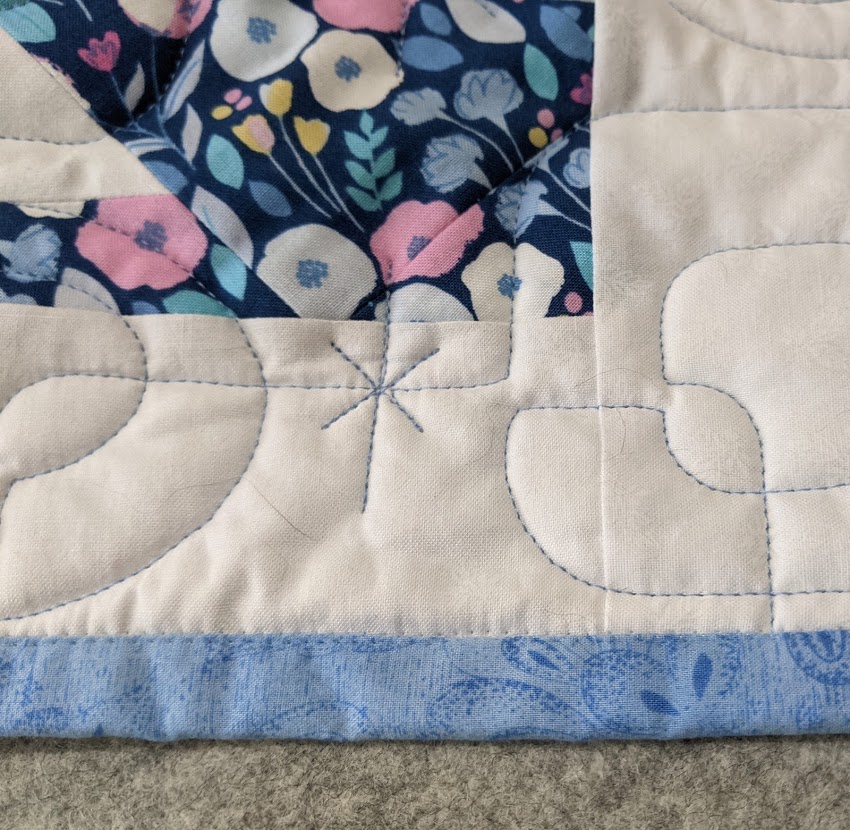
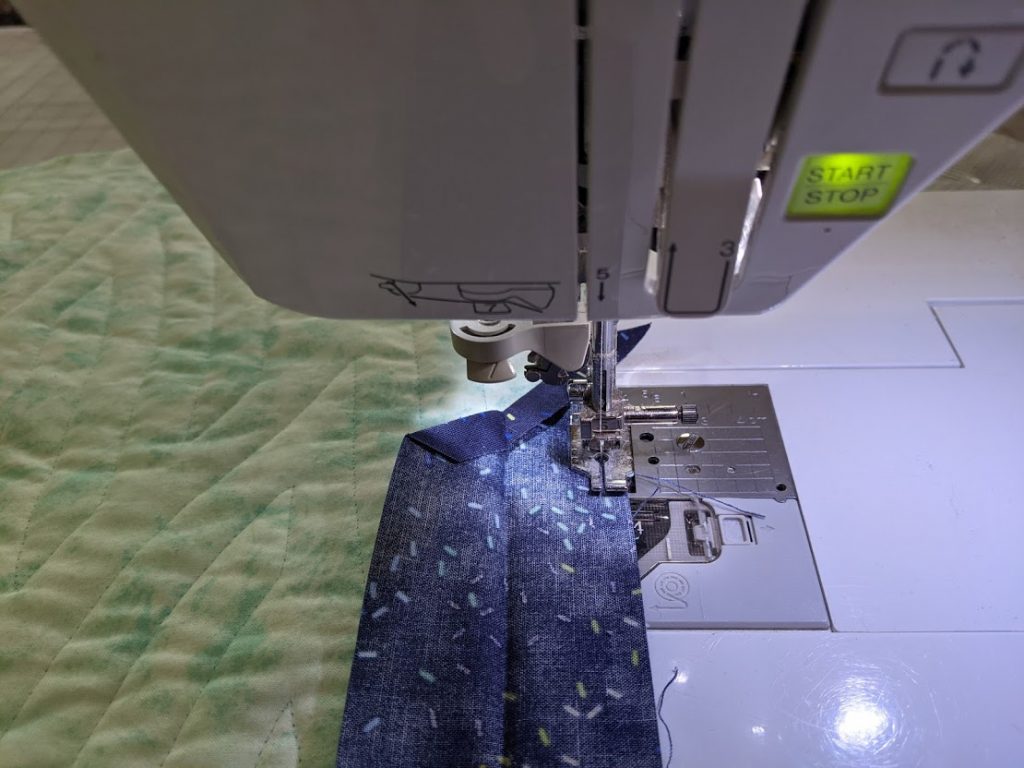
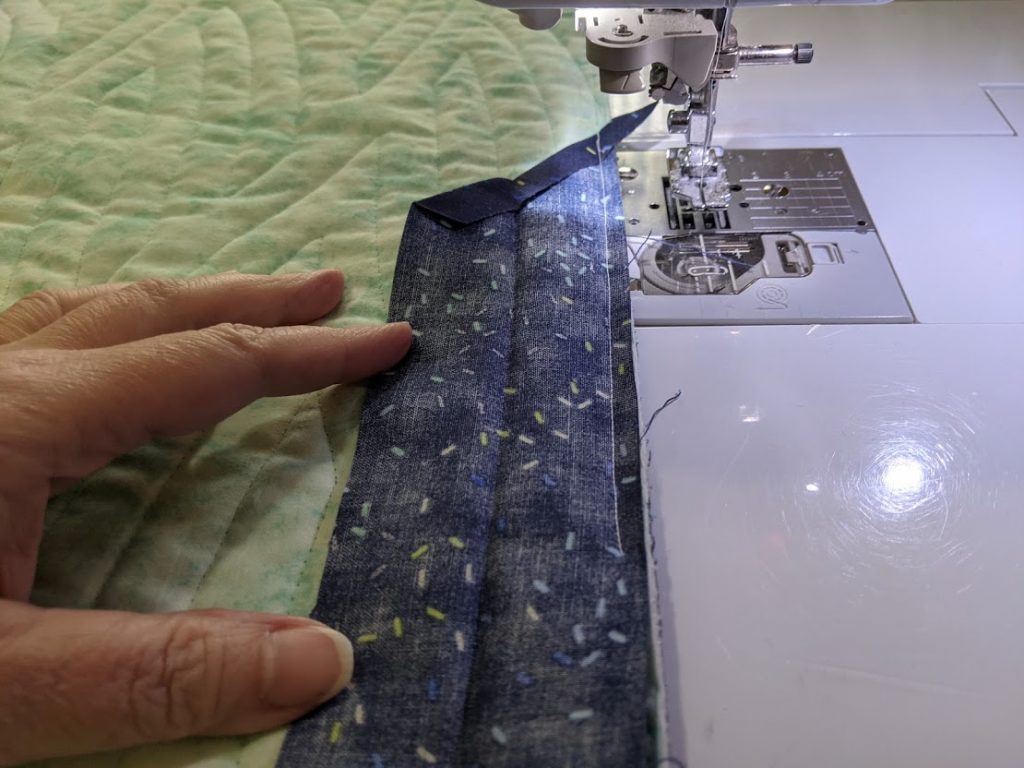
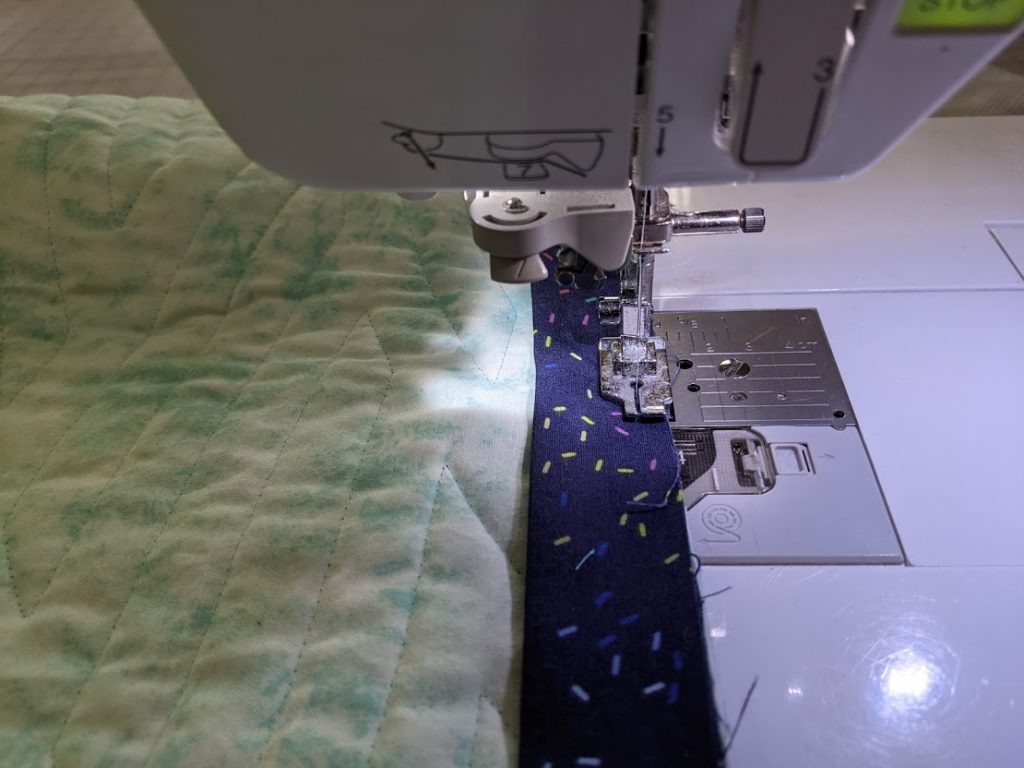
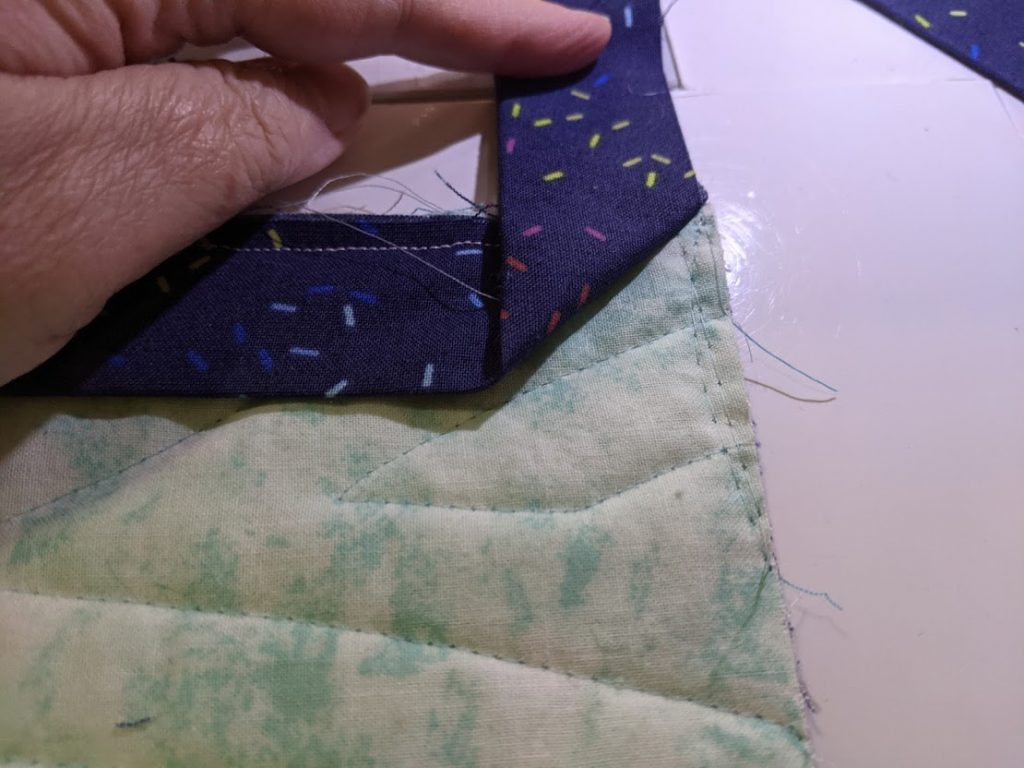
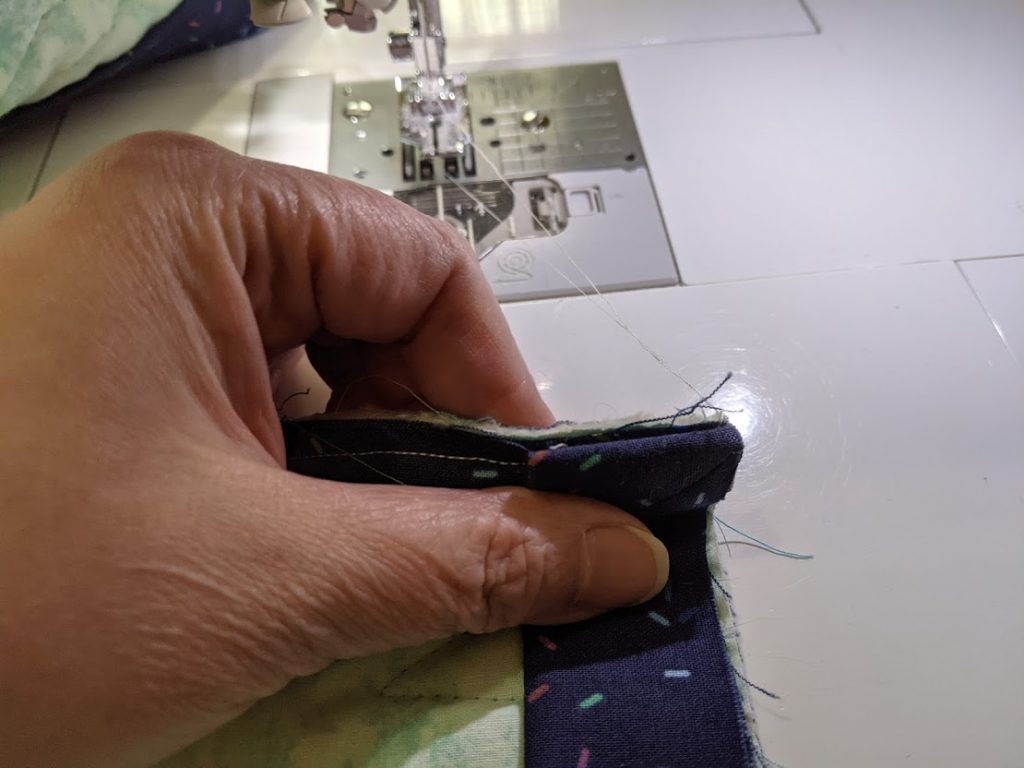
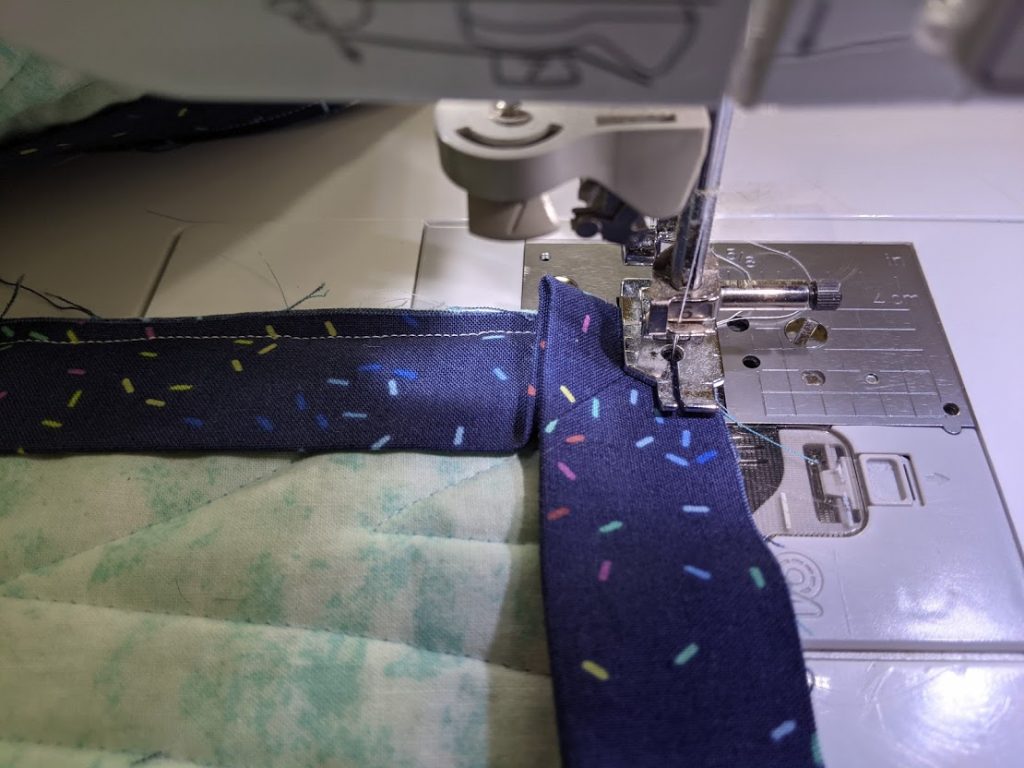
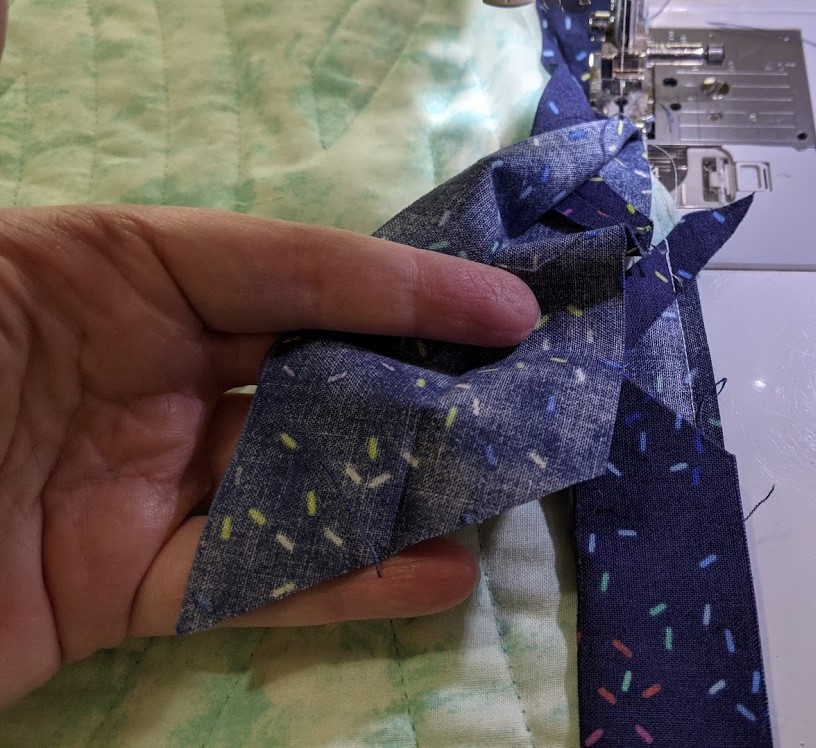
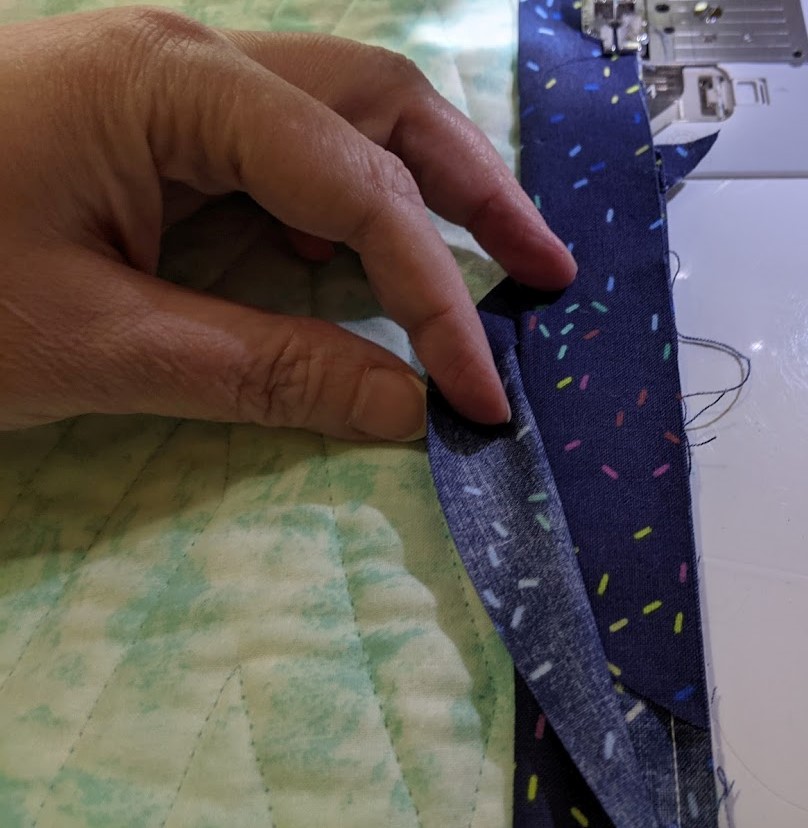
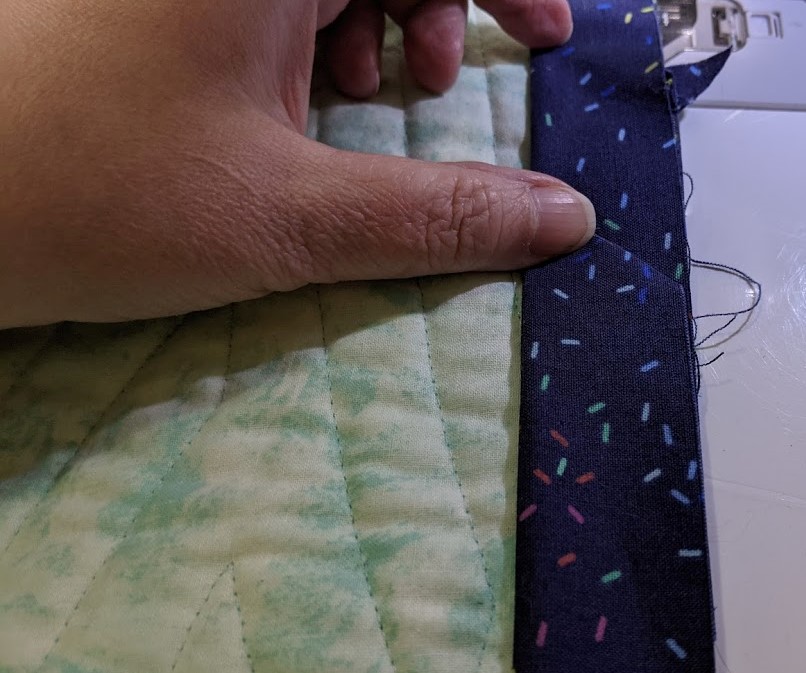
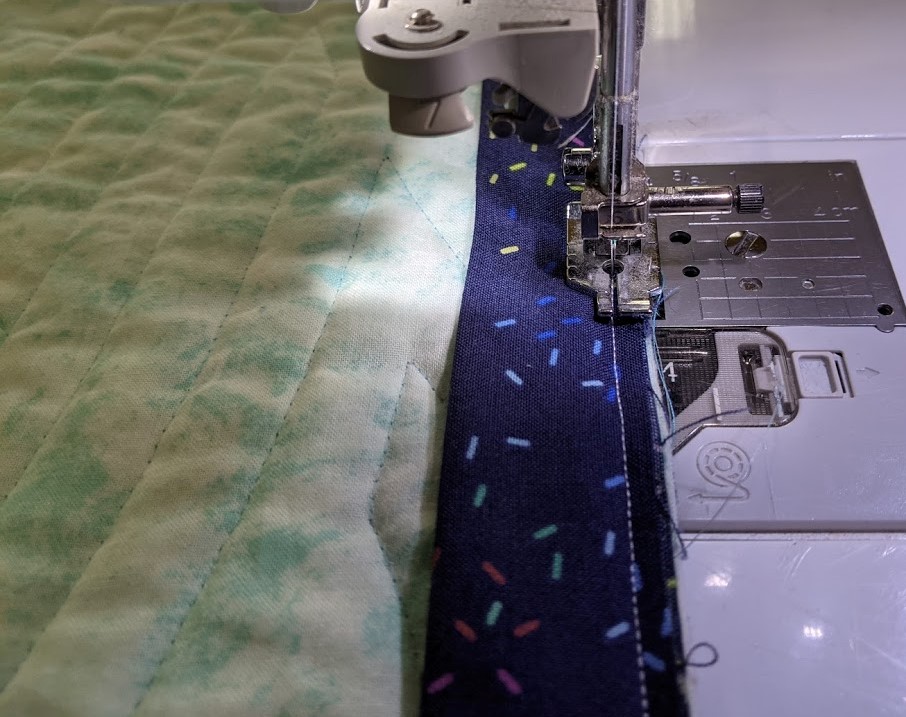
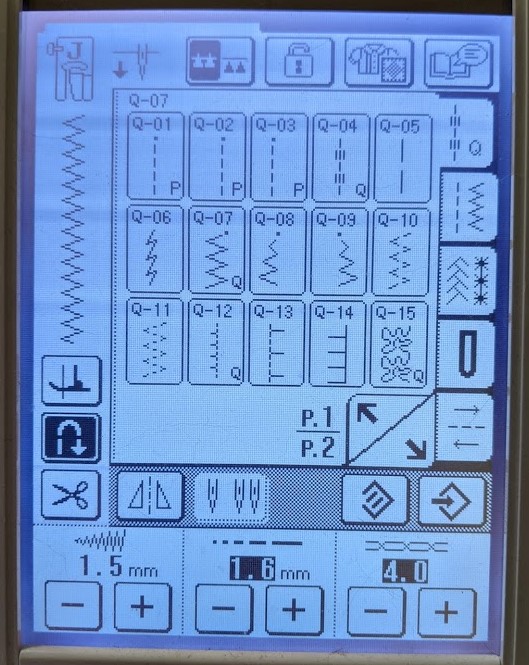
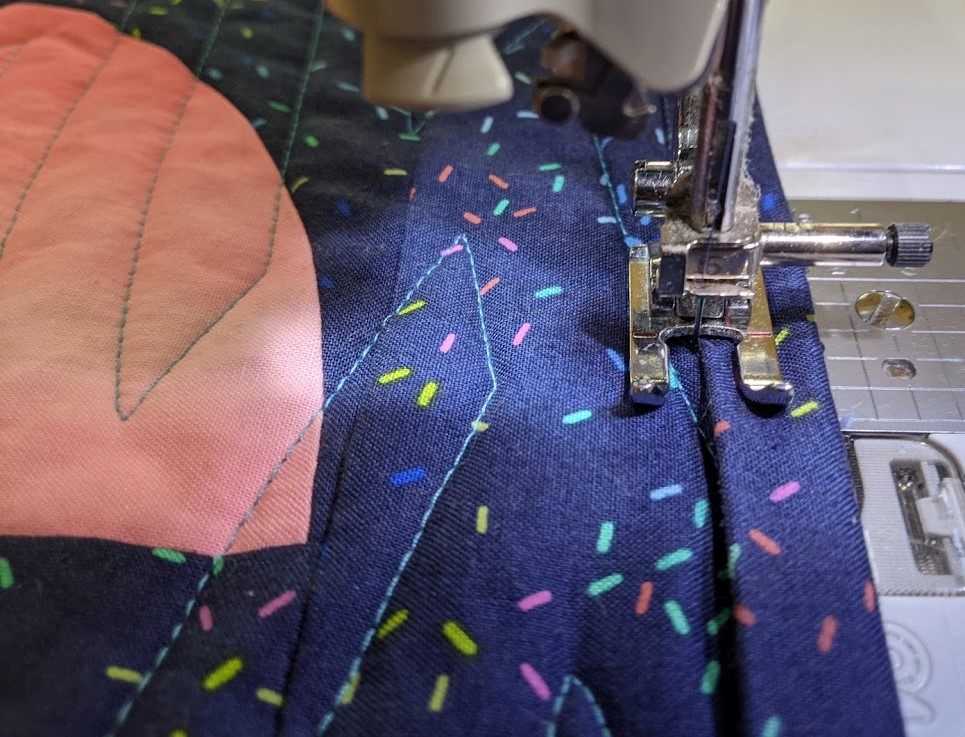
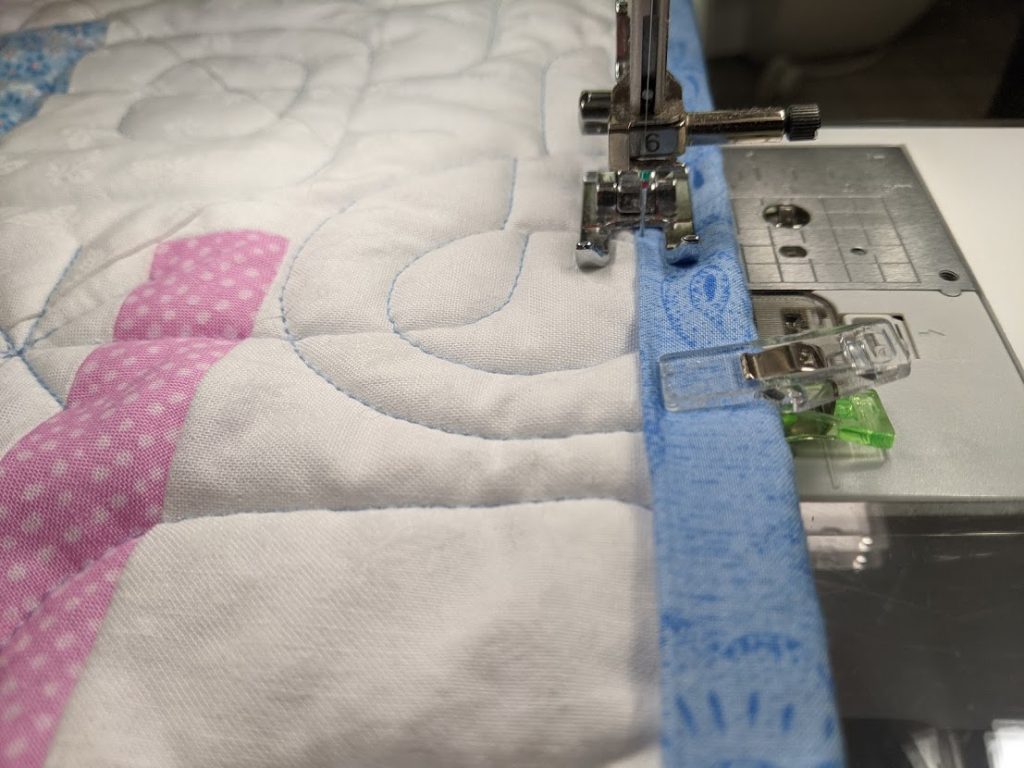
I trimmed the beginning end of the binding strip on an angle, and folded over and pressed the edge to give it a clean finish.I began by sewing the binding to the back of the quilt. Since I planned to use the tuck-in method for finishing my binding, I anchored the beginning of my binding by opening up the folded strip and sewing the first 6″ or so through the bottom layer only, using a 1/4″ seam allowance.Sewing through the bottom layer only at the beginning of the binding strip will make it easier to tuck in the other end of the binding later.Then I refolded the binding and resumed sewing it to the back of the quilt with a 1/4″ seam allowance.I stopped stitching 1/4″ away from the corner, and then stitched through the corner right off the edge of the quilt. I folded my strip first up and away from the quilt, and then folded it back down again, making sure the fold was even with the edge of the quilt.I resumed stitching at the outer edge of the quilt and continued around all 4 sides, mitering all of the corners in the same way.As I approached the beginning of the binding, I stopped with the needle down in the fabric. I gauged how much of an overlap I wanted between the beginning and end of the binding, and temporarily opened up the fold so I could cut the end of the binding at an angle to reduce bulk in the overlapped area. (There’s no need to press up a hem on this end – it will be completely enclosed in the binding.) I refolded the binding and inserted the newly cut end between the fold at the beginning of the binding. (Having the lower side of the beginning end of the binding already stitched down helps keep it from slipping out of place during this part of the process.)The overlapped area – ready to be stitched down.I resumed stitching and continued until I passed the beginning of the stitching on top of the fold near the beginning of the binding.I like to “prime” the binding for wrapping it around to the front of the quilt by first pressing it away from the back of the quilt with a hot iron.What the back of the quilt looks like with the binding pressed away from the quilt, ready to wrap around to the front. (Just one corner of the quilt is shown in the photo.)I set my machine for a small zigzag – just large enough for me to see clearly enough to aim for one side of the zigzag to fall on the surface of the quilt right next to the binding, and the other side of the zigzag catching the edge of the binding. (The numbers on your machine may or may not match mine – different brands/models may have different systems for setting stitch length and width.)
UPDATE 9/17/21 – I have recently switched to using a stitch width of 2.0 and am finding it much easier on my eyes 🙂
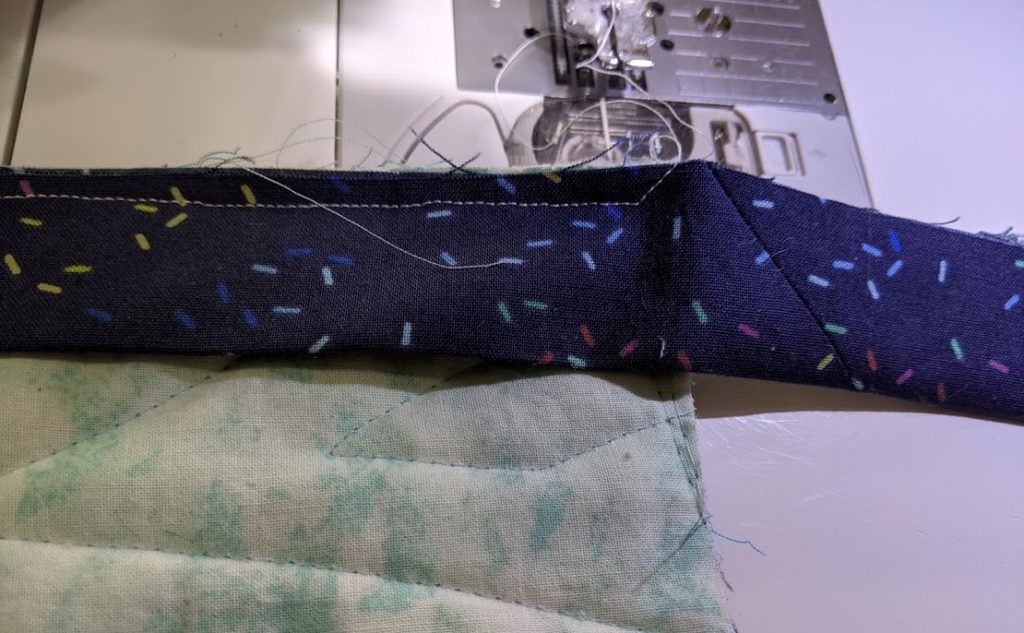
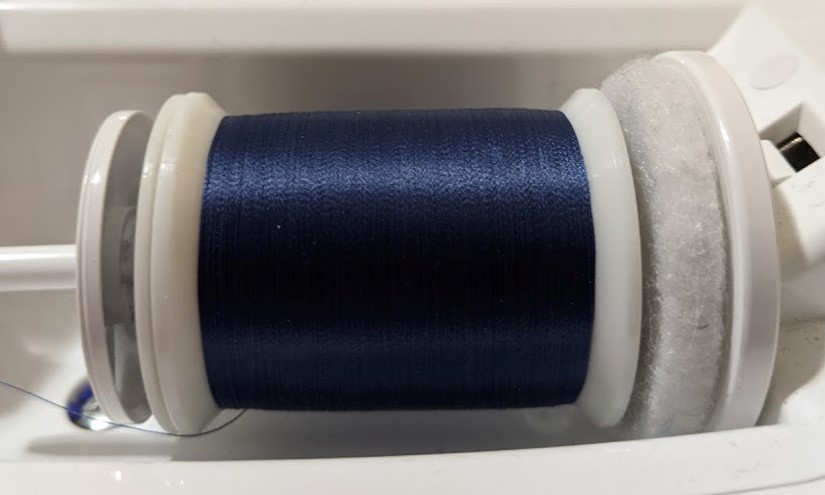
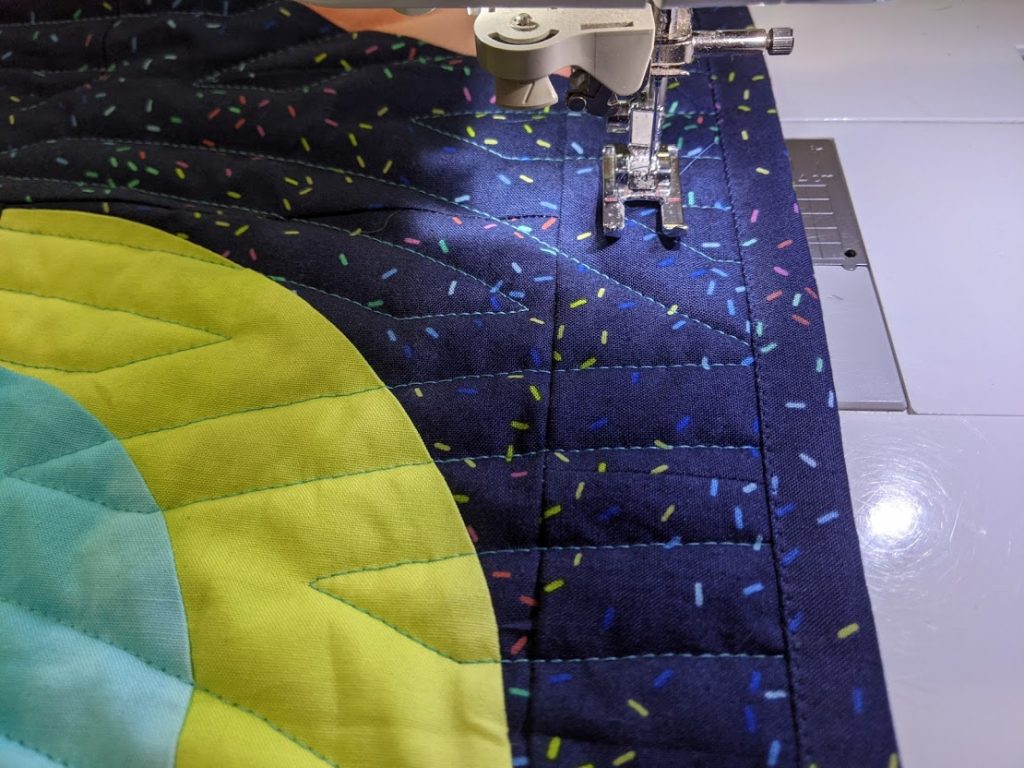
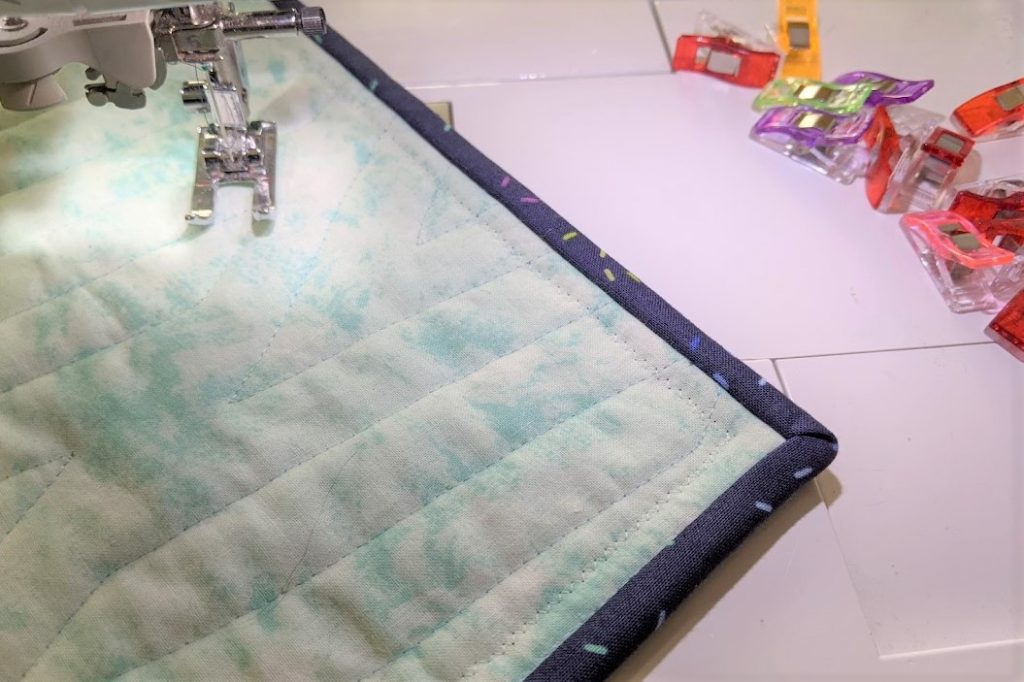
In the past, I’ve used MonoPoly as my top thread with Bottom Line in the bottom – but this time, I opted for Bottom Line in both the top and bobbin. (InvisaFil would have been another great option, but I didn’t have the right color on hand.)Stitching in progress. One side of the zigzag falls just off the binding into the quilt, and the other side of the zigzag will catch the binding.What the finished binding looks like. The needle holes in the binding are visible right now, but they will virtually disappear if you run your finger nail across the stitching and/or wash the quilt.What the finished corner of the binding looks like from the front – I don’t find it necessary to stitch down the miter; it is quite secure already. 🙂What a corner of the quilt looks like from the back – I purposely made the binding wider on the front than on the back of the quilt so that the zigzag stitching does not go through the binding on the back; instead, it runs parallel to the binding.And the quilt is ready to enjoy!A closer look – Butterfly Bouquet quilt (pattern by Simone Quilts), made by Beth Ann Williams, quilted by Terri Watson of Threadtales Quiltworks.I sewed the binding on my Supergalactic quilt (pattern by the Athena Workshop), in the same way; but this time I used MonoPoly as my top thread with Bottom Line the bobbin, since I didn’t have a spool that was a good color match. (This quilt was also quilted by Terri.)A close up of the finished binding (before washing).And the finished quilt in use!Scrappy Posie quilt made and quilted by Beth Ann Williams (pattern by Bonjour Quilts), Java Batik fabrics from Cotton Cuts.
Once again, I used MonoPoly as my top thread with Bottom Line the bobbin when I stitched down the binding on my Scrappy Posie quilt.Back in the shade – Celtic Crossing quilt made and quilted by Beth Ann Williams (pattern by Lo & Behold Stitchery), Java Batik fabrics from Cotton Cuts.
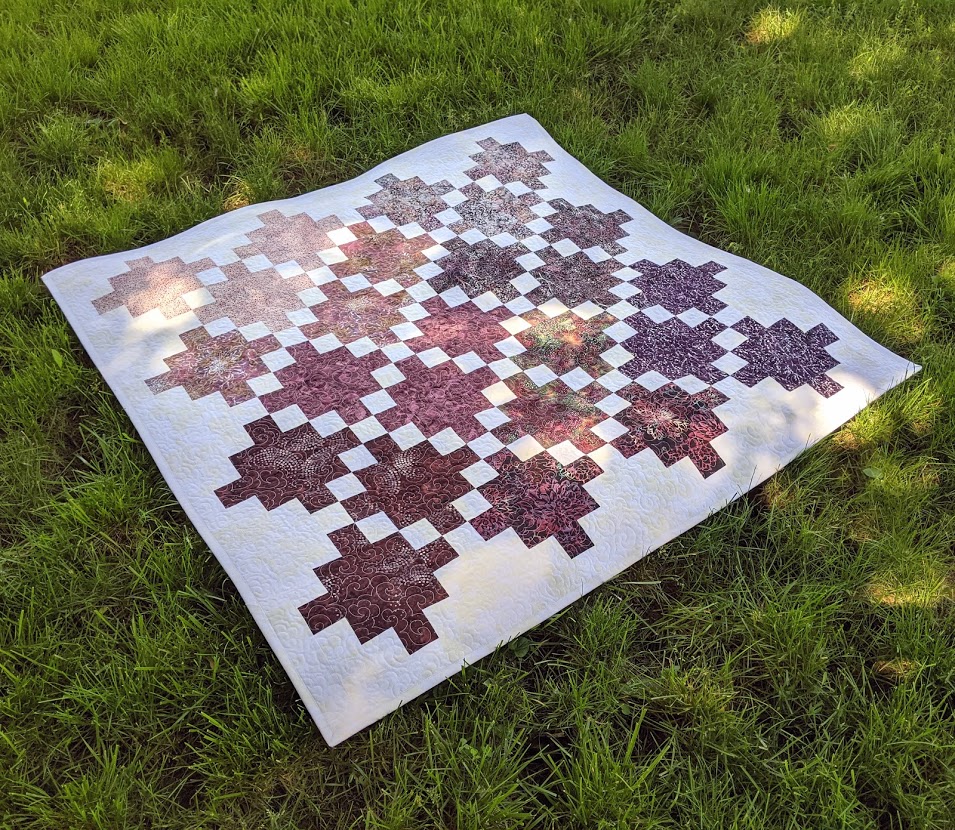
I used the same fabric for both the background and the binding for a “disappearing” binding on my Celtic Crossing Quilt. I used Auriful 50 cotton thread as my top thread and also in the bobbin. The stitches melted in completely!
And that’s how I’m catching up with my pile of quilts waiting for bindings. 🙂
When health challenges made hand-sewing (and hand appliqué and hand-quilting) no longer physically viable for her, Beth Ann’s first instinct was dismay and discouragement. But Grandma Baldwin gave her a loving (but stern!) “No pity parties – just figure out a different way.” So Beth Ann turned to her trusty sewing machine and began devising ways to achieve the fine quality appliqué look she craved faster and easier than she ever thought possible. And a career was born!
Now Beth Ann enjoys sharing her accessible “invisible” machine appliqué and creative machine quilting techniques with other quilters and fiber artists around the world.