What is a flange binding? It’s a great no-hand-sewing option for finishing quilts with a sturdy double fold binding while adding a fun design element to the outer edges of your quilt.
With only a few exceptions, I’ve always bound my quilts by sewing the binding to the front of the quilt by machine, and then wrapping the binding around to the back of the quilt and sewing it down by hand. I expect that I will always finish my show and “heirloom” quilts this way, but I have been thinking for quite a while about how I can speed up the process for utility quilts. Especially now that I’ve become enthralled with sew-alongs, the number of quilts in the to-be-finished pile is growing, and I’m finding it challenging to keep up with myself!
I’d done some experimenting, but had not settled on a method I was entirely happy with, when a couple of the ladies at the Muskegon Lakeshore Sewing store told me about the flange binding method demonstrated by Jenny Doan of the Missouri Star Quilt Company.
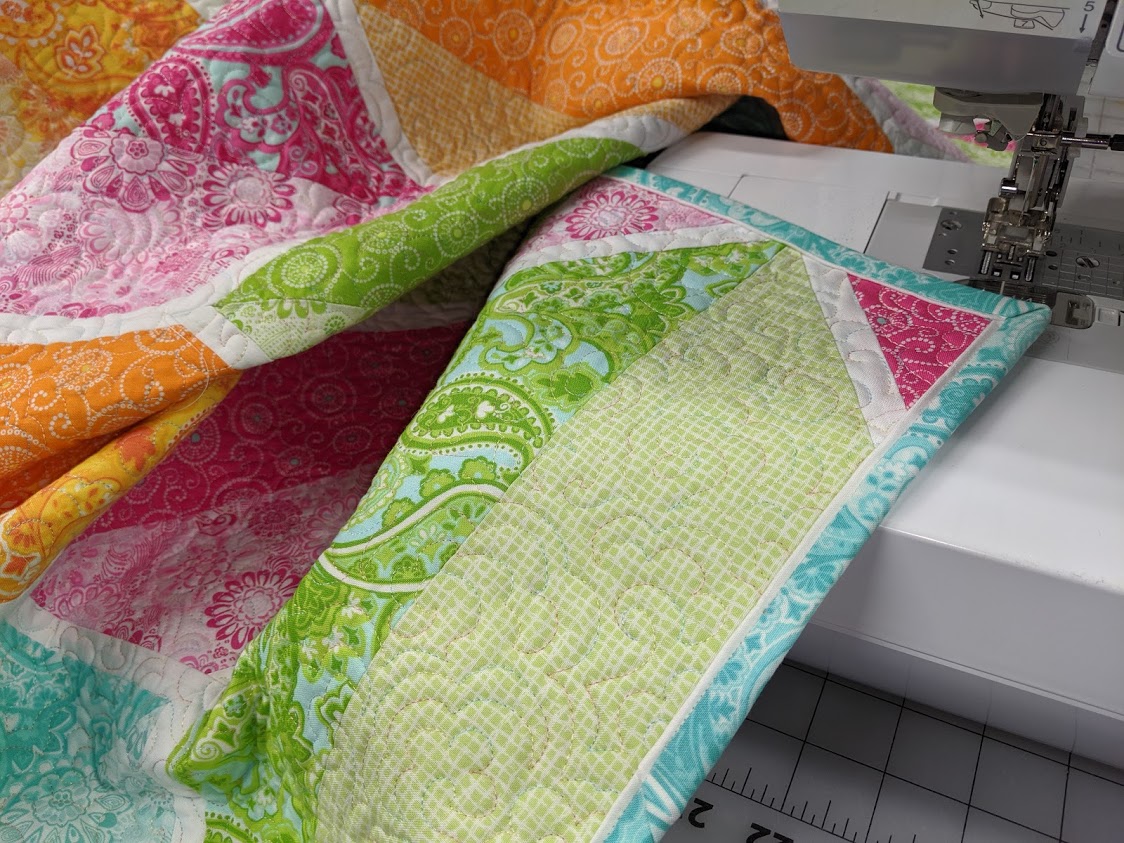
I was so impressed! The finished binding looks like it has been accented with fine piping – adding a fun design element at the same time as offering a relatively quick machine-sewing finish.
Since then, I’ve done quite a bit of research and found a number of different ways to achieve this effect. I’m going to share what works for me – but please remember, this is only 1 of the many ways to do this. 🙂
There is quite a bit of preparation for this method, but I find that each step is an important factor in ensuring a hassle-free result at the end.

Preparing the Binding
For a 1/8″ wide flange (it will look a lot like piping), you need to cut the accent (flange) fabric 1/4″ wider than the main binding fabric.
I like my flange binding to finish about 3/8″ wide on the back and 1/2″ (or about 5/8″ with the flange) on the front, which seems to be smaller than in most of the tutorials I found. I cut my accent (flange) fabric strips 1 1/2″ wide and my main binding fabric strips 1 1/4″ wide.

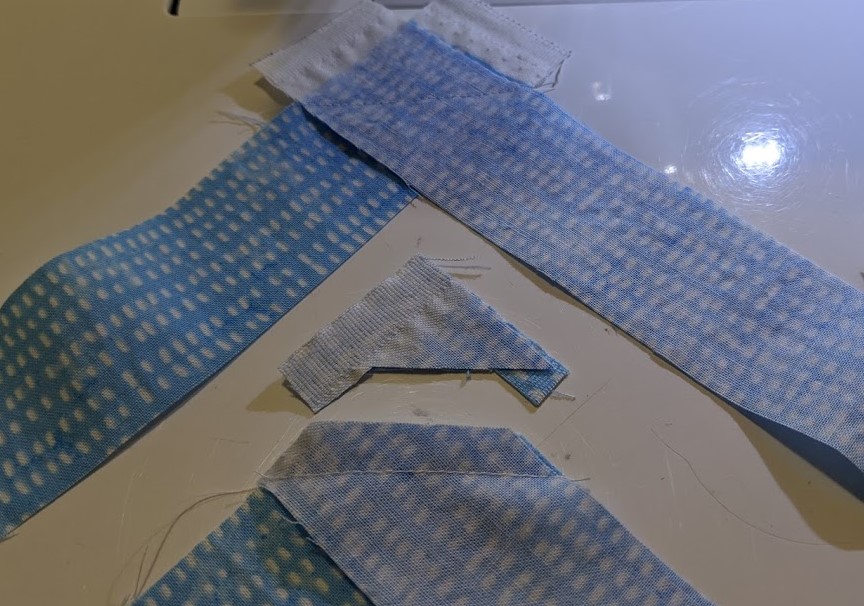
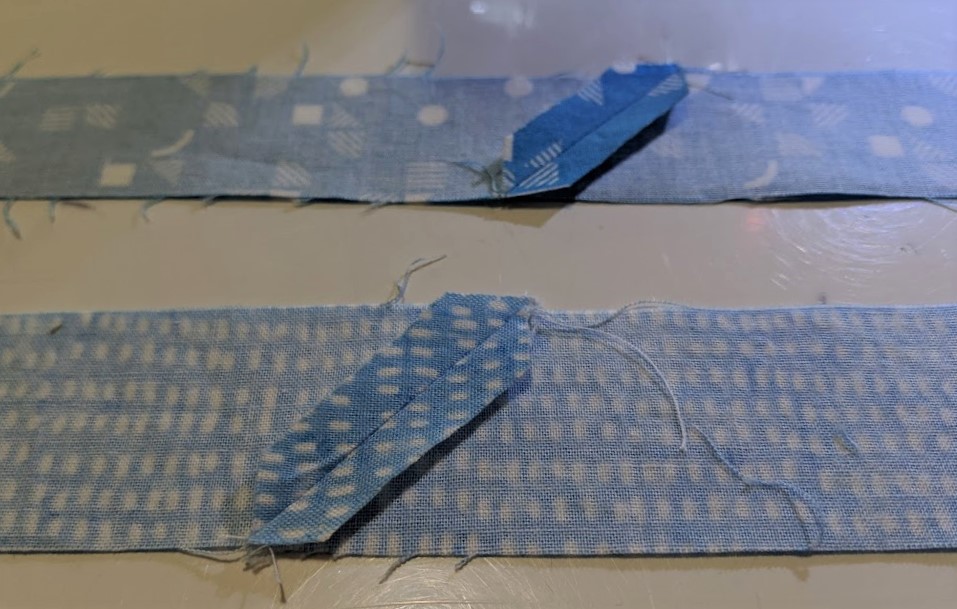
I join the strips with a diagonal seam, as that helps prevent the seam allowances where the strips are joined together from forming lumps or bumps in the finished binding. I trim the excess fabric on the other side of the seam and press the seam allowances open.
All of the accent fabric strips should be joined to make 1 long strip – enough to go all the way around the quilt, plus an extra 10″-15″ for corners and overlap. (I’d rather have extra than risk running short!) In the same manner, all of the main binding strips should also be joined with diagonal seams.
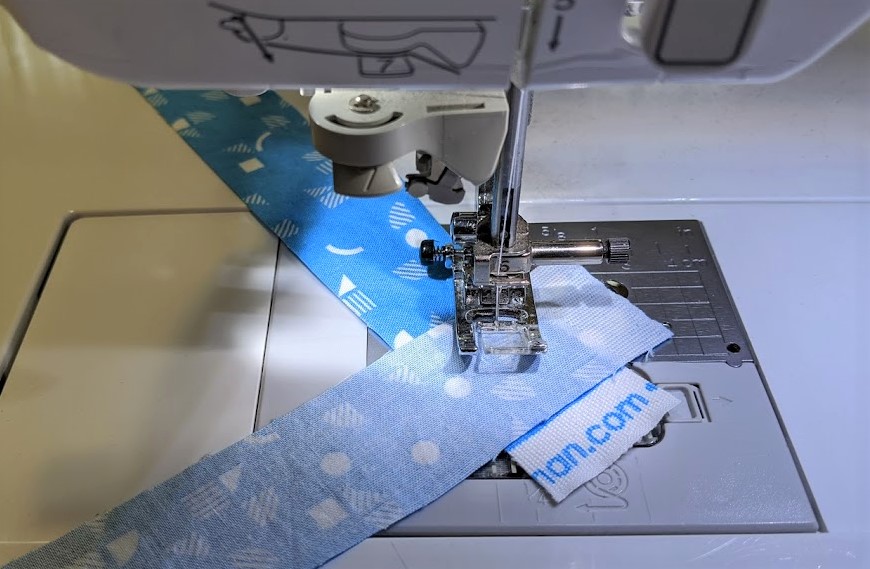
The next step is to sew the two fabrics together with a scant 1/4″ seam, one of the fabrics shifted down so that the diagonal seams joining the original strips do not end up across from each other.

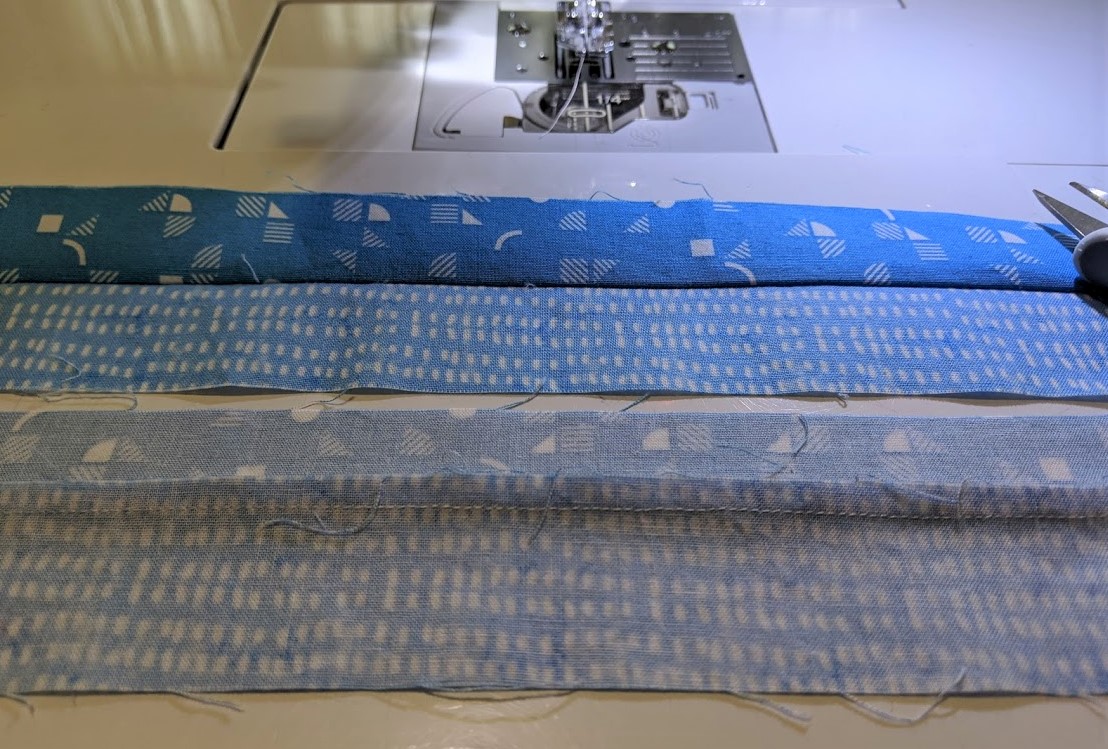
Fold the sewn strip in half and press again.

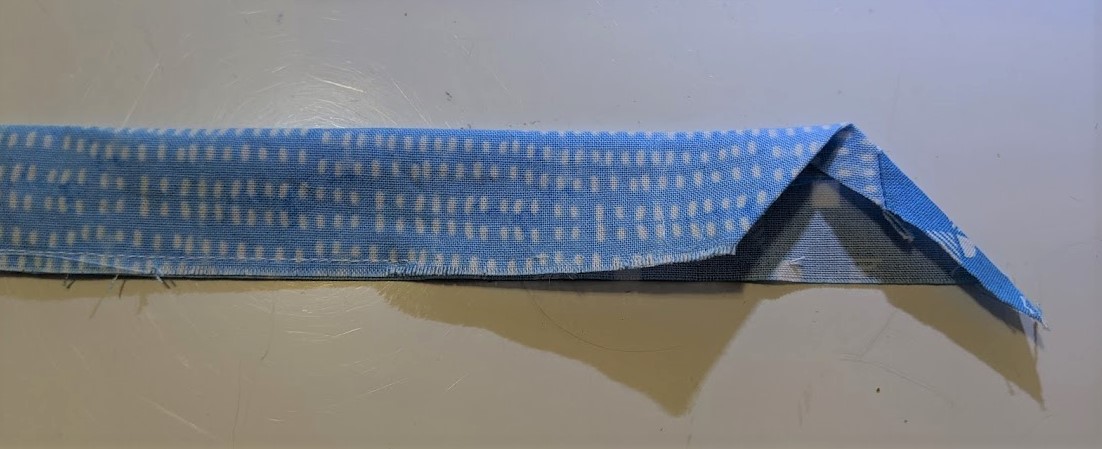
IF YOU PLAN ON USING THE TUCK-IN METHOD I will be describing below to eventually join the beginning and end of the binding after it has been sewn to the quilt (as opposed to using a seam): Open up the binding and trim the fabric at the beginning of the binding to a 45 degree angle and press up a generous 1/4″ seam allowance. (This is again to reduce bulk.) Refold the binding.
Please note that the side of the binding that shows the main binding fabric with just a flash of flange is the high side of the angle, while the underside of the binding (which shows only flange fabric) is the low side.
Optional, but recommended: place a pin 6-8″ from the tip of the binding. Starting at the pin, sew down the raw edges of the rest of the entire length of the folded binding with a 1/8″ seam allowance. You can skip this step, but I find that it helps keep the fabric from stretching unevenly later.
Sewing the Binding to the Back of the Quilt
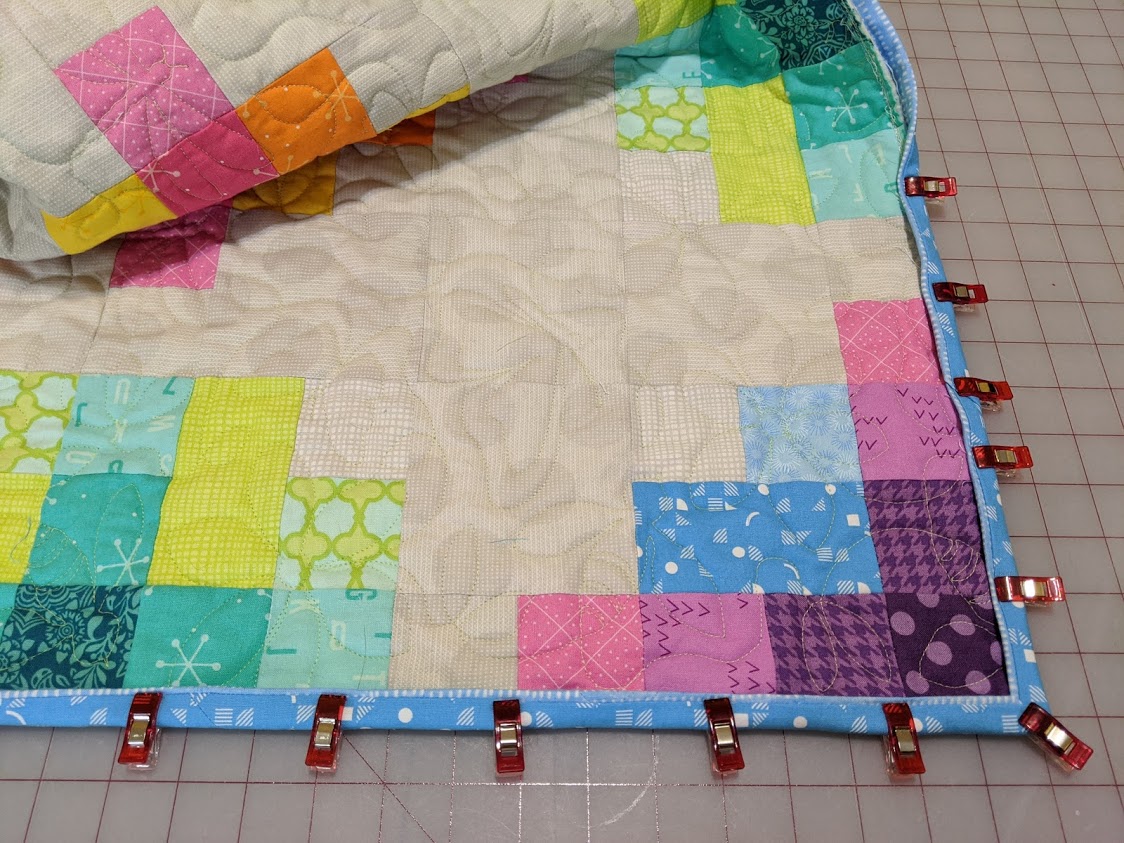
Before I start sewing, I lay the binding around the outer perimeter of the quilt and note where the diagonal seams joining the binding strips are falling. If necessary, I adjust the position of the binding to ensure that no joins fall at any of the corners of the quilt.
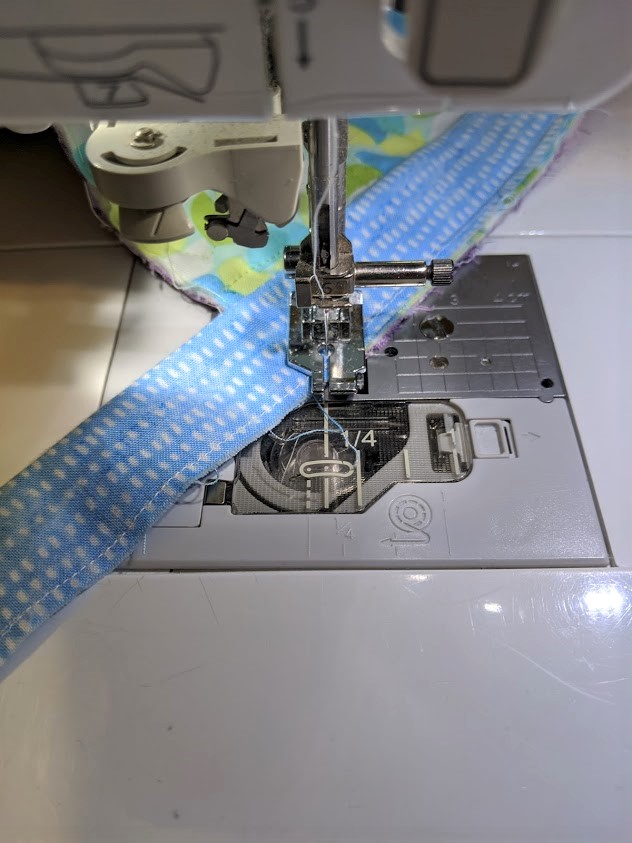
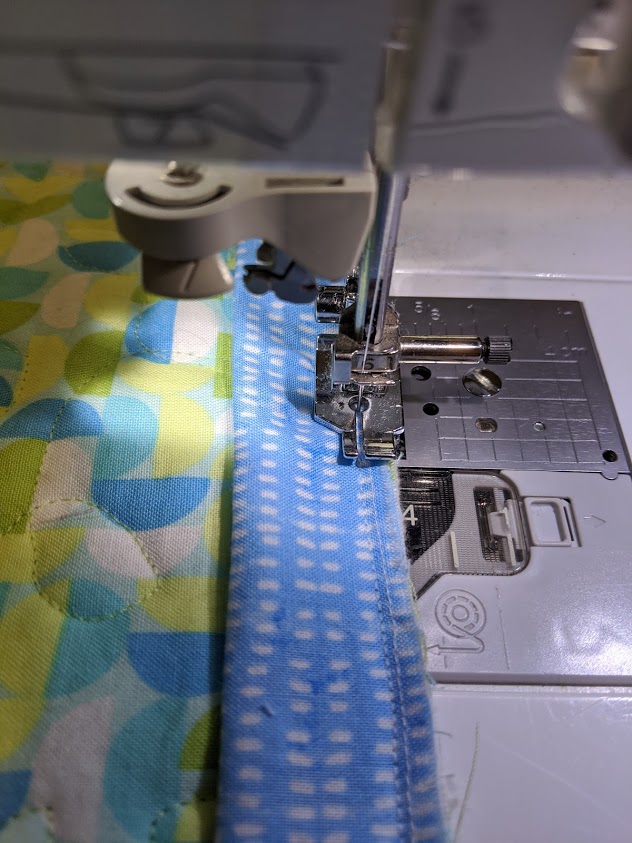
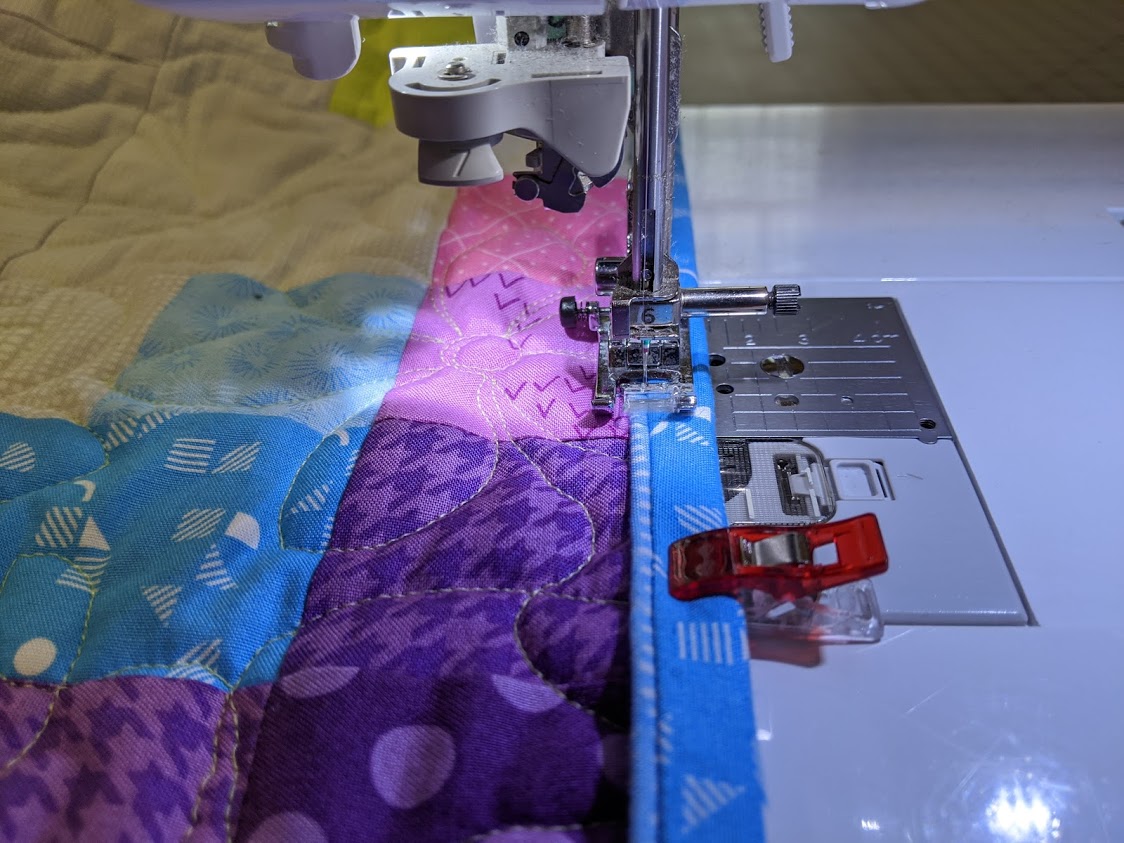
Working on the BACK of the quilt instead of on the front, I start sewing the binding to the quilt with the main binding fabric against the back of the quilt – but only sewing through the bottom layer of the binding until I get to the pin or clip.
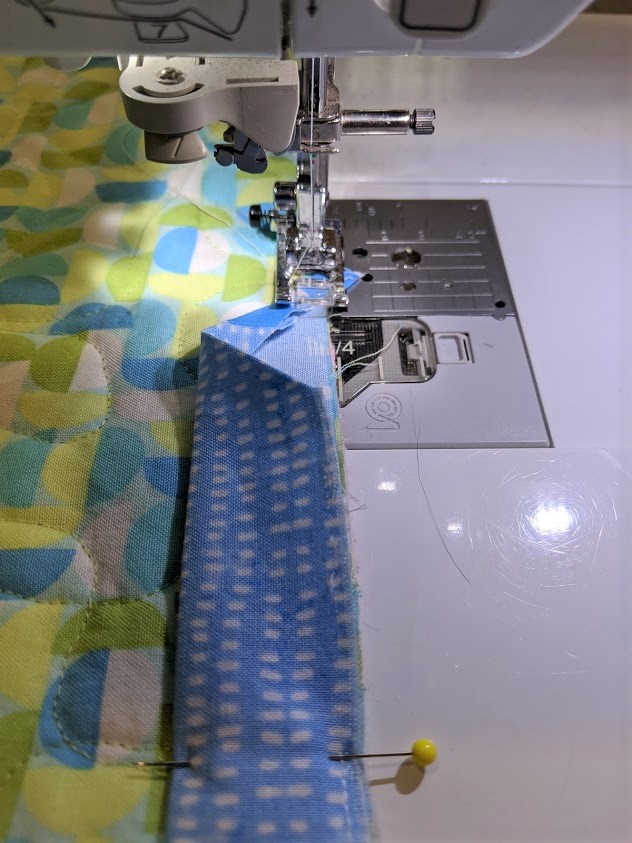

I’m using my quarter-inch foot to attach the binding with a scant 1/4″ seam. You can use your walking foot for this if you find it helpful.
Here’s how I miter the corners of the binding:
Since I am sewing with a 1/4″ seam allowance, I stop when I am 1/4″ from the corner of the quilt.
Keeping the needle in the fabric, I rotate the quilt gently and stitch off the corner at a 45 degree angle from the previous stitching.
I’ve stitched off the corner of the quilt. Next, I’ll fold the binding back onto itself (away from me) so that I can see the mitered corner. (I don’t cut the threads – I just raise the presser foot and pull enough slack in the threads to give me maneuvering room.)
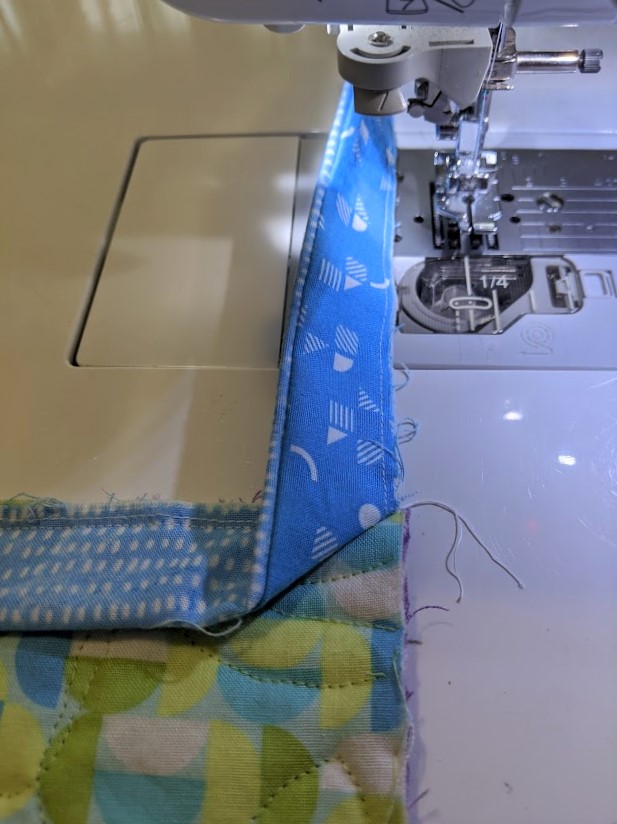
Then I fold the binding back towards me again, so that the fold line is even with the outside edge of the quilt.

I slide the quilt back under the presser foot and start stitching at the outer edge of the quilt, right on top of the folded binding.
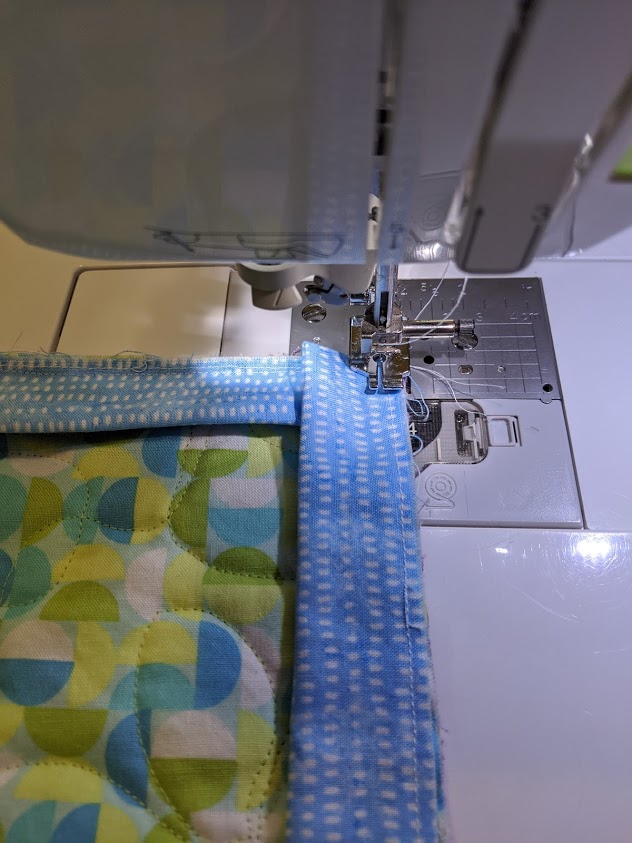
I continue stitching around the quilt, mitering all the corners in the same manner.
When I am almost back to where I started, I briefly unfold the remaining binding and cut the end of the binding to another 45 degree angle (to eliminate bulk), short enough to fit into the opening left when I started attaching the binding. Then I refold the binding and insert the end into the fold of the beginning of the binding.
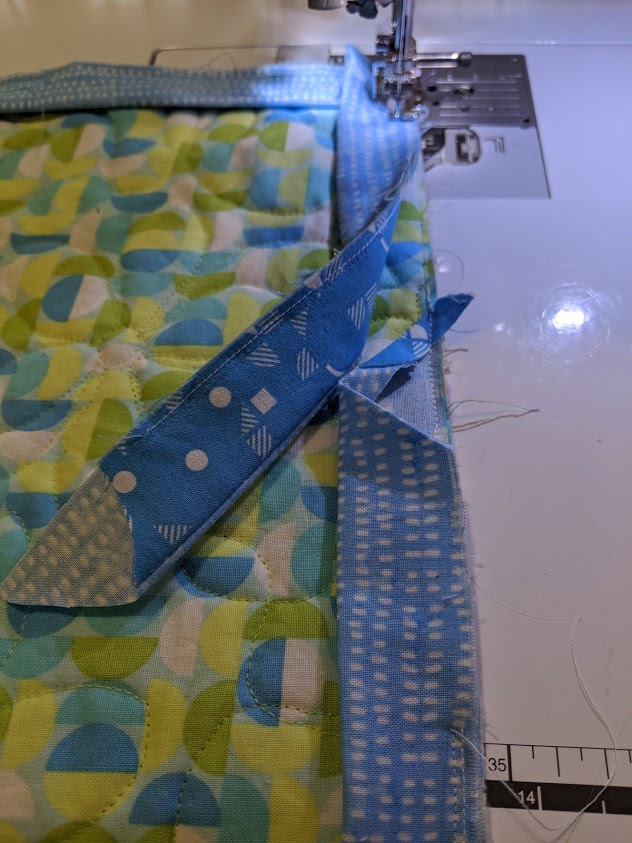

I pull all the layers until they lay smooth and even with the edge of the quilt. Then I continue stitching until I overlap my previous stitching by about 1/2″ or so, and backstitch or “fix” stitch to secure the stitching.
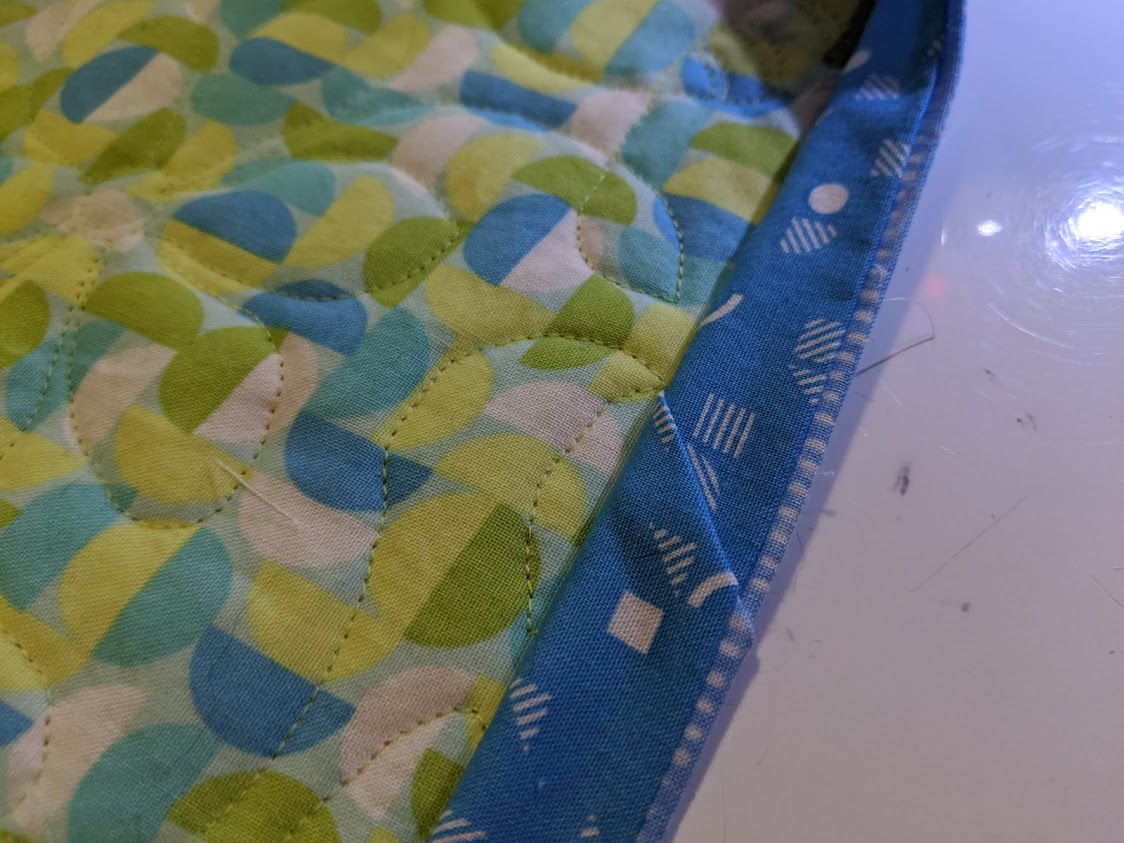
This is what the overlapped ends of the binding look like when I start to wrap the binding over to the other side:
If you are concerned about the ends shifting and the seam where the flange meets the main binding fabric not lining up properly, you can always secure it with a dot or two of water-soluble fabric glue before proceeding.
Sewing the Binding to the Front of the Quilt
Now it’s time to bring the binding around to the front of the quilt.
But first, another optional, but VERY helpful step: use a seam roller (or your fingernail) to get right into the seam and press it fully open all the way around the quilt.
To miter the corners, first fold one side of the binding over, and then the other. If the corner seems bulky or the miter is a little off, try switching the side that gets folded over first. It can make a huge difference!
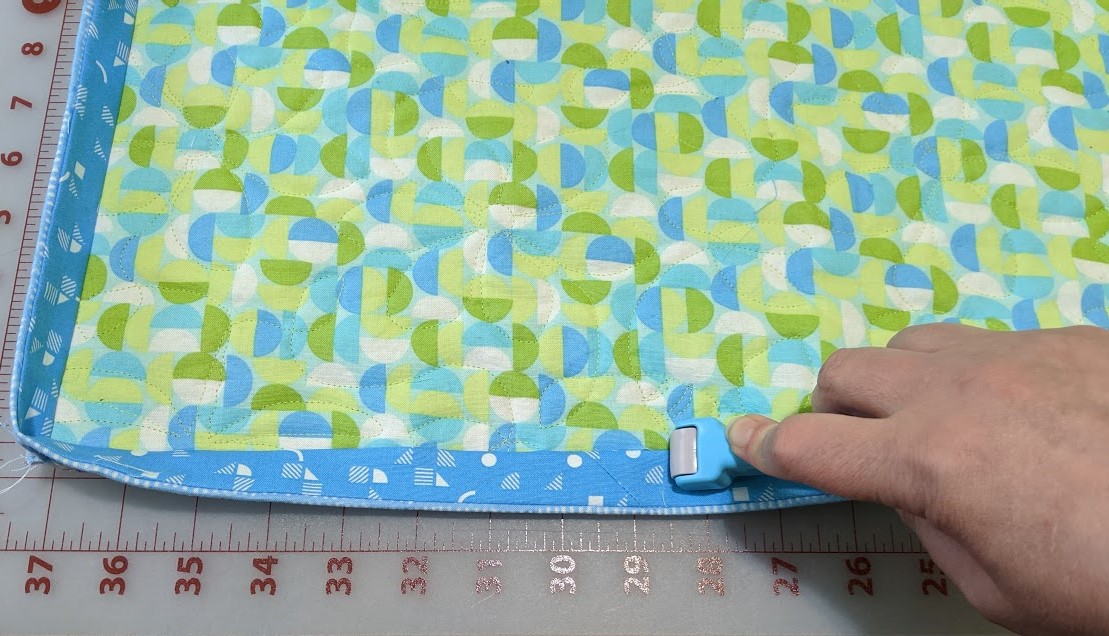
Tip: Wonder Clips are an amazingly helpful alternative to pins when working with thick layers, curves, fabrics that might show pin holes, etc. – and are especially helpful when attaching binding. (There are various more affordable clips listed on Amazon; these are the ones I’ve purchased 4 times – occasionally I find a dud; but overall, I’ve been very happy with them.)
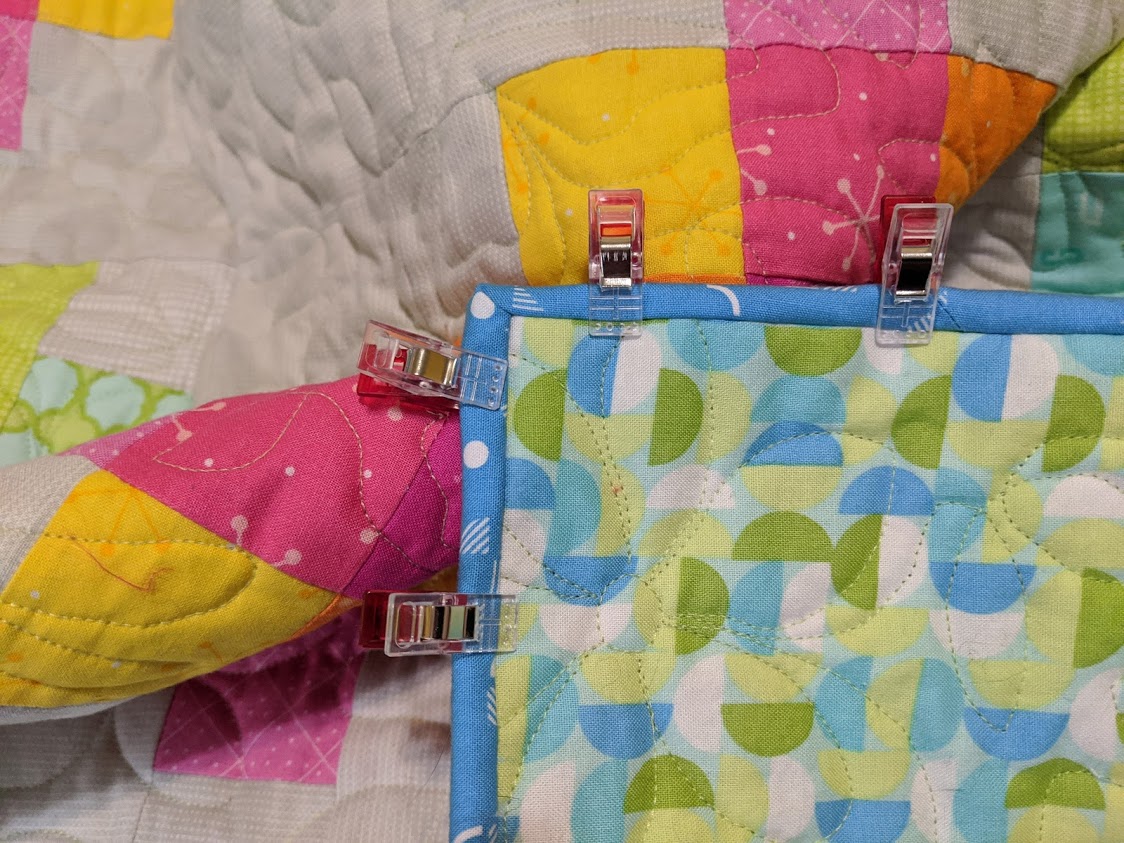
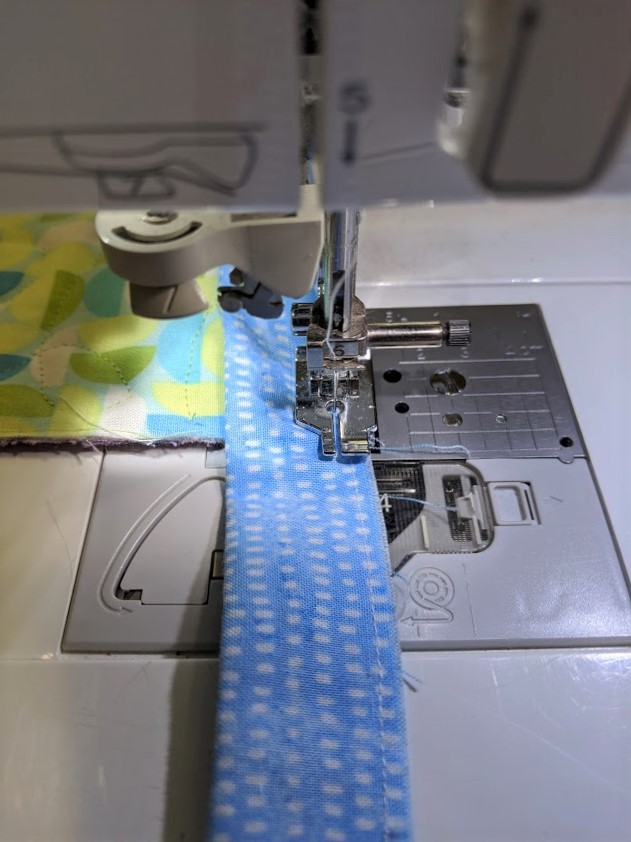
I like to use a thread that either matches my flange fabric or a monofilament thread such as MonoPoly as my top thread, and a thread that matches the backing fabric as my bobbin thread.
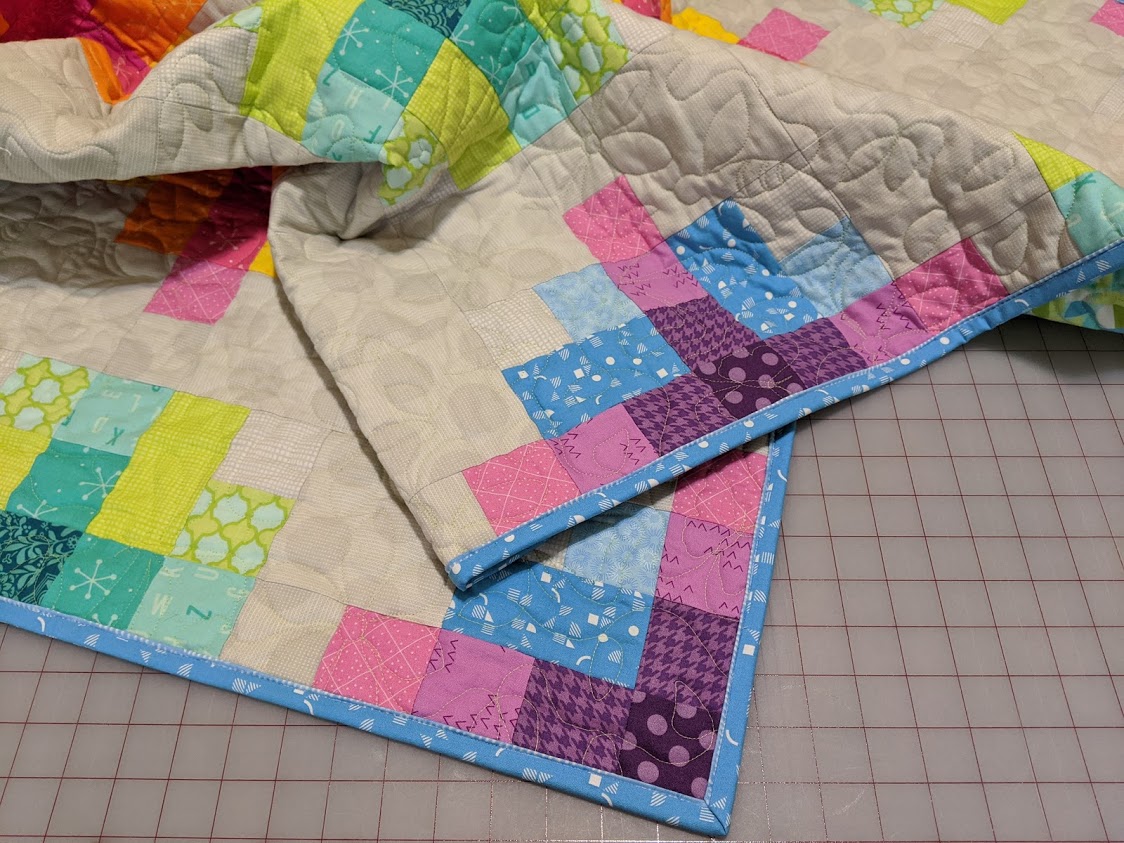
Stitch “in the ditch” or groove between the flange and the main binding fabric all the way around the quilt, removing pins or clips as you go.
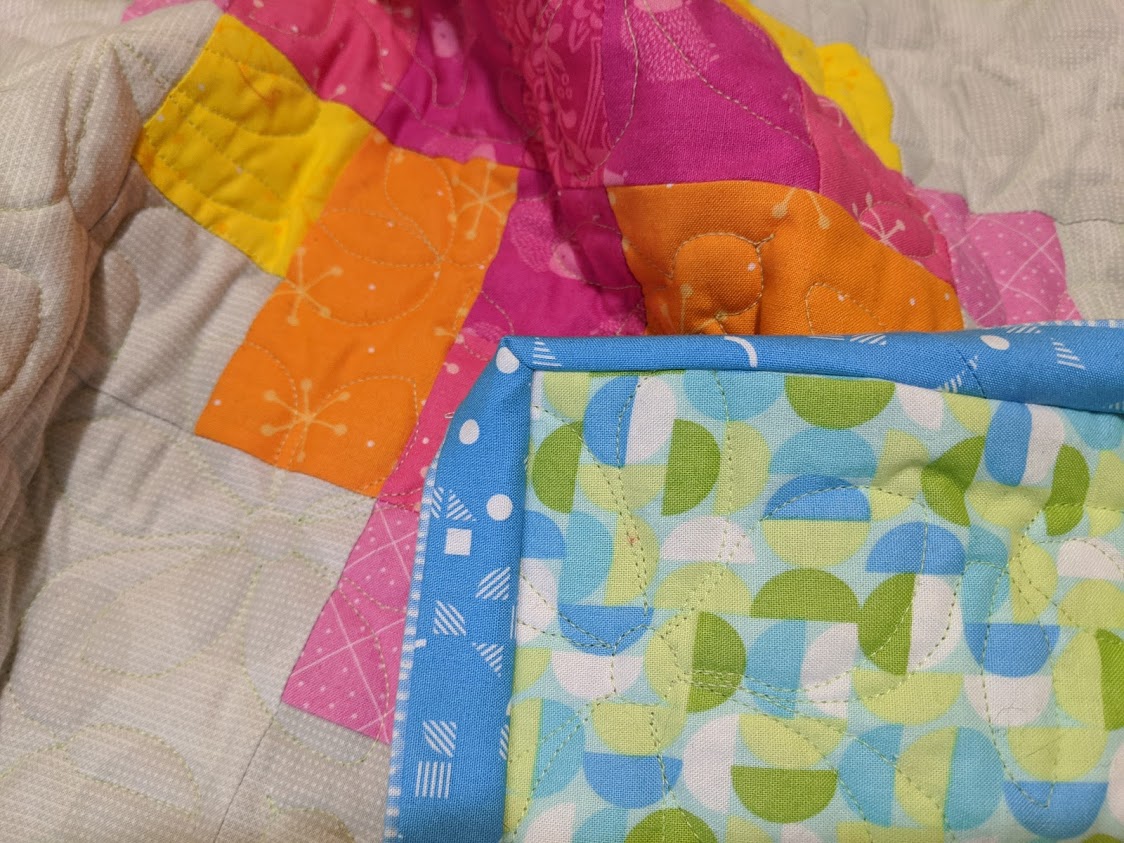
Ta-da! The binding is now attached to the front of the quilt.

I love doing flange bindings, they look soo nice.
Thanks, Angie – I do, too! 🙂
Looks great! My challenge with this technique is joining the binding so the seams line up at the end before I turn it to the front and stitch it down. I might have to try laying it in. Thanks for post with all the wonderful photos.
Thanks so much for taking the time to comment, Sally! I hope the photos are helpful. I sometimes use a drop of water-soluble fabric glue to temporarily “baste” the ends of the binding together so that the flange stays lined up at the beginning and end of the binding before I sew it. 🙂