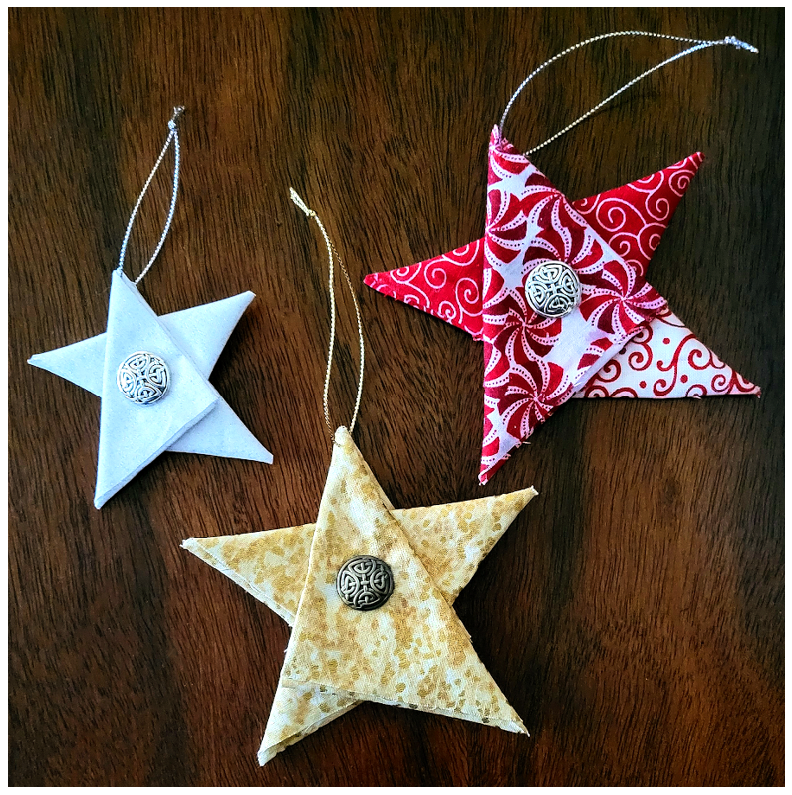
These scrap-busting stars make great holiday ornaments or decorations, and are easy enough that kids can enjoy making them, too. 😊
What You’ll Need:
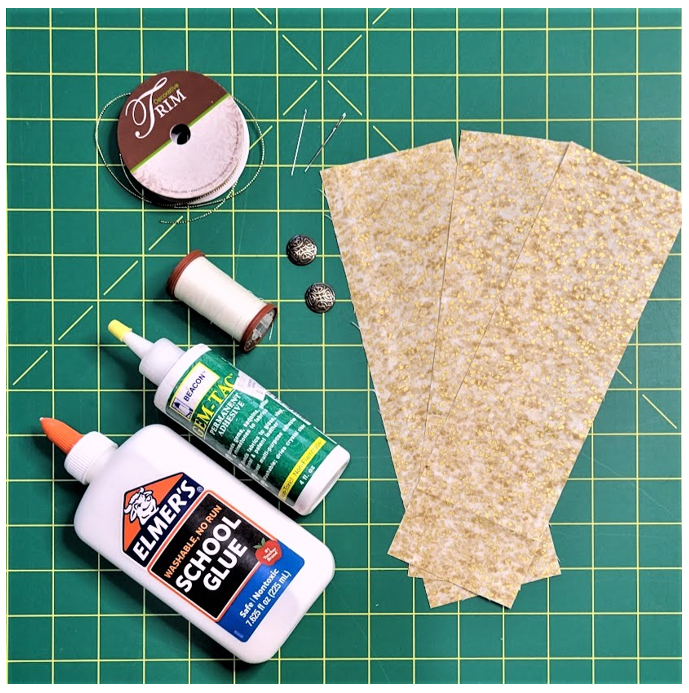
- 3 strips of fabric for each star
- I used 3” x 10” strips for the larger stars and 2” x 7” strips for the smaller star.
- You can use 3 strips of the same fabric for each star, or you can use 3 different fabrics.
- 2 buttons or charms for each star
- If you are using buttons with holes, make sure the holes will line up with each other when you sew on the buttons.
- If you are using buttons with shanks, you may prefer to cut off the shanks with wire snips (as I did for the sample stars) and treat the buttons as charms.
- Thin metallic cord or embroidery floss in color(s) coordinating with your fabrics to hang the ornaments.
- I used a 6” length of metallic cord for the small star and 8” lengths for the larger stars.
- Button or upholstery thread – this will be hidden under the button or charm, so don’t worry about the color.
- Hand sewing needles
- I used a regular hand sewing needle for the button thread for assembling the star.
- I switched to a large tapestry needle for the metallic cording for the hanging loops.
- Glue that will dry clear (I used Elmer’s School Glue).
- (Optional) Specialty adhesive that bonds metal or plastic to fabric (I used Gem-Tac.) You won’t need this if you are sewing on buttons with holes.
You’ll also need EITHER an iron or a seam roller.
A seam roller is great for kids, since it eliminates the risk of burns from the iron.

Let’s get started!
First, we’ll make 3 folded triangles for each star.
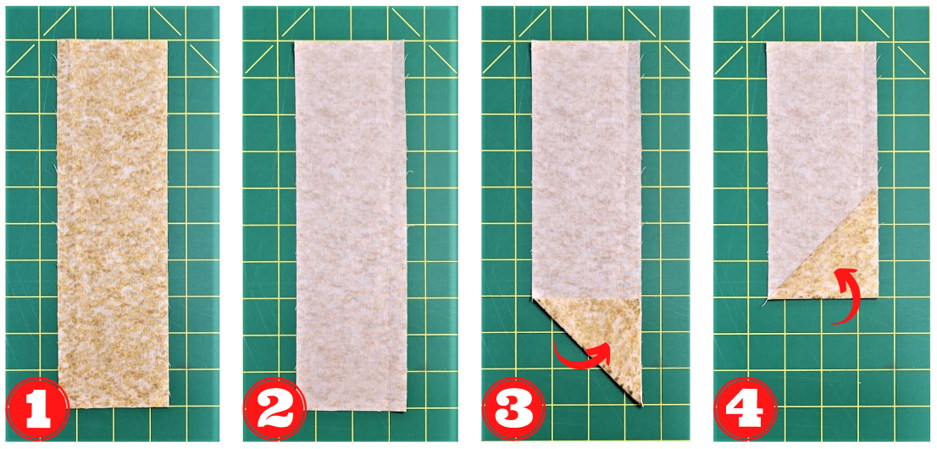
- Pull out one fabric strip to work on at a time.
2. Turn the strip over so that you are looking at the back of the fabric.
3. Starting at the bottom of the strip, fold up the corner to create a right-angle triangle. Press with the iron to set the crease OR go over the fold with the seam roller.
4. Fold the fabric up again. Set the crease.
Try to keep the points of the triangle as pointy as you can throughout folding process.
Keep an eye on the sides of the strip to make sure the fabric edges are aligned as you fold the fabric.
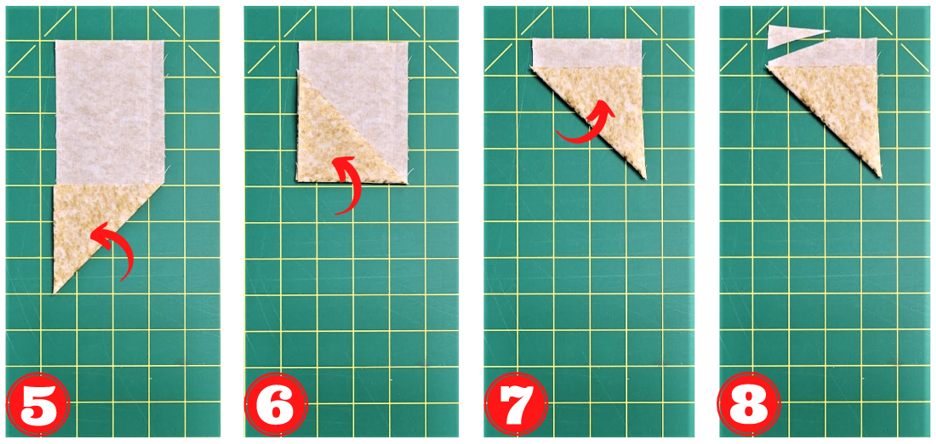
5. Fold again. Set the crease.
6. Fold again. Set the crease.
7. Fold again. Set the crease. There should now be just a skinny strip of fabric left.
8. Carefully trim off some of the excess fabric at the corner of the strip just above the upper point of the triangle.
This may make more sense if you look ahead to the next photo.
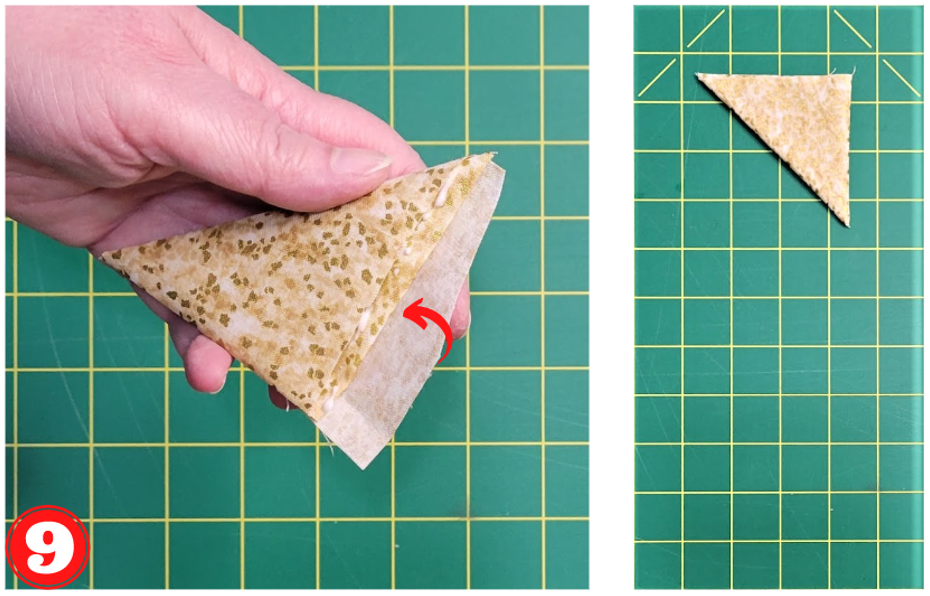
9. Tuck the leftover strip of fabric down into the triangle until you have a nice even fold along the outer edge of the triangle. I like to use a little glue to keep the fabric in place.
The first triangle is complete!

You’ll need 3 triangles for each star.
They can all be made out of the same fabric or you can use a different fabric for each triangle. This is a fun way to use up scraps!
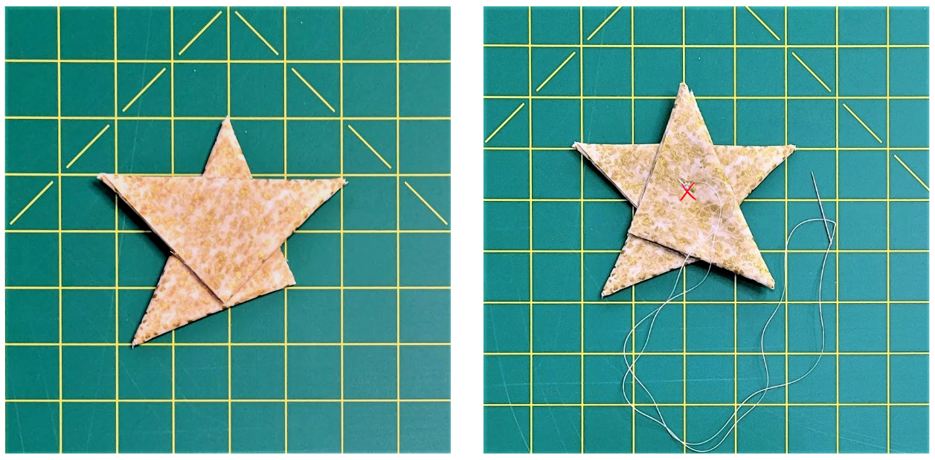
- Stack the 2nd triangle on top of the first as shown.
- Add the 3rd triangle to form a star.
- Using a doubled thread (so that the thread won’t break when you pull hard on it), sew the three stars together as shown by the red X. Make sure your button or charm will cover this stitching.
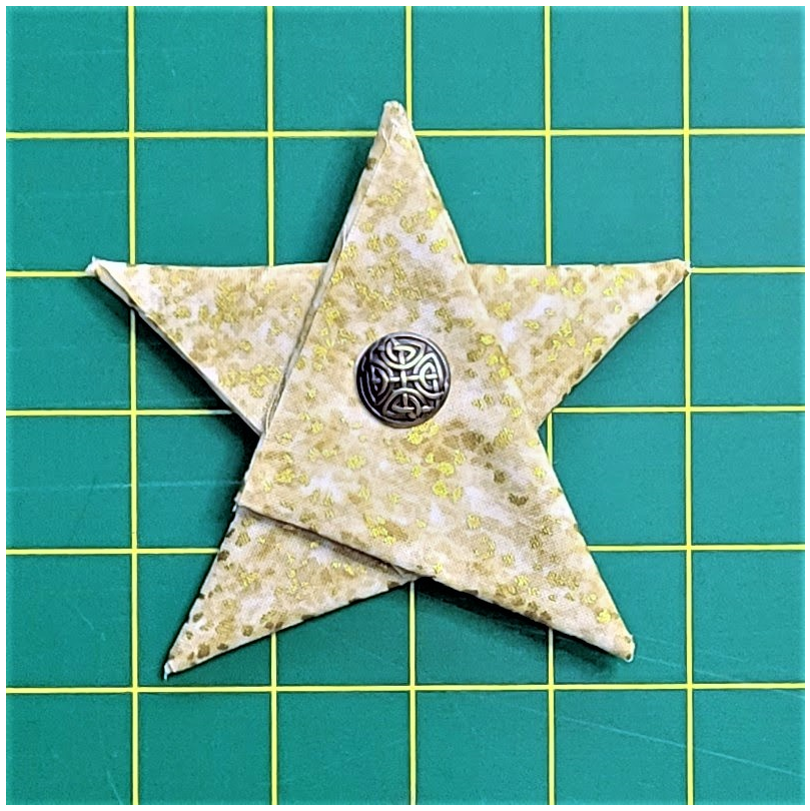
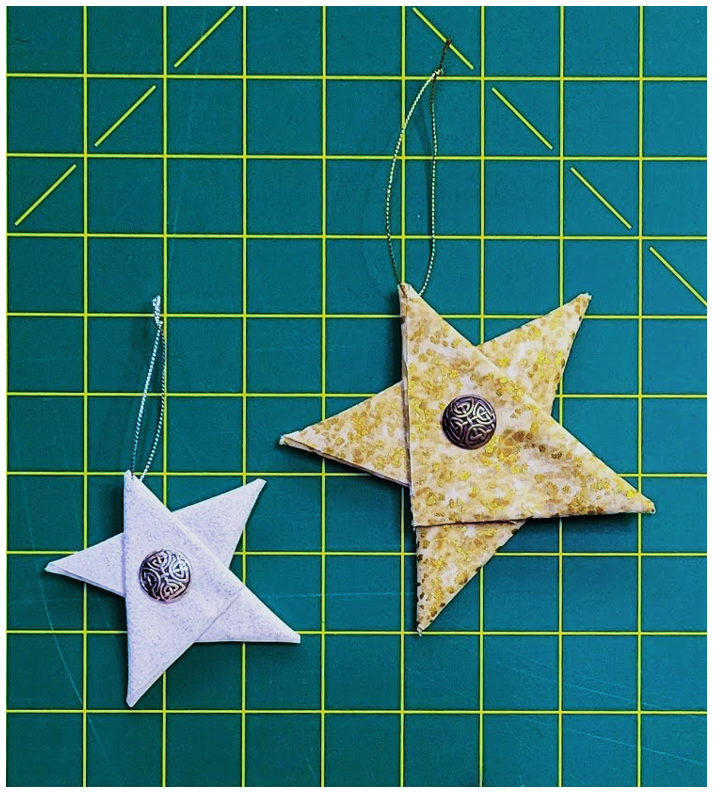
- Sew (if you are using buttons with holes) or glue (if you are using charms or buttons without shanks) a button or charm in the center of each side of your star. The charms or buttons should completely cover the stitching holding the triangles together.
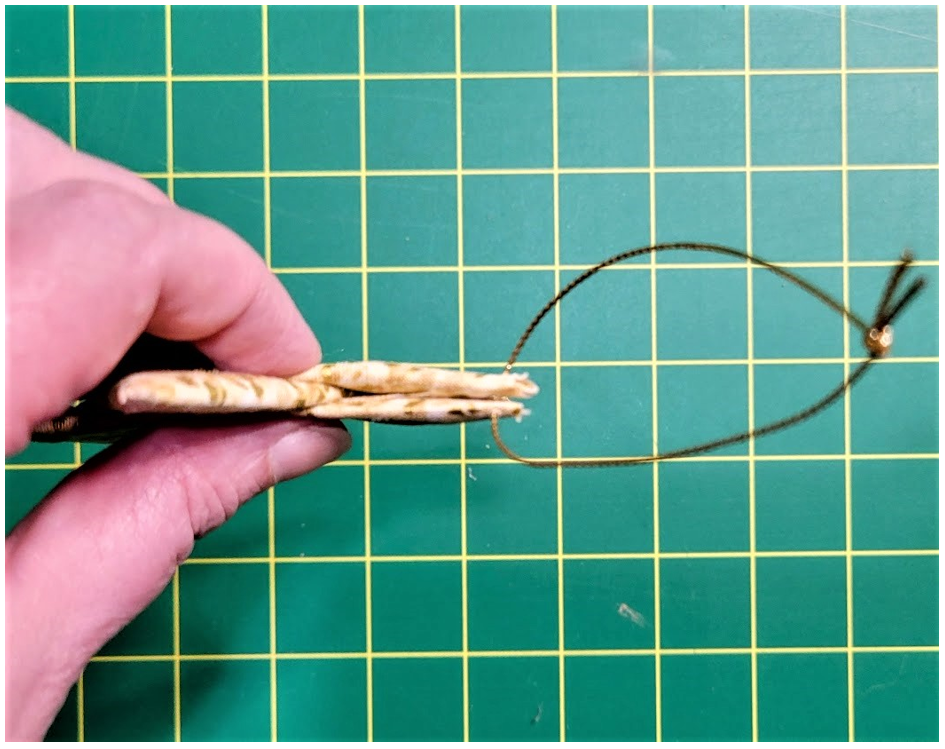
- Use the tapestry needle to thread the cord or embroidery floss through the tip of the star. You’ll be going through both the 1st triangle and the 3rd triangle – lots of layers!
- Knot the cord or floss to create a hanging loop for your star.
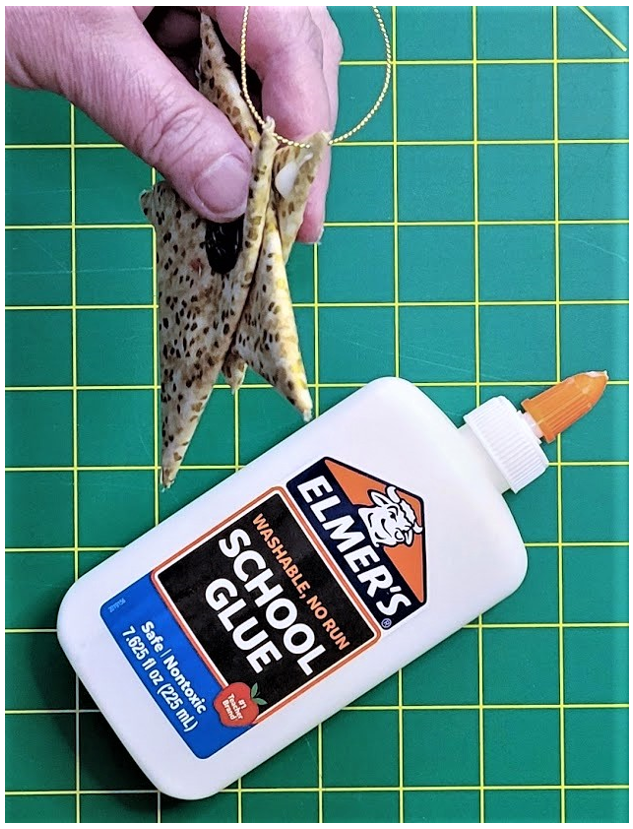
This is optional, but I like to use a little glue to keep the star points at the top of the ornament together. I also use a dot of glue anywhere the folds of the fabric look loose or a point looks like it might fray.
And the star is complete!
All your star needs now is some friends. 😊
Happy Holidays from my house to yours!
This is a slightly expanded version of my post originally featured on the official Cotton Cuts blog.