Continuous Curve (also known as Orange Peel) quilting has been around a long, long time, but its gentle curves are still one of my favorite ways to add a lovely soft texture to a quilt. It can be done by hand, with a walking foot, or with a free-motion foot; but the stitching path may differ greatly. Today we are going to focus on beginner-friendly techniques using a walking foot.
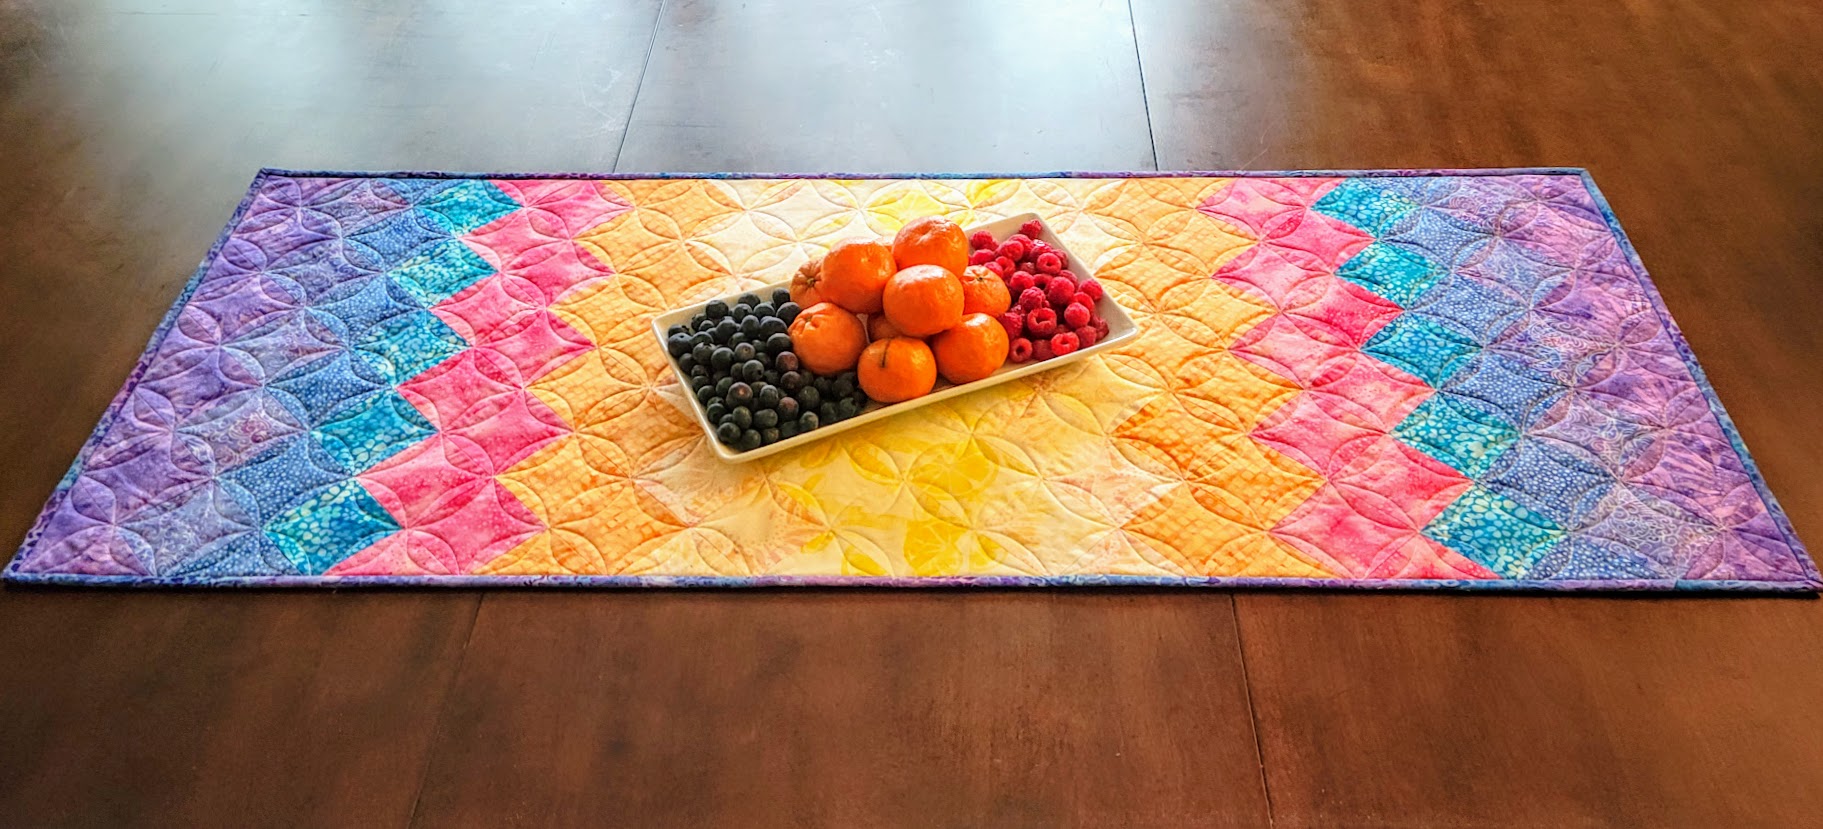
Here is an example of continuous curve quilting on the table runner I designed to feature the delicious fabrics in the April Java Batiks box from Cotton Cuts:
A close-up of the quilting:
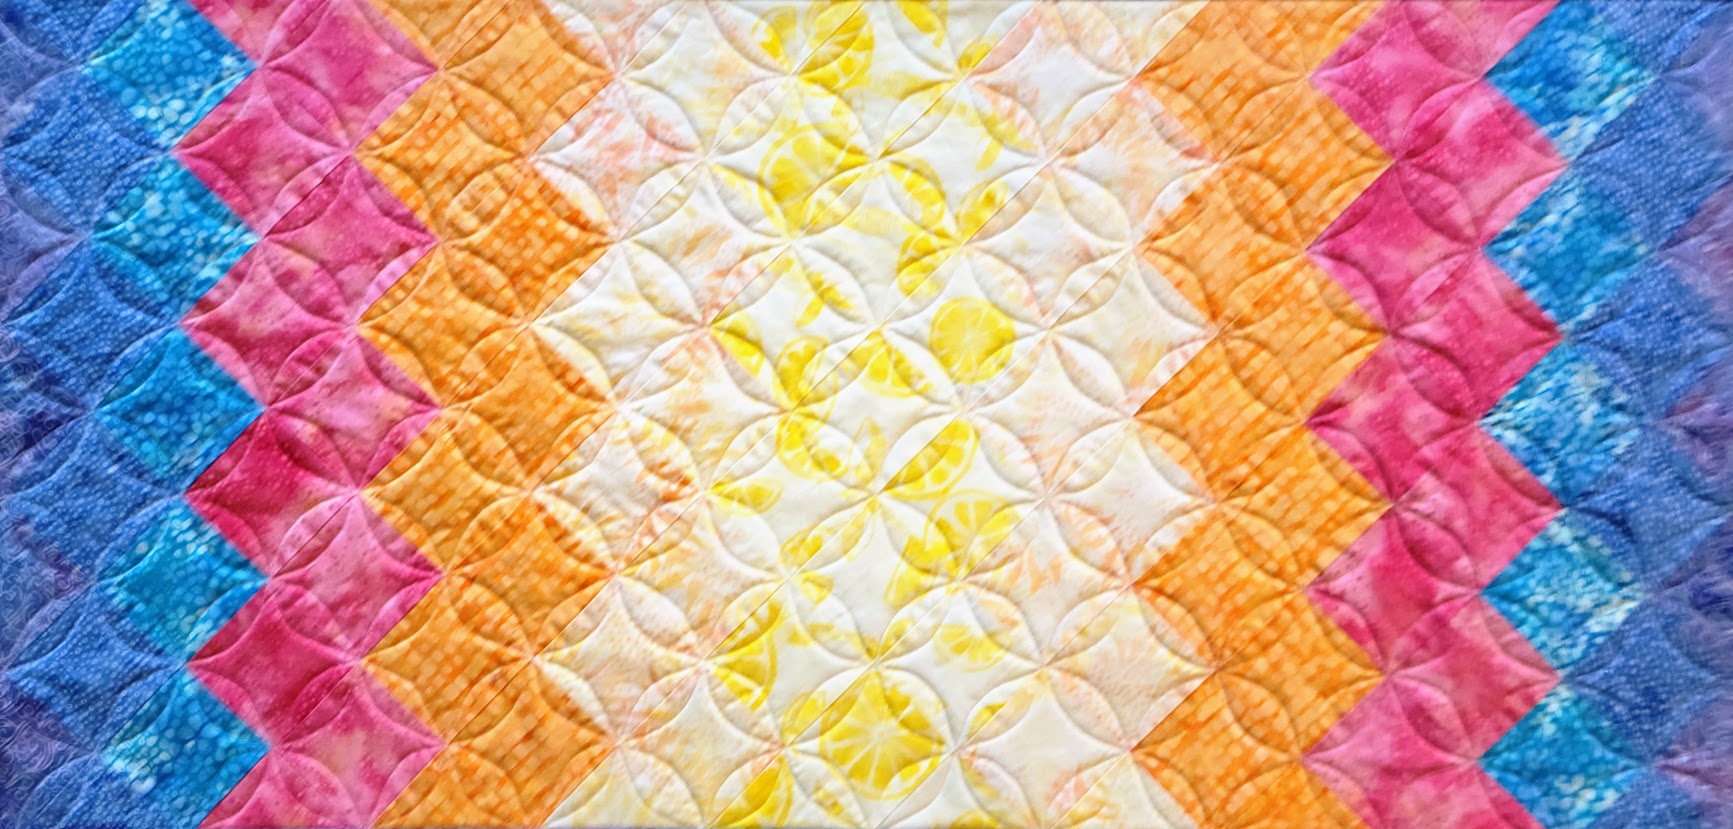
And an even closer view of the quilting on the back of the runner:

I love how the continuous curve quilting looks; and even better – it is pretty easy to do!
A few tips to remember:
- This works best on a grid of either patchwork or marked lines. It looks great when squares are on point, too! The patchwork squares in my table runner are all on point.
- Use gentle curves. These can be freehand, or you can mark them ahead of time. For some projects, I like the curves quite shallow; while for other projects, I make the curves a little more pronounced. Go with your personal preference – just keep consistent within each project.
- As you stitch, switch back and forth from one side of the seam to the other side each time you hit an intersection. (No worries if this doesn’t make sense yet – it will later!)
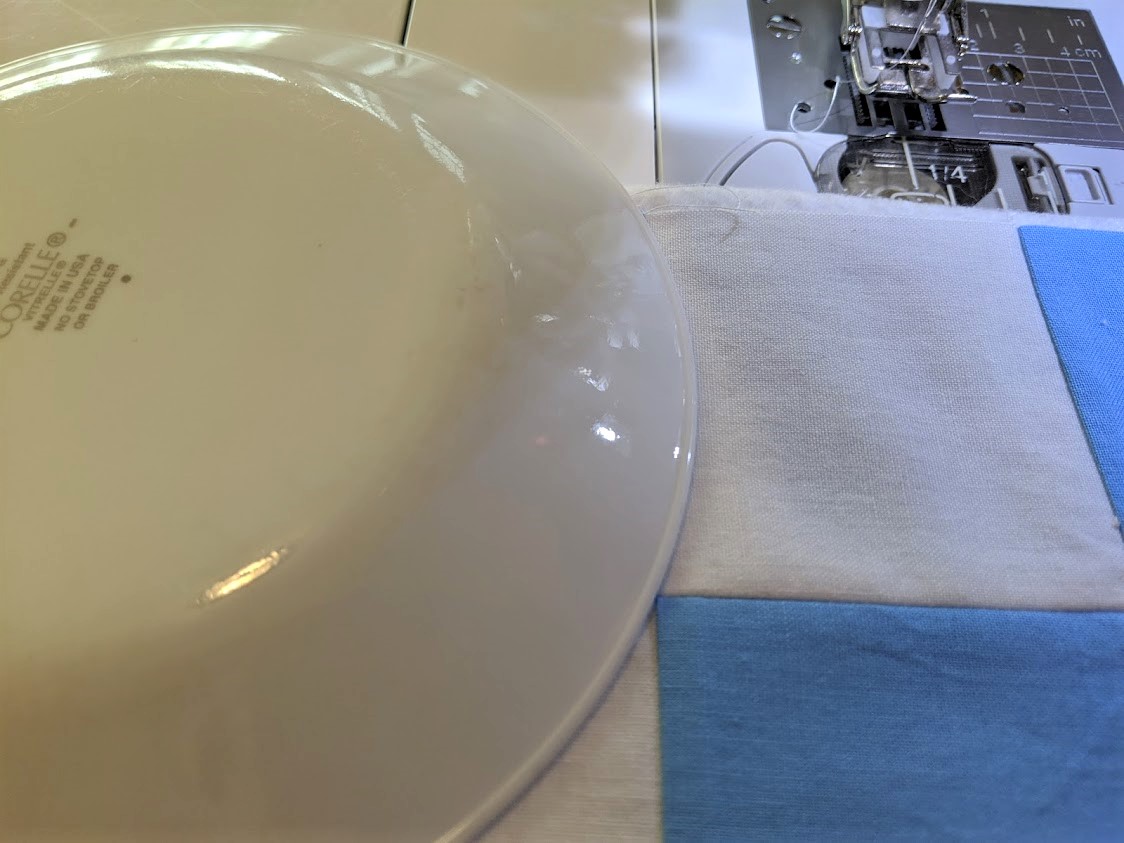
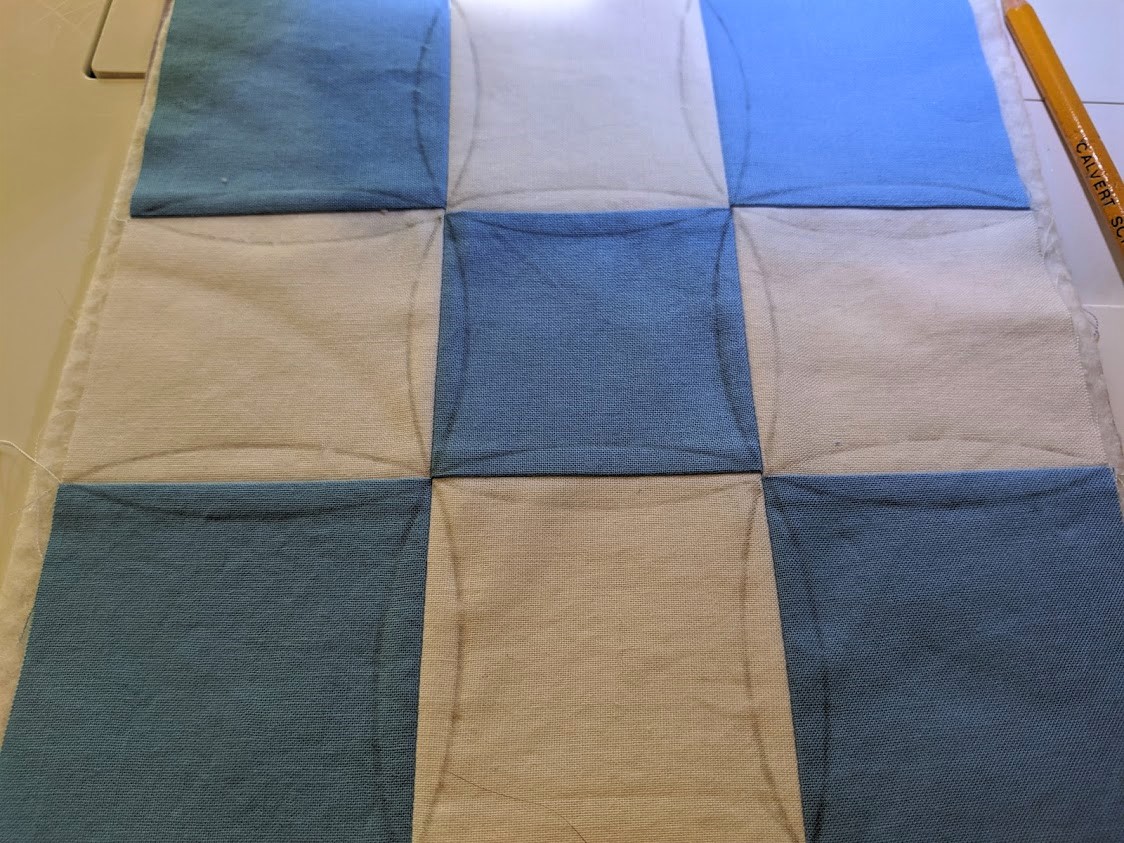
Here I’m using a saucer as a guide for marking shallow curves:
Here is what it my block looks like after marking the center section:
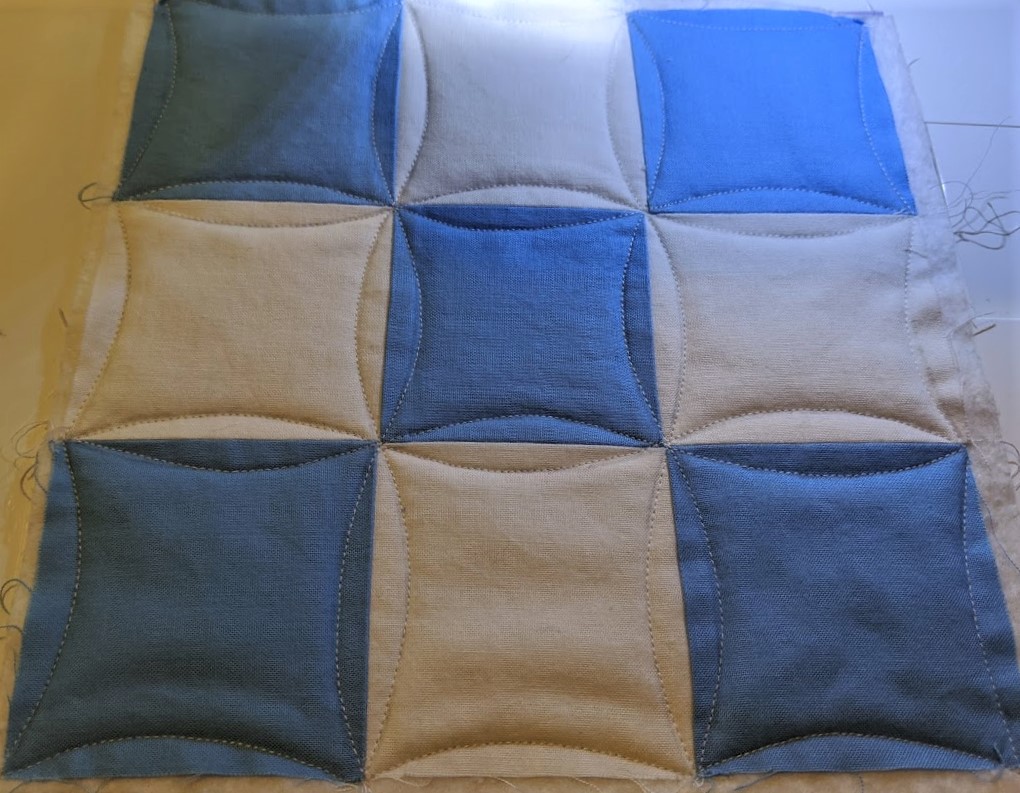
And here is what it looks like from the front when stitched:
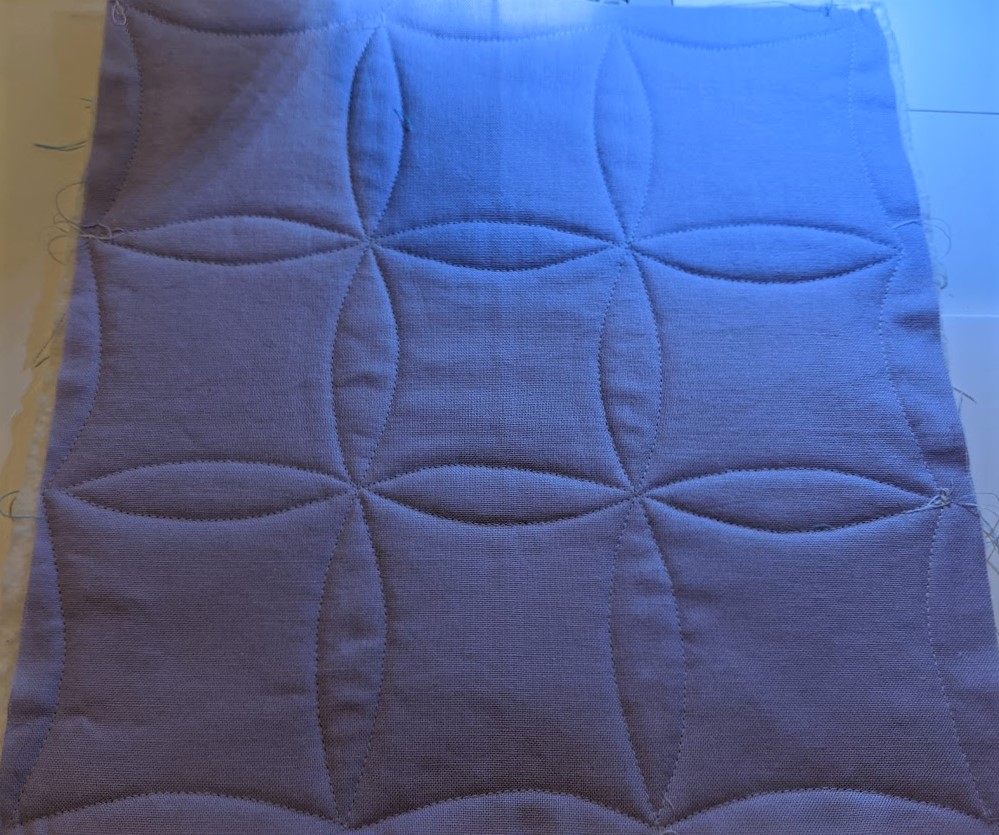
And what it looks like from the back:
Let’s break it down…
I’m going to switch to paper and a sharpie now, because I think it will be easier for everyone to see.
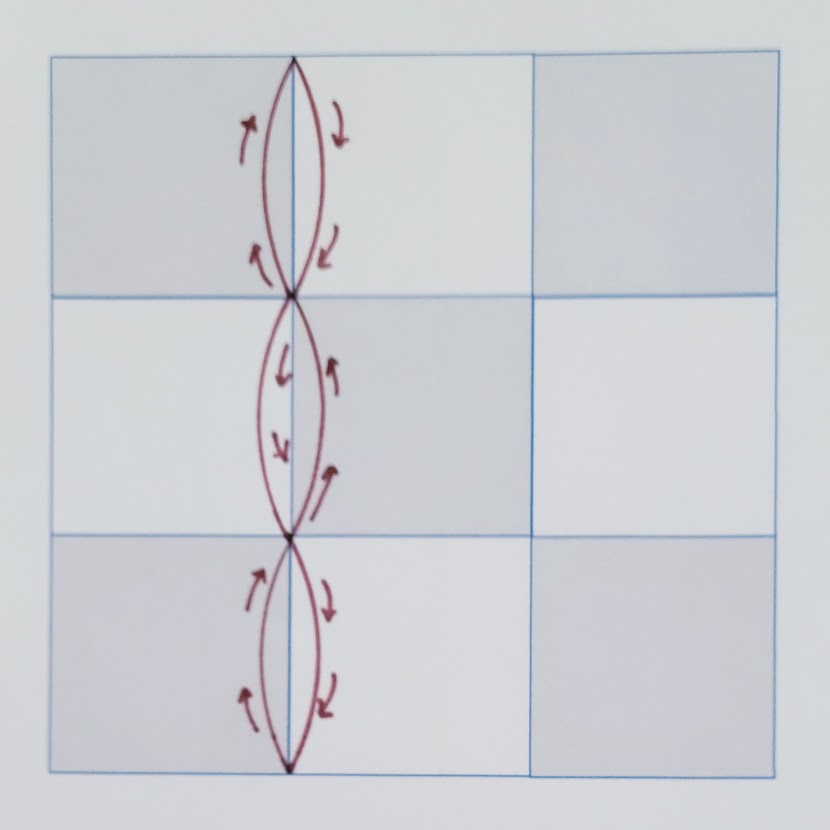
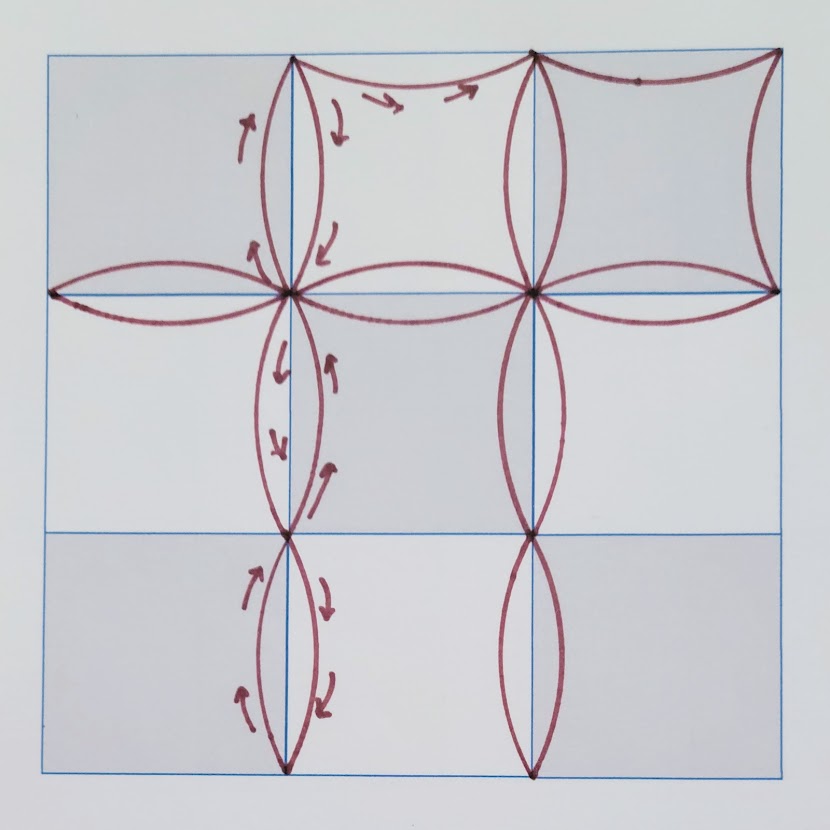
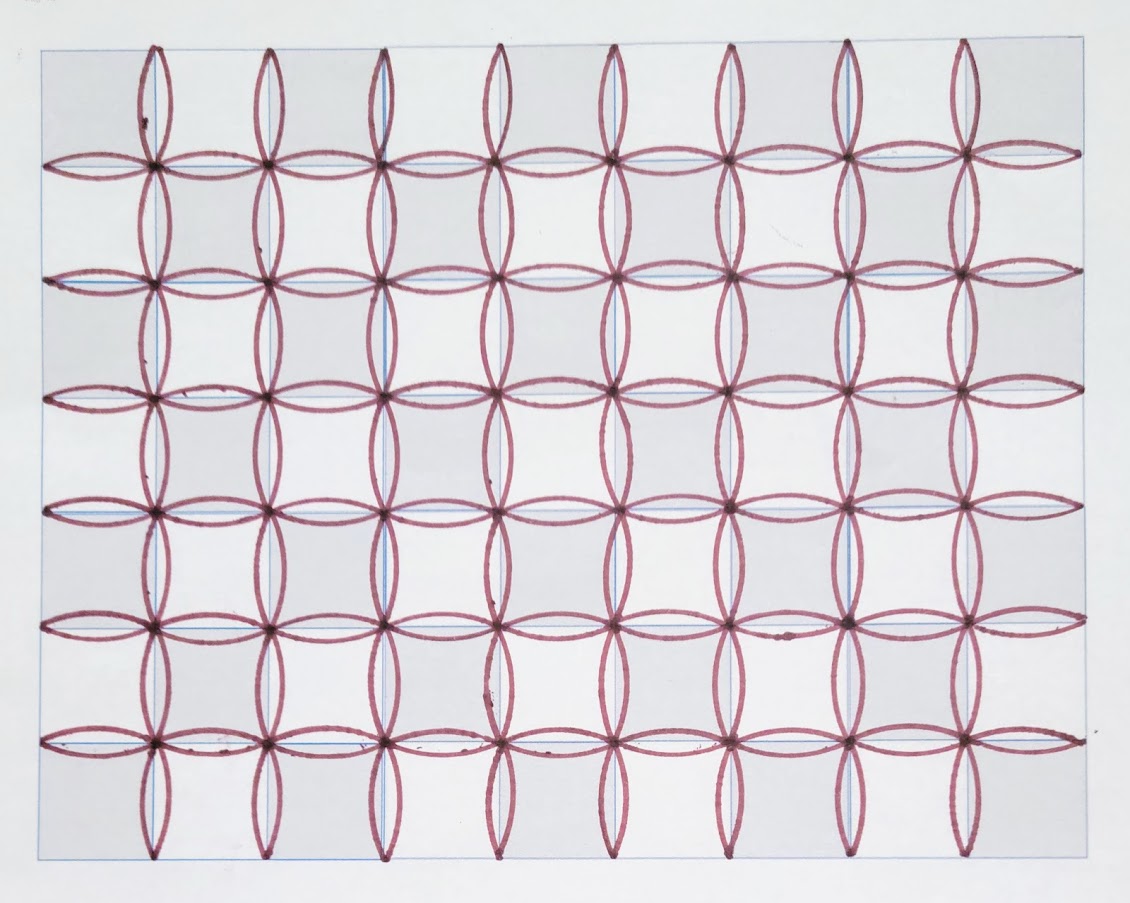
If you are quilting on a block, potholder, table mat, runner, or other item small enough to turn easily in your machine, your stitching path might look like the graphic below.
You’ll start stitching at the top of the first seam, switching sides every time you reach an intersection, until you reach the bottom of the block.
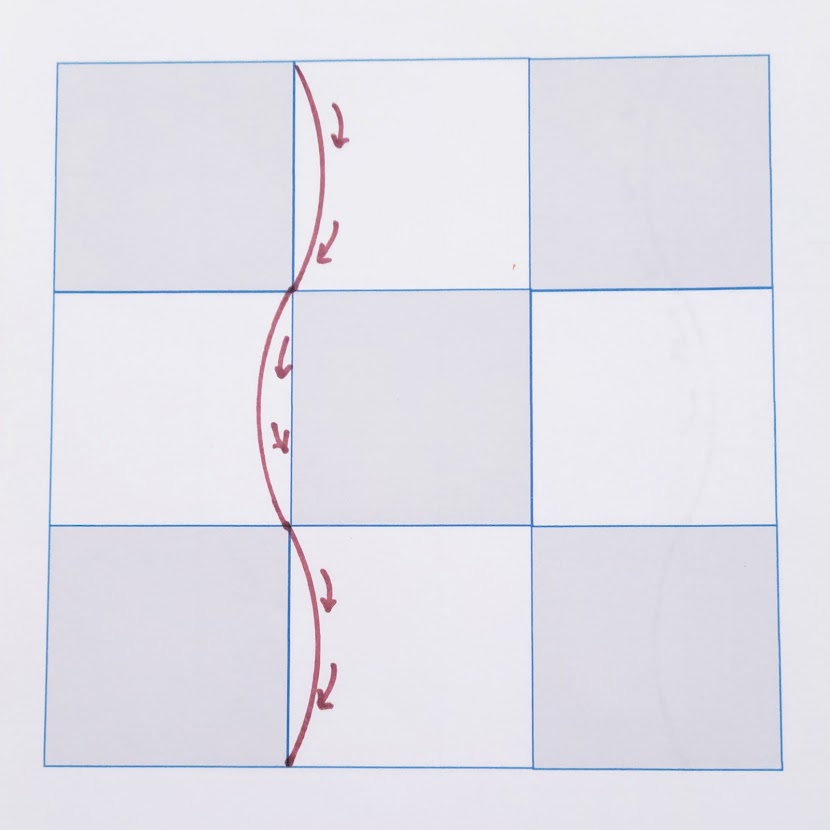
Then you’ll turn around (you’ll need to rotate the block) and stitch in the opposite direction, switching sides at each intersection, until you are back to where you first started.
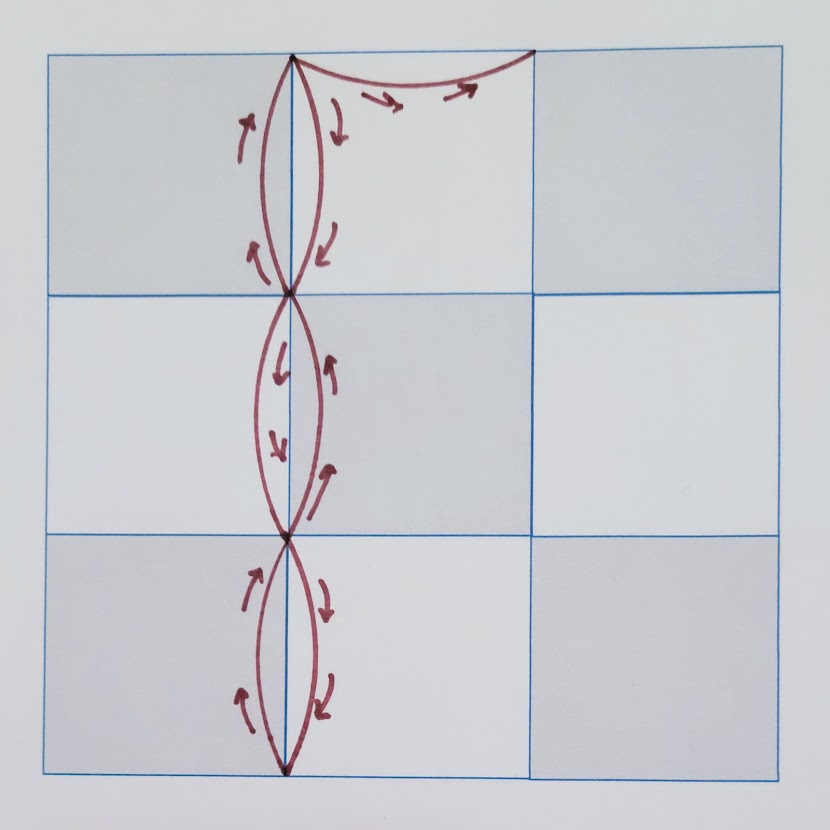
Then you’ll stitch a curve to get over to the next vertical seam.
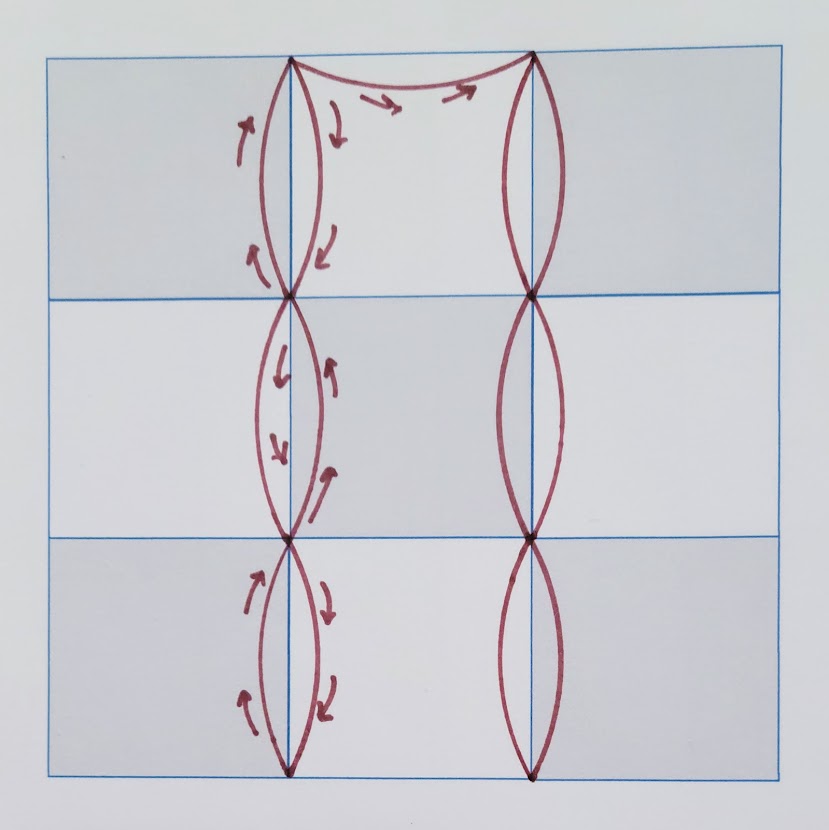
Repeat the process until you return to the outer edge of the block.
Then you can turn the block and start stitching the first horizontal seam.
For clarity, I’m keeping the orientation of the block the same in all of the photos, but you’ll need to rotate the block (or quilt) in order stitch in all the different directions.

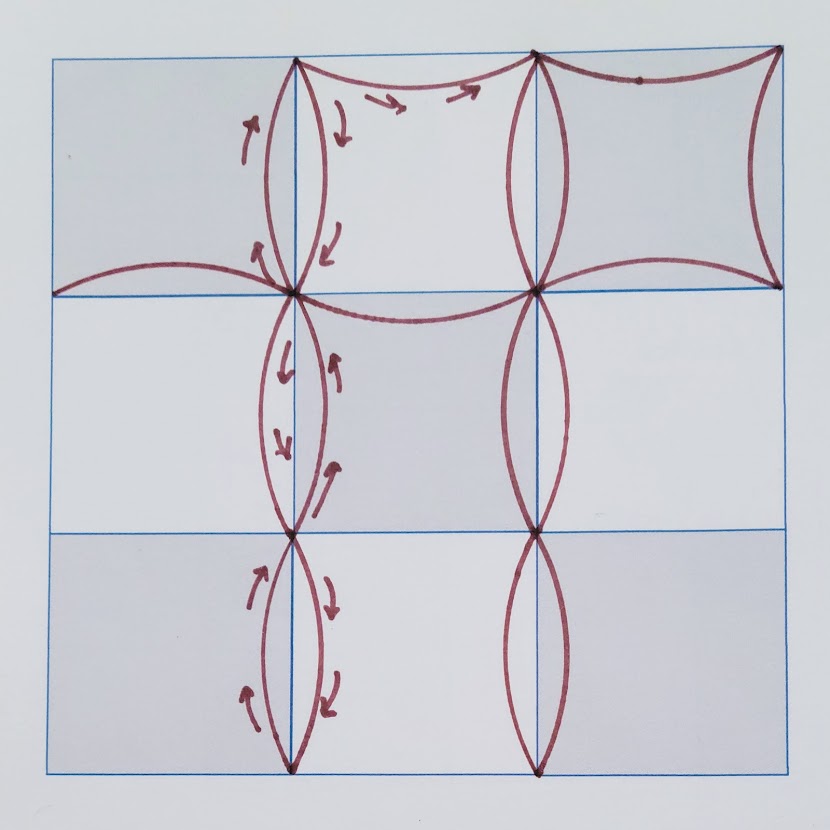
Continue working your way back and forth across the block, just like when you stitched the vertical seams.

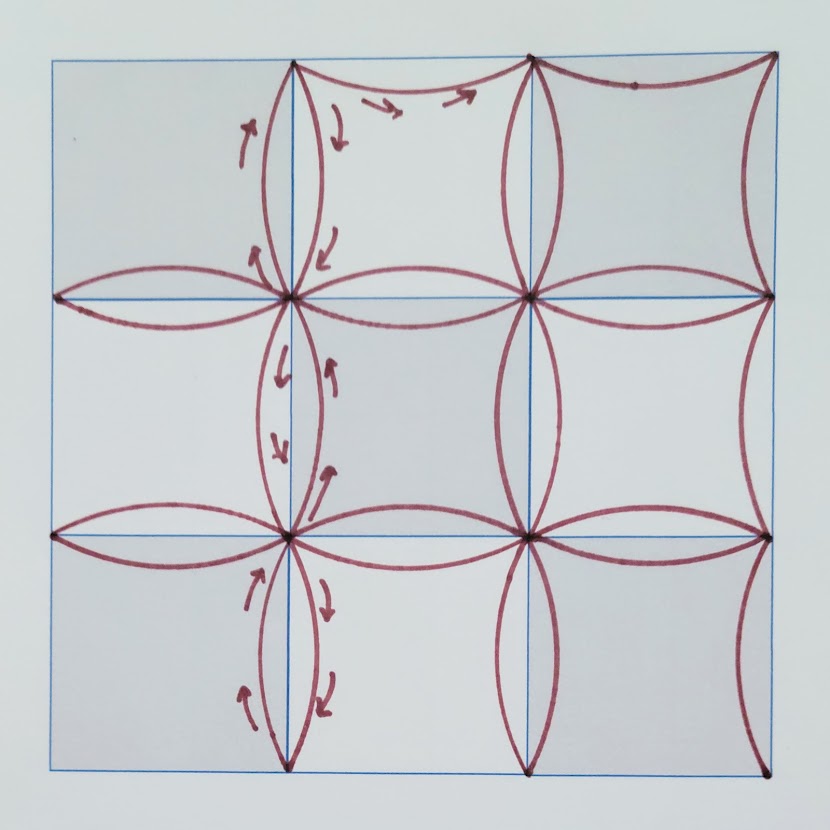
Finish off the outer edges of the block with curved stitching.


And you’re finished!
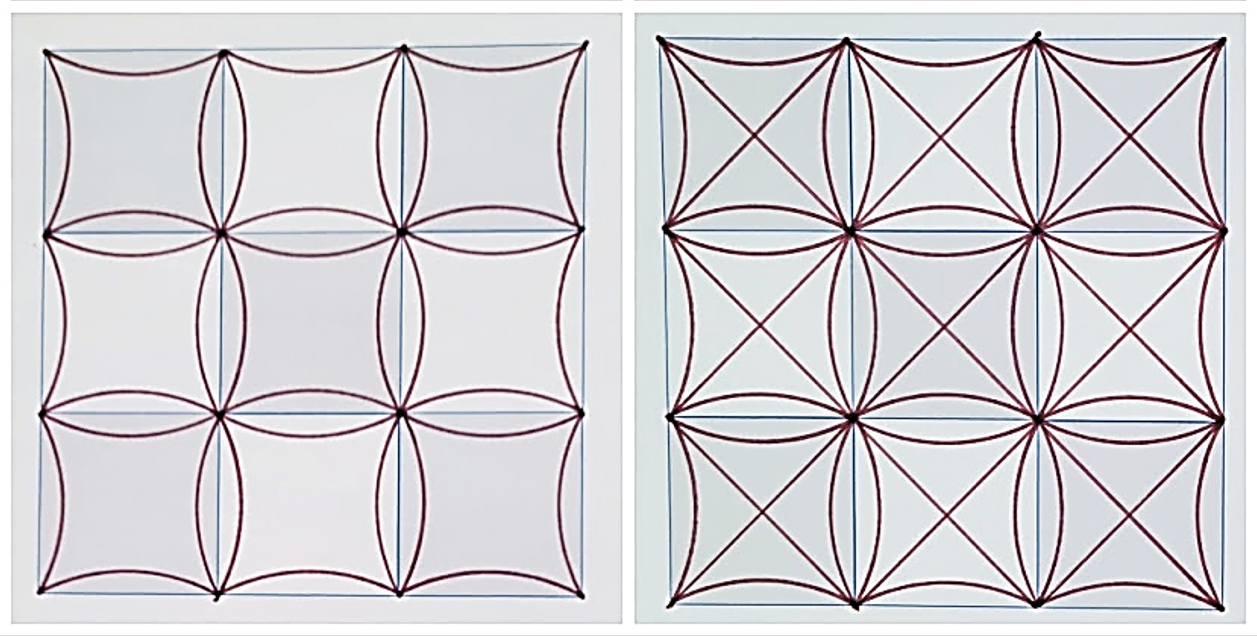
Variation: If your squares are quite large, or if you would just prefer a little more quilting, you can jazz it up even further by stitching a diagonal grid either before or after the continuous curve quilting.
If you are working on a large quilt, I recommend going about it just a little bit differently.
Plan your stitching so that you never have more than half of the quilt going through your sewing machine at any given time.
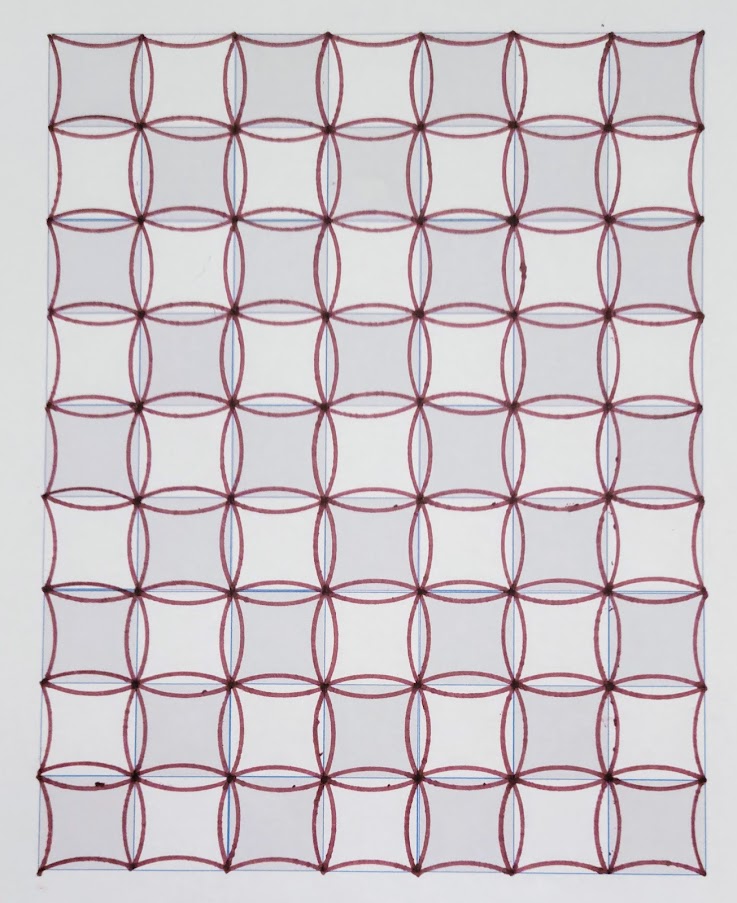
Here is what that might look like:
Work on ½ of the quilt at a time.
Stitch each line one at a time, all starting from the top of the quilt (no turning around)
Then rotate the quilt so that you can work on the other side.

Turn the quilt so you can stitch around the horizontal seams.
Once again, stitch each line one at a time, all starting from the top of the quilt (no turning around for large quilts).
Stitch each line one at a time, all starting from the top of the quilt (no turning around).
Finish by stitching curves along the outer edges of the quilt.
And you’re done!
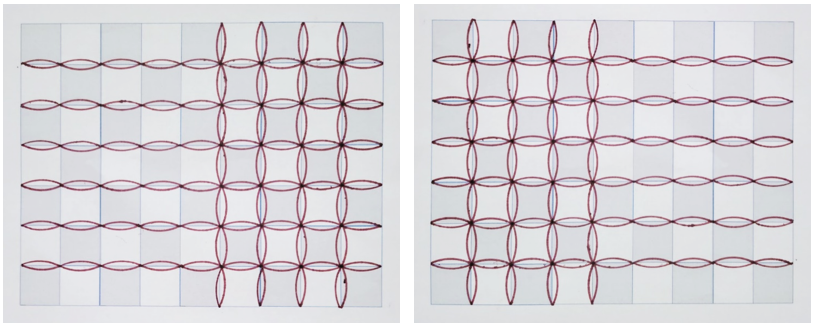
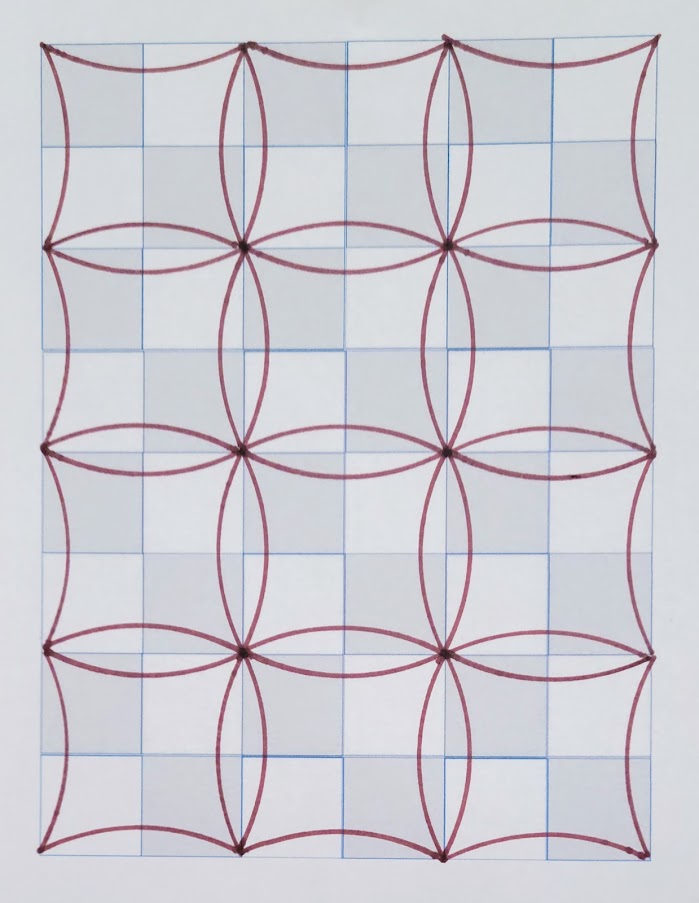
Another variation: if your squares are on the small side, you might try treating a 4-patch (or even a 9-patch or other patchwork block) as a single unit. Here is what that might look like:
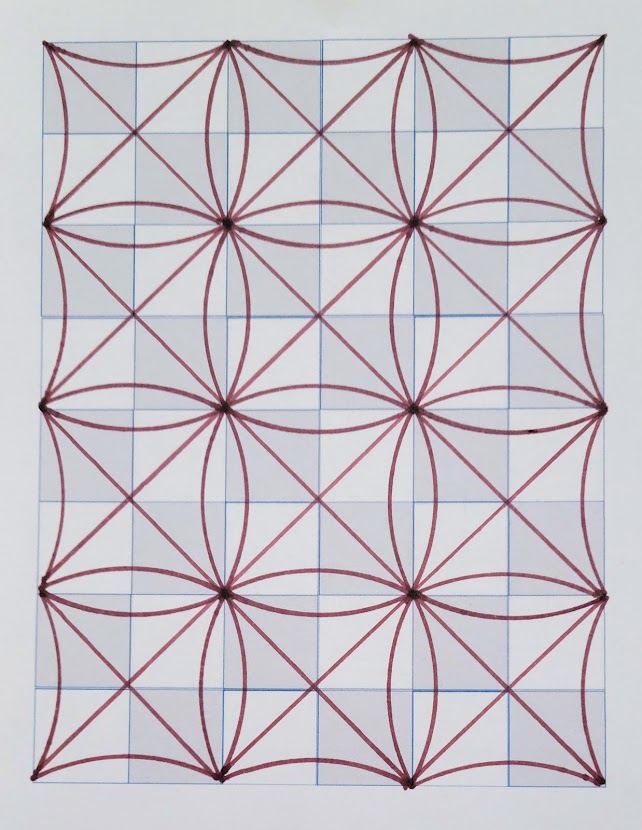
And what it would look like with a diagonal grid combined with the continuous curves:
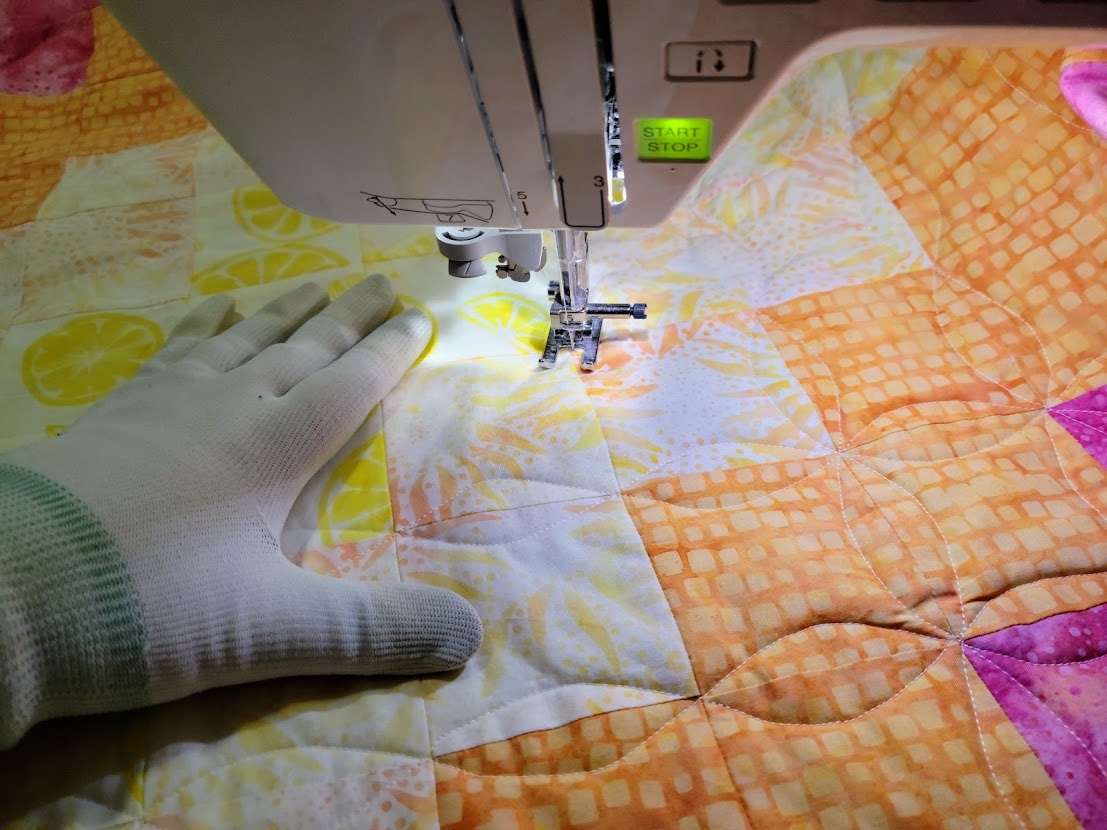
One last tip: Although quilting gloves are primarily used for free-motion quilting, I find them incredibly helpful with many walking-foot designs, too. They make it easier to control the fabric with significantly less effort!
Note: normally, I would use both hands to guide the fabric through the machine as I stitch. You only see one hand in this shot because the other is taking the photo. 😉
There are lots of other creative ways to use Continuous Curves – experiment to see what works best for you!
I hope you have as much fun with these techniques as I do. Please feel free to tag me if you try them! 😊
Instagram: bethann.williams
This original version of this post was originally posted on the official Cotton Cuts blog. I’ve added a few new photos here that I wasn’t able to include in the original post due to the size of the files. I hope you’ll find them helpful! 🙂