I love to sit on the floor with William (age 3) and Emilia (age 1) and play, but I sure don’t love trying to get up again. Nor am I impressed with how hard the floor feels after a while. Given that and also knowing how much fun the little ones have falling/jumping/snuggling into pillows, I figured we could come up with something that would work for all of us.
I searched online for inspiration, and came across some pillow loungers made from commercial pillowcases.
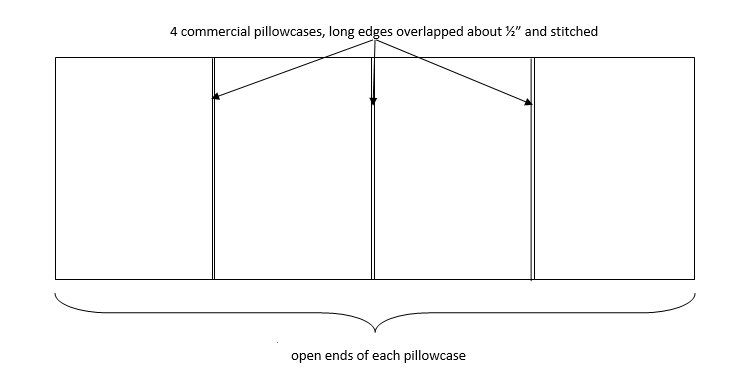
I loved the idea, but wanted a wide overlap to keep the pillows from falling out, and sturdier fabric.
Here’s what used:
- 4 bed pillows, each 20″ x 28″
- 4.5 yd.* fabric – I used 40″ wide outdoor fabric for durability; it feels a lot like cotton twill or canvas
*I recommend buying a little extra for matching prints and/or to compensate if the cut ends of the fabric need to be straightened. I didn’t have have enough fabric to line the print up exactly when I sewed the 2 lengths together, but decided not to worry about it this time.
NOTE: A flat sheet could be substituted for the yardage (check size, first) – I expect a soft flannel or jersey might be especially cozy.
Here’s how I figured out how big a piece of fabric I needed:
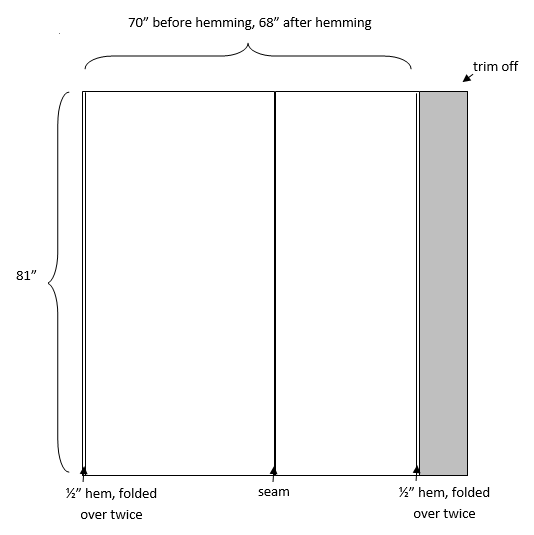
- length: 20″ (width of each pillow) x 4, plus 1″ for seam allowance on each end = 81″
- width: 28″ (length of each pillow) x 2, plus 2″ for hems, plus 12″ overlap = 70″
Here’s how I made it:
Please note: these illustrations are not exactly to scale, especially when it comes to hems!
- I cut my fabric exactly in half across the 40″ width, which gave me two pieces of fabric, each 81″ x 40″
- I sewed the 2 pieces together along 1 long side with a 1/2″ seam to create a 81″ x 79″ piece of fabric.
- I trimmed 9″ off 1 side so that I ended up with a piece of fabric 81″ x 70″
- I folded and pressed up each 81″ long edge 1/2″ and then another 1/2″ to create a finished hem on each side, and stitched the hems down.
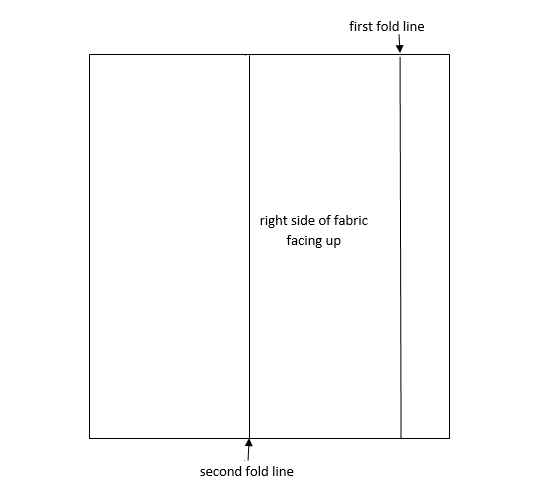
Prepping the fabric - After hemming the long side edges of the fabric, I laid the fabric out, right side (pretty side) up.
- I measured in 12″ from one long edge and folded it toward the center of the fabric.
- Then I folded the other long edge so that it almost touched the opposite side. (The folded tube this creates should measure 28″ wide. The right side of the fabric is no longer visible.)
Fold the 12″ wide section over first. - I sewed across the top and the bottom of the layered fabrics with a 1/2″ seam.
- I stitched over the raw edges of the fabric with an overlock stitch to prevent fraying. (You could use a serger or use a zigzag stitch, if you prefer.)
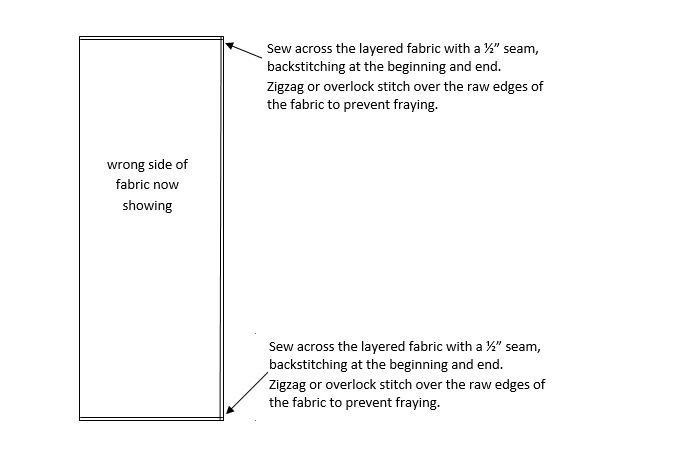
Stitching across the ends to form a long tube - I turned the whole thing right side out and poked out the corners and sides so that it would lay flat.
- I sewed 3 lines across, each 20″ apart, backstitching at the beginning and end of each line of stitching.
- For extra durability, I stitched each of these 3 lines again, right on top of the first stitching.
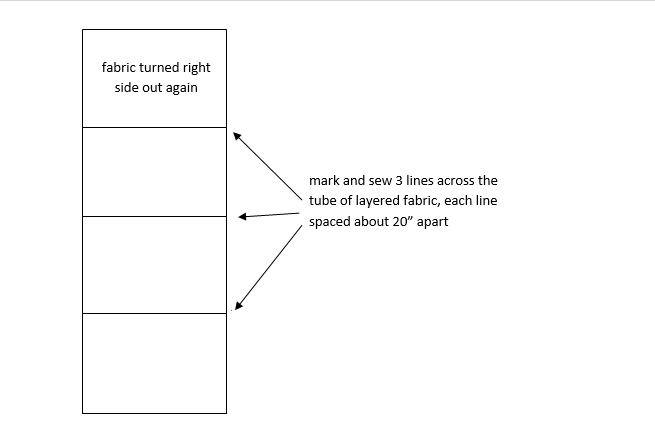
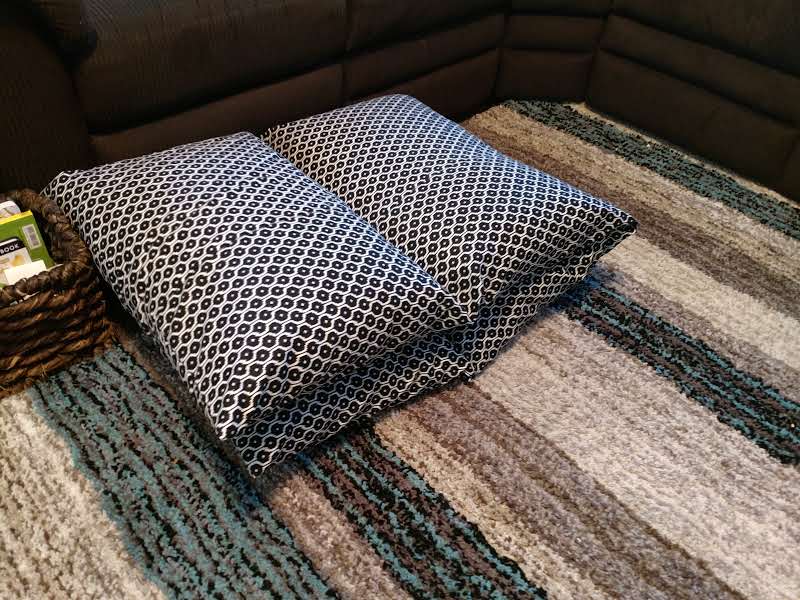
Stitching the lines across the tube to create an individual pocket for each pillow – the fabric must be turned right side out FIRST! - I inserted the 4 pillows through the opening in the overlapped fabric on the back side of the tube and smoothed the fabric out again.
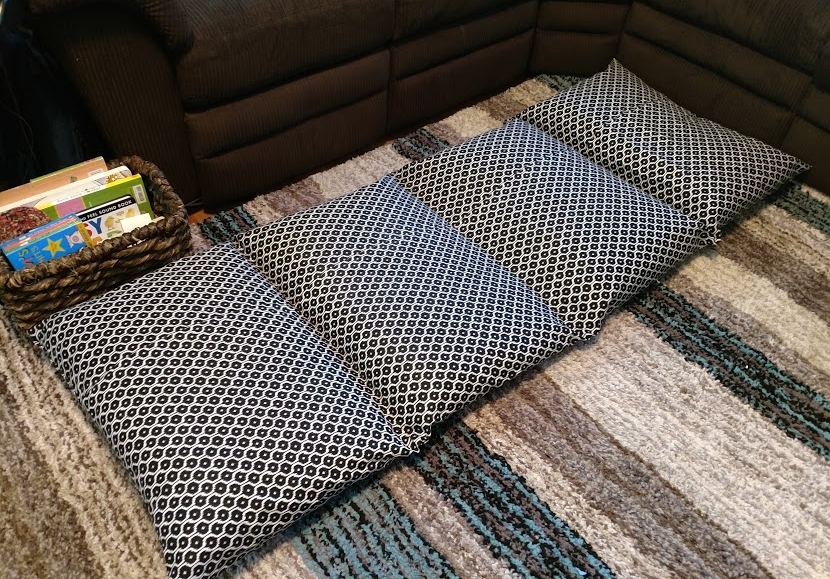
Backside of lounger, showing 12″ overlap holding pillows securely in place
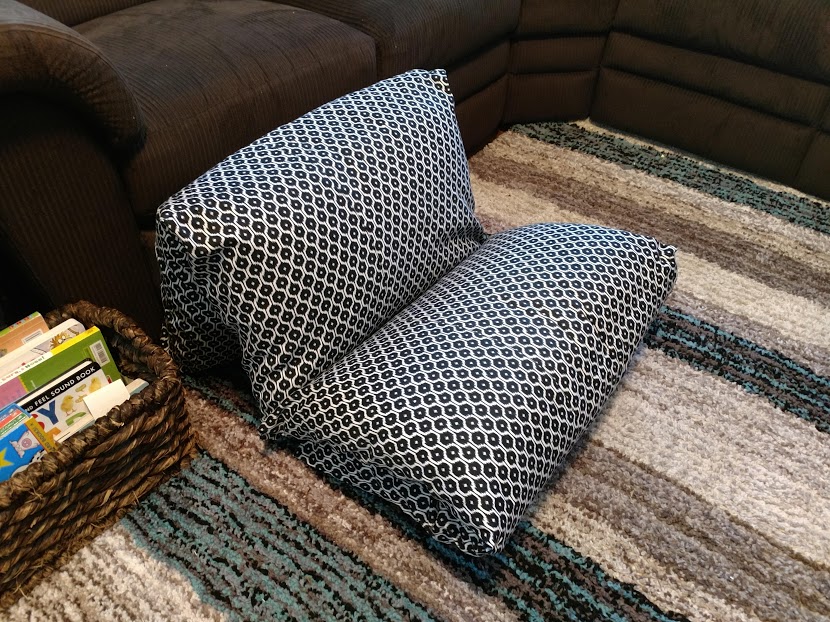
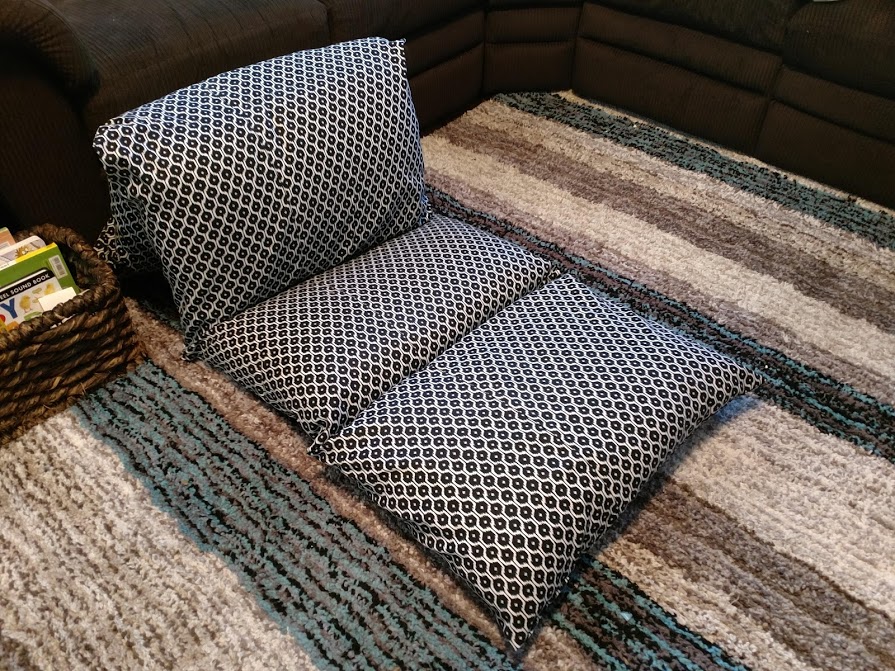
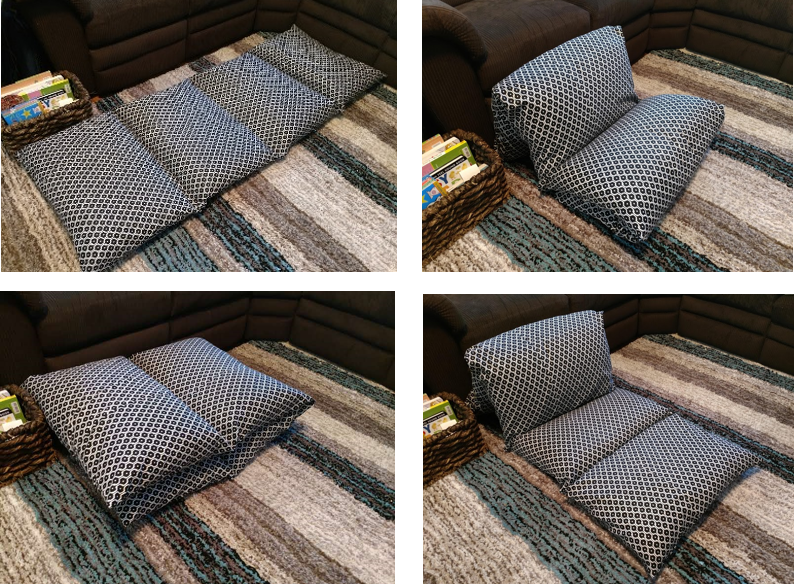
Ready to snuggle, read, or catch a movie in comfort 🙂