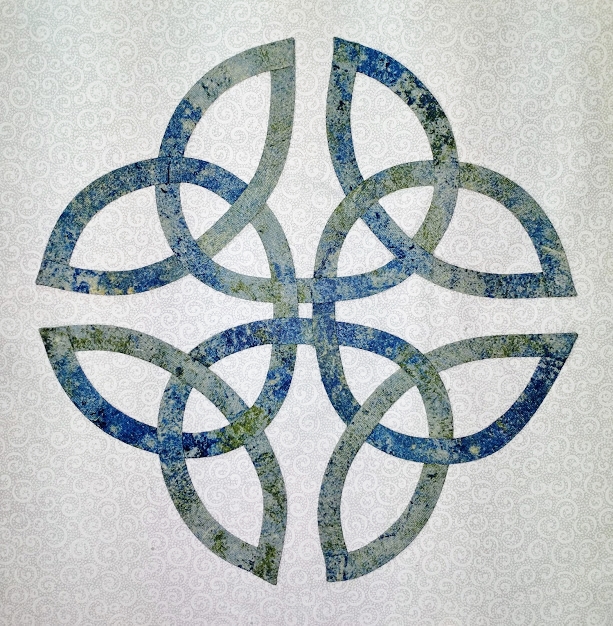
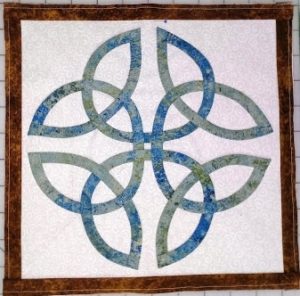
This is the seventh in a series of posts that will take you step-by-step through the process of creating a Celtic Quilt.
The lines that form my Celtic and Celtic-style knotwork designs are formed by cutting bias strips of fabric and sewing them into tubes, which are then fuse-basted onto background fabric. You can choose to appliqué the design (sew everything down), add borders, layer the quilt top with batting and backing, and then quilt by either hand or machine. Or you can choose (as I usually do) to add the border(s), layer the quilt top with batting and backing, and then machine appliqué and quilt in one step.
How do you decide whether or not to appliqué and quilt in one step?
The main rule of thumb for me is the size of the quilt. For wall-hangings, table runners, pillows, etc., I always appliqué and quilt in one step. For larger projects such as bed quilts, it depends on if the design has lots of major changes in direction or not. There are definitely times when it is easier to appliqué first and then quilt later!
You can also use my methods to “baste” the design in place and then appliqué by hand. If you choose that route, I recommend matching your thread color to the fabric. Silk thread is my top choice – the stitches usually sink down into the fabric for a lovely “invisible” stitch – even if you don’t have a perfect color match. You can then layer the appliquéd design with batting and backing and quilt by hand or machine.
(Optional) Add a little flair with a “Flap” border:
Note: I didn’t add a flap border to the True Lover’ Knot as pictured in my book, but I did add one to some of the other projects, and cover the technique on p. 25.
A flap border not only adds a bit of dimension to your quilt top, but it is also an much easier way to add a narrow accent border than trying to piece in a 7/8″ strip border.
- Square up your block (quilt top), if necessary, so that the sides are all even and the design is approximately the same distance from each outer edge of the block.
- (Optional) place a pin near the top of the block to mark the upper edge.
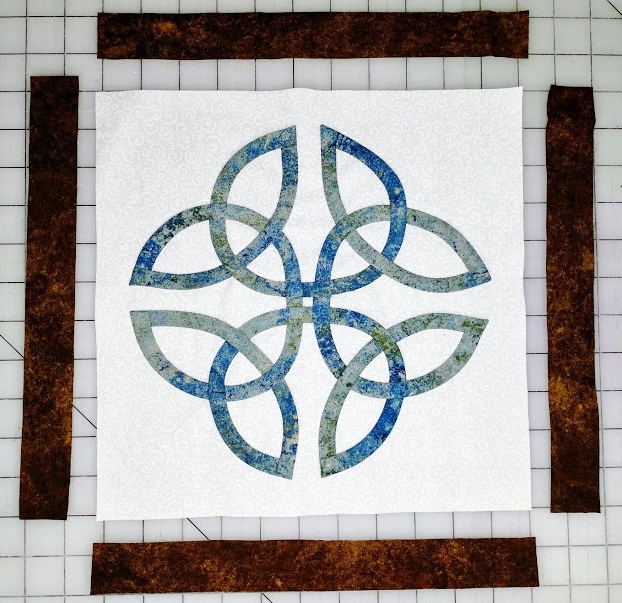
- Cut four strips, each 1 1/4″ wide x the length of each side of the quilt top.
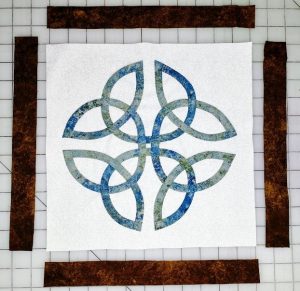
Fabric for the inner border – ready to trim to match the block. - Fold each strip in half lengthwise, wrong sides together (pretty side showing), and matching up the long raw edges carefully. Press with a hot iron to set.
Border strips pressed in half lengthwise - Pin a flap border to the left and to the right sides of the quilt top, aligning the raw edges of the folded flap borders with the raw edges of the quilt top. The folded edges should face the center of the quilt, covering up some of the background fabric.
- Sew with a 1/8″ seam allowance (or scant 1/4″).
Flap borders added to the left and right sides - Sew the top and bottom flap borders in the same manner.
Top and bottom flap borders added


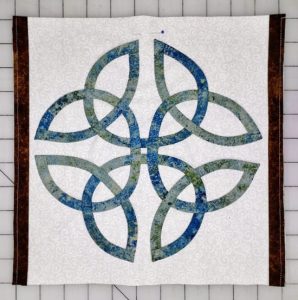
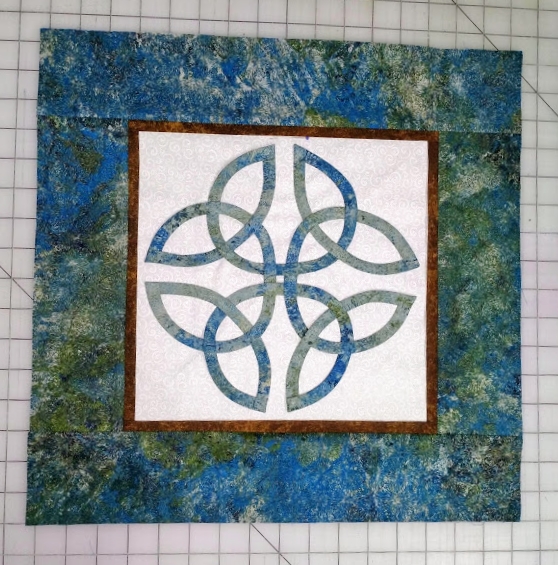
Add a final border:
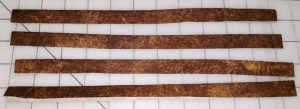
- Cut border strips your desired width. I used a 3″ outer border on my original sample, but I’m cutting the strips 3 1/4″ wide here because I’m planning on turning it into a pillow later. There’s no magic width – you can make yours narrower, if you like.
- Cut your left and right border pieces at the same time so that they will be the exact same length.
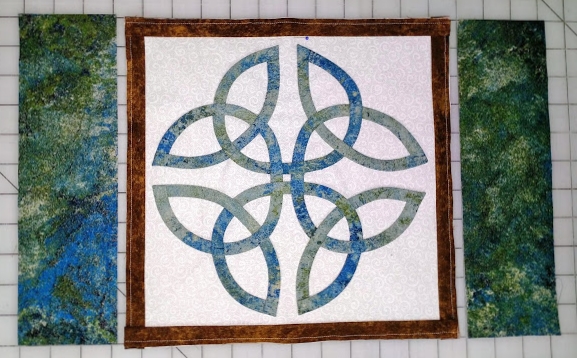
Ready to add the next border - Pin and sew them to the quilt with a 1/4″ wide seam allowance.

Sew these borders with a 1/4″ wide seam allowance - Flip the borders open and press with the seam allowance pointing toward the outer border, away from the center of the quilt. The stitching used to attach the flap border should be completely hidden.

Press so that the seam allowances point away from the center of the quilt - Measure through the center of the quilt and cut the top and bottom border pieces the same length.
- Pin and sew them to the quilt with a 1/4″ wide seam allowance.
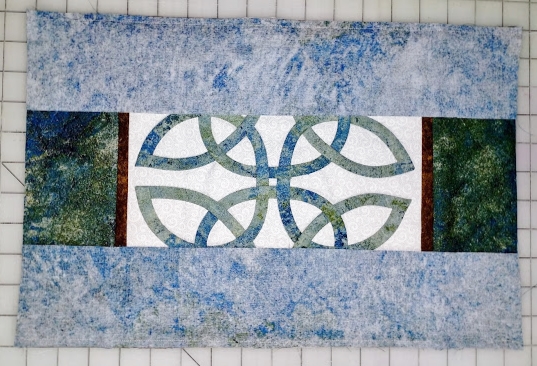
Add the top and bottom borders - Flip the borders open and press with the seam allowance pointing toward the outer border, away from the center of the quilt.
Press the final borders so that the seam allowances point away from the center of the quilt
Note: Feel free to change the number of borders and/or the width of the borders as you prefer.