
2025 UPDATE: My Celtic patterns can now be found in my online shop.
This is the fifth in a series of posts that will take you step-by-step through the process of creating a Celtic Quilt.
The lines that form my Celtic and Celtic-style knotwork designs are formed by cutting bias strips of fabric and sewing them into tubes, which are then fuse-basted and machine appliquéd onto background fabric.
The strips have been sewn into tubes, but how do you hide the seam allowance along the side?
There are two main ways to deal with this:
Either way, you’ll need a 3/8″ wide press bar.
I like these plastic bars the best, as they are economical, do not get as hot as metal press bars, and are more stable than nylon bars.
You’ll need a firm pressing surface.
You’ll also need an iron.
Finally, you’ll also need to trim down the seam allowances of the fabric tubes to about 1/8″.
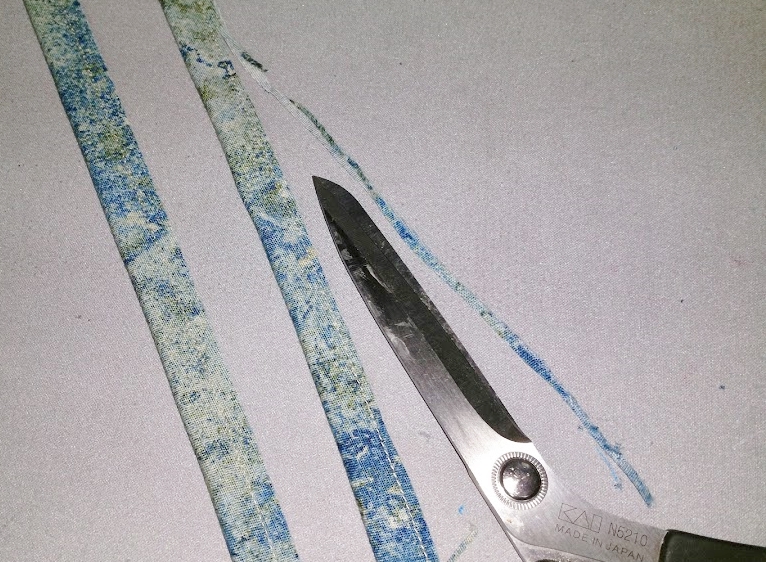
Note: If you were to cut your original fabric strips 1″ wide and sew them into tubes with a scant 1/8″ seam allowance, you wouldn’t need this step. However, most people find the 1 1/4″ strips and scant 1/4″ seam allowance so much easier to work with that they don’t mind trimming down the seam allowances before pressing the fabric tubes.
Method 1 – Most Common:
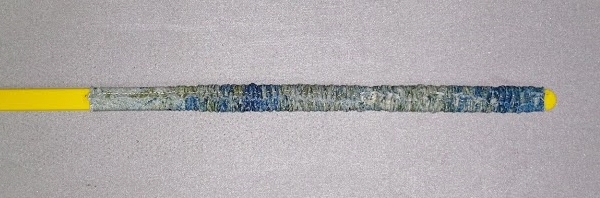
- Slide the fabric tube onto the bias press bar; in this case, it should be the 3/8″ wide bar.
- Center the seam allowance (not the seam itself!) in the middle of the bar.
- Press the tube with a hot, dry iron (cotton setting if you are using cotton fabric), guiding the seam allowance to one side.
- For longer strips, continue sliding the bar inside the tube and pressing until the full length of the tube has been pressed flat.
- Carefully remove the press bar. Be very careful not to stretch the fabric!
- Depending on the type of bar you are using (metal, plastic, or nylon), you may need to give the tube an additional press to completely flatten it after the bar has been removed.

Method 1: Center the seam allowance (not the seam!) and press the fabric with the press bar inside.
Method 2 – My Preference:
- Slide the fabric tube onto the bias press bar; in this case, it should be the 3/8″ wide bar.
- Center the seam allowance (not the seam itself!) in the middle of the bar.
- Scrunch up the tube on one end of the bar.
- GENTLY guide the fabric off the end of the tube (I like to hold the bar at an angle to the pressing surface) and press the tube with a hot, dry iron (cotton setting if you are using cotton fabric), guiding the seam allowance to one side. Be careful not to stretch the tube as it comes off the bar!
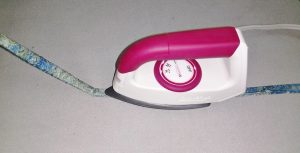
GENTLY guide the fabric off the end of the tube and press with a hot, dry iron, guiding the seam allowance to one side as you flatten the tube.
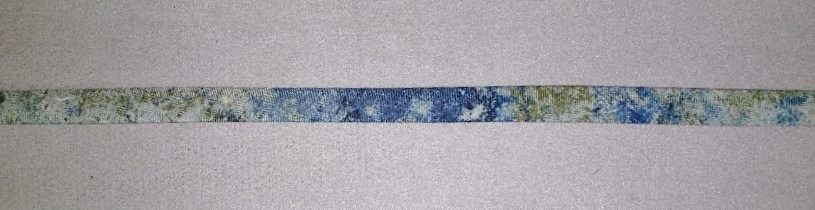
For either method, don’t stress too much if the seam allowance occasionally flips from one side of the seam to the other, as long as it remains hidden when you turn the tube over to check the front.
Once you have all of the tubes pressed, you are ready to start creating the design!