2025 UPDATE: My Celtic patterns can now be found in my online shop.
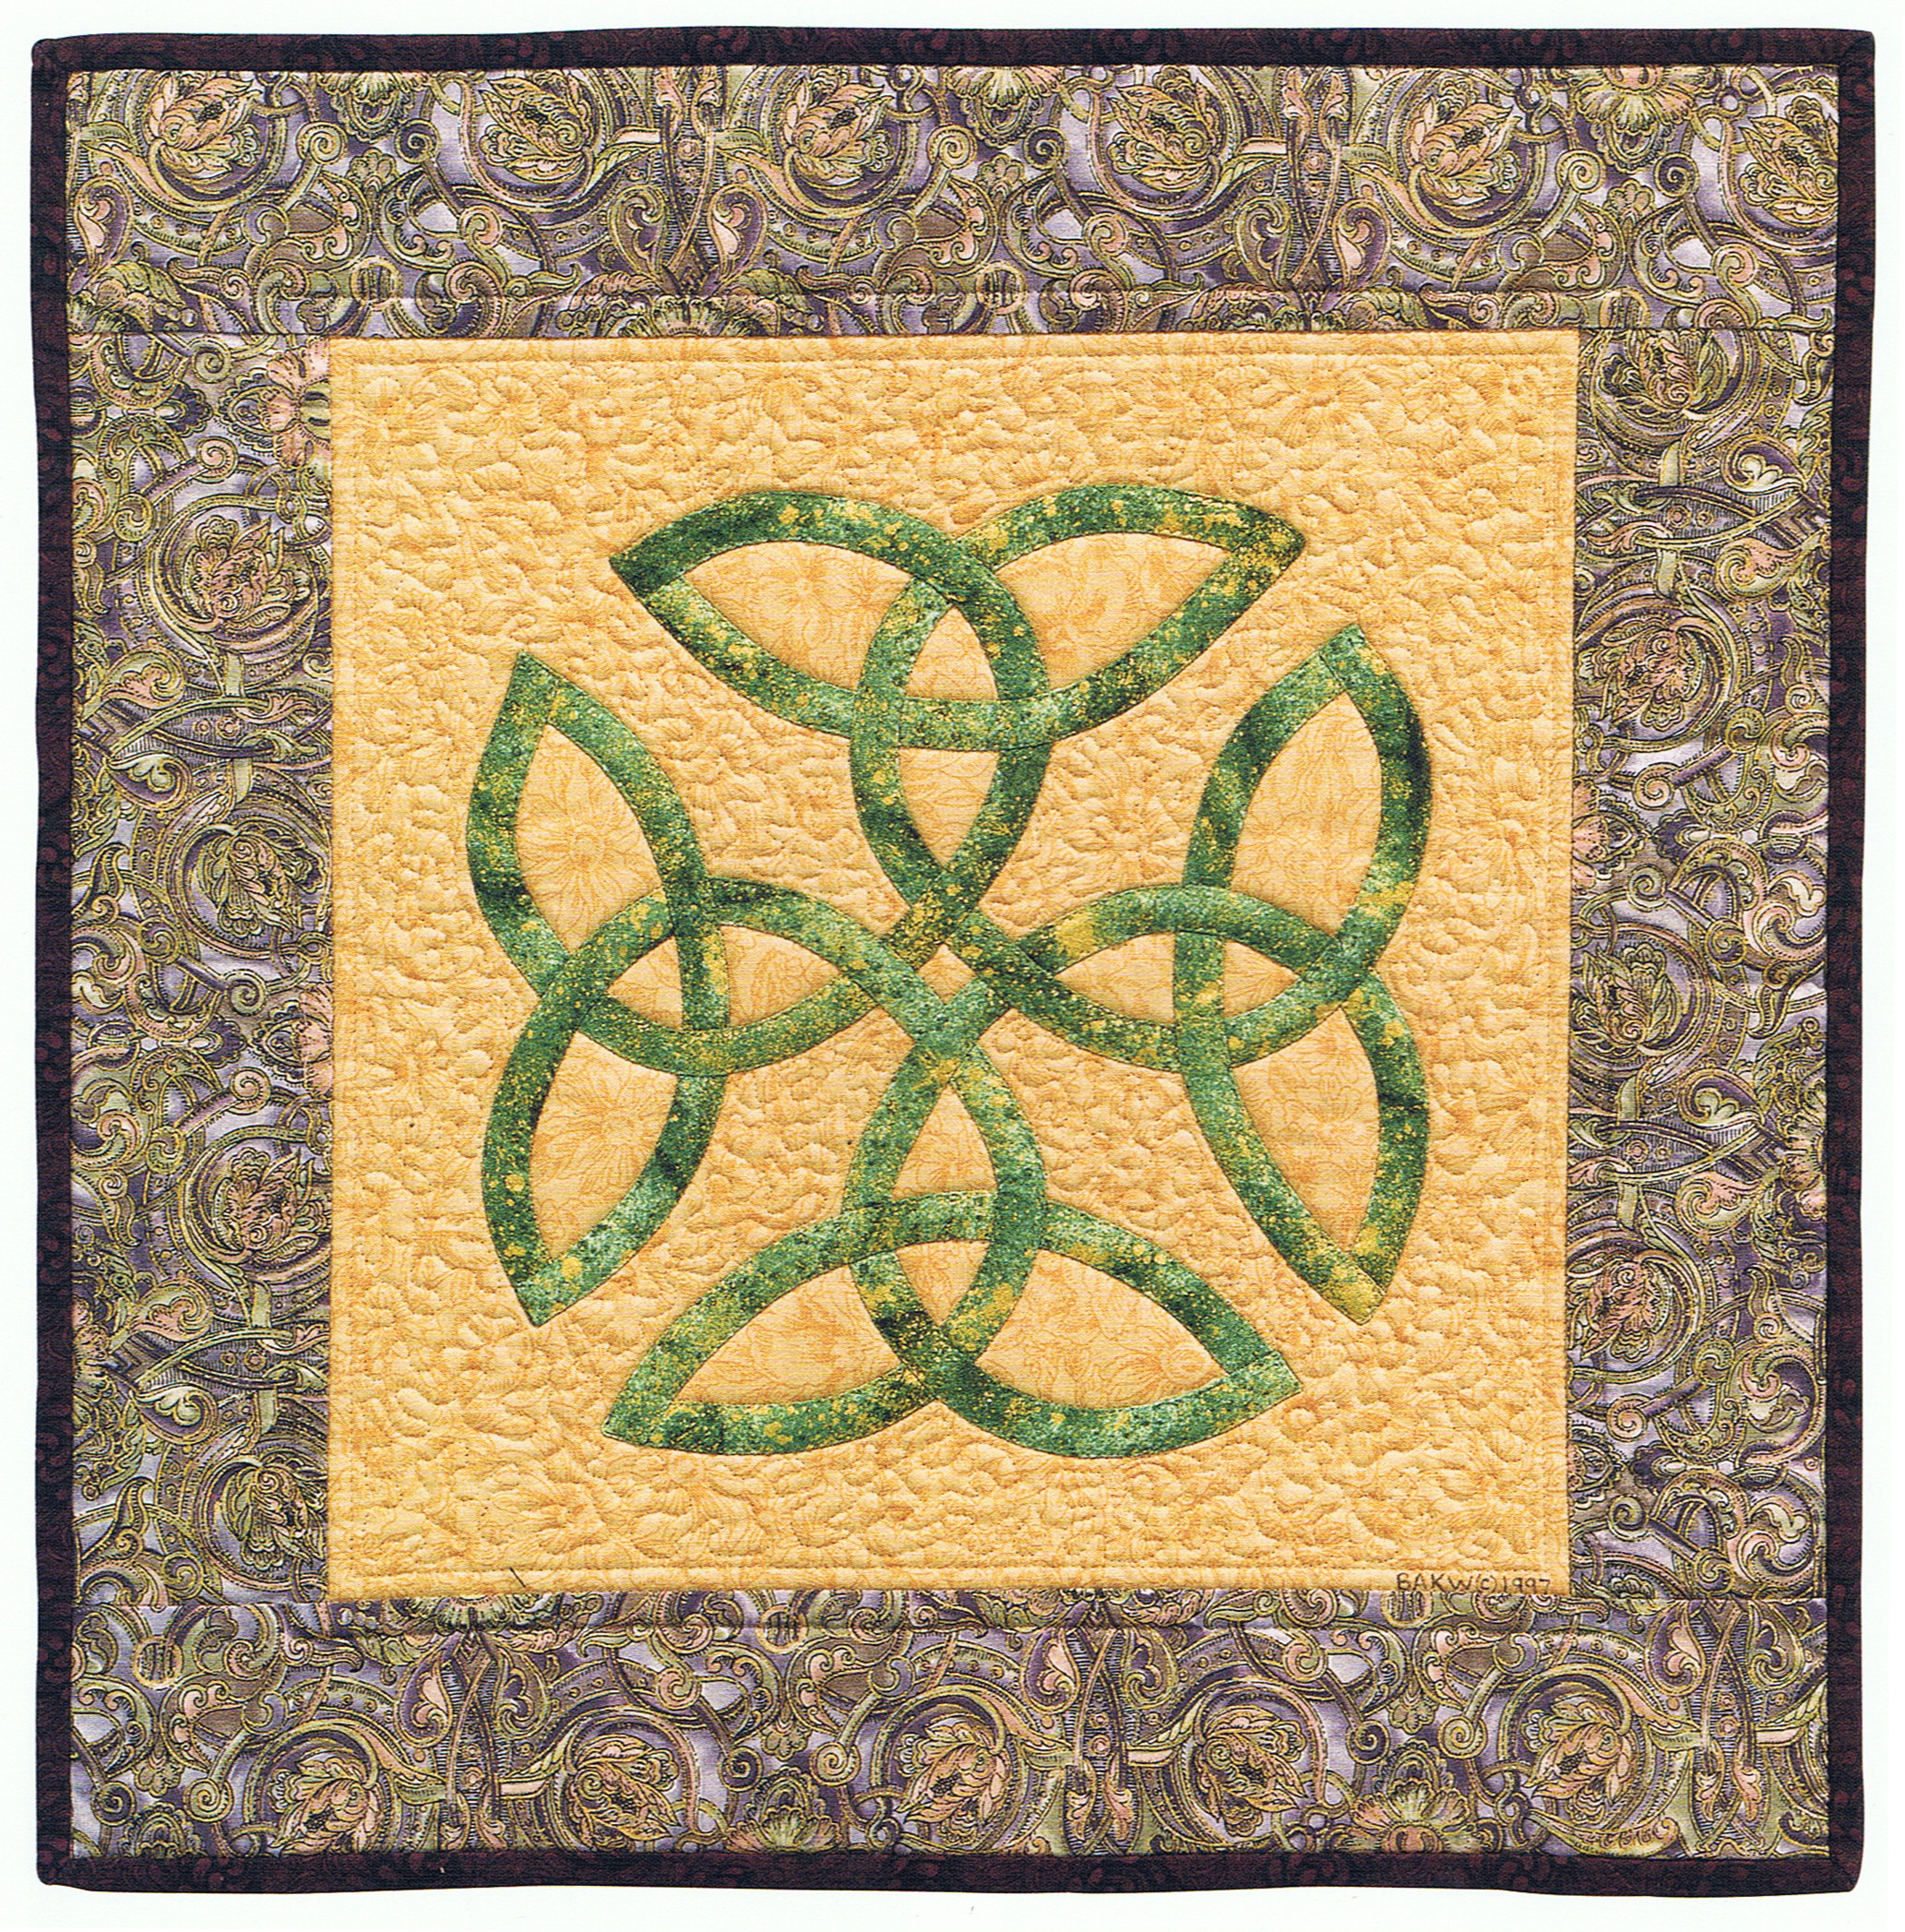
This is the third of a series of posts that will take you step-by-step through the process of creating a Celtic Quilt.
The lines that form my Celtic and Celtic-style knotwork designs are formed by cutting strips of fabric and sewing them into tubes.
The first thing to decide is how wide you want your finished tubes of fabric to be. I’ve seen many beautiful Celtic-style designs created with 1/4″ wide (finished) tubes, but I prefer to use 3/8″ wide (finished) tubes for a couple of reasons: (1) they are easier to handle, and (2) that little bit of extra width makes it easier to see the color and print of the fabric when you stand away from the design.
The next thing is to decide how wide you want to cut your fabric strips.
If you are very skilled at sewing with a perfectly consistent scant 1/8″ seam allowance, you can cut your strips 1″ wide.
If you are more comfortable sewing with a scant 1/4″ seam allowance, you can cut your strips 1 1/4″ wide.
If you want maximum fudge-room, you can cut your strips 1 1/2″ wide.
Cutting: Step 1
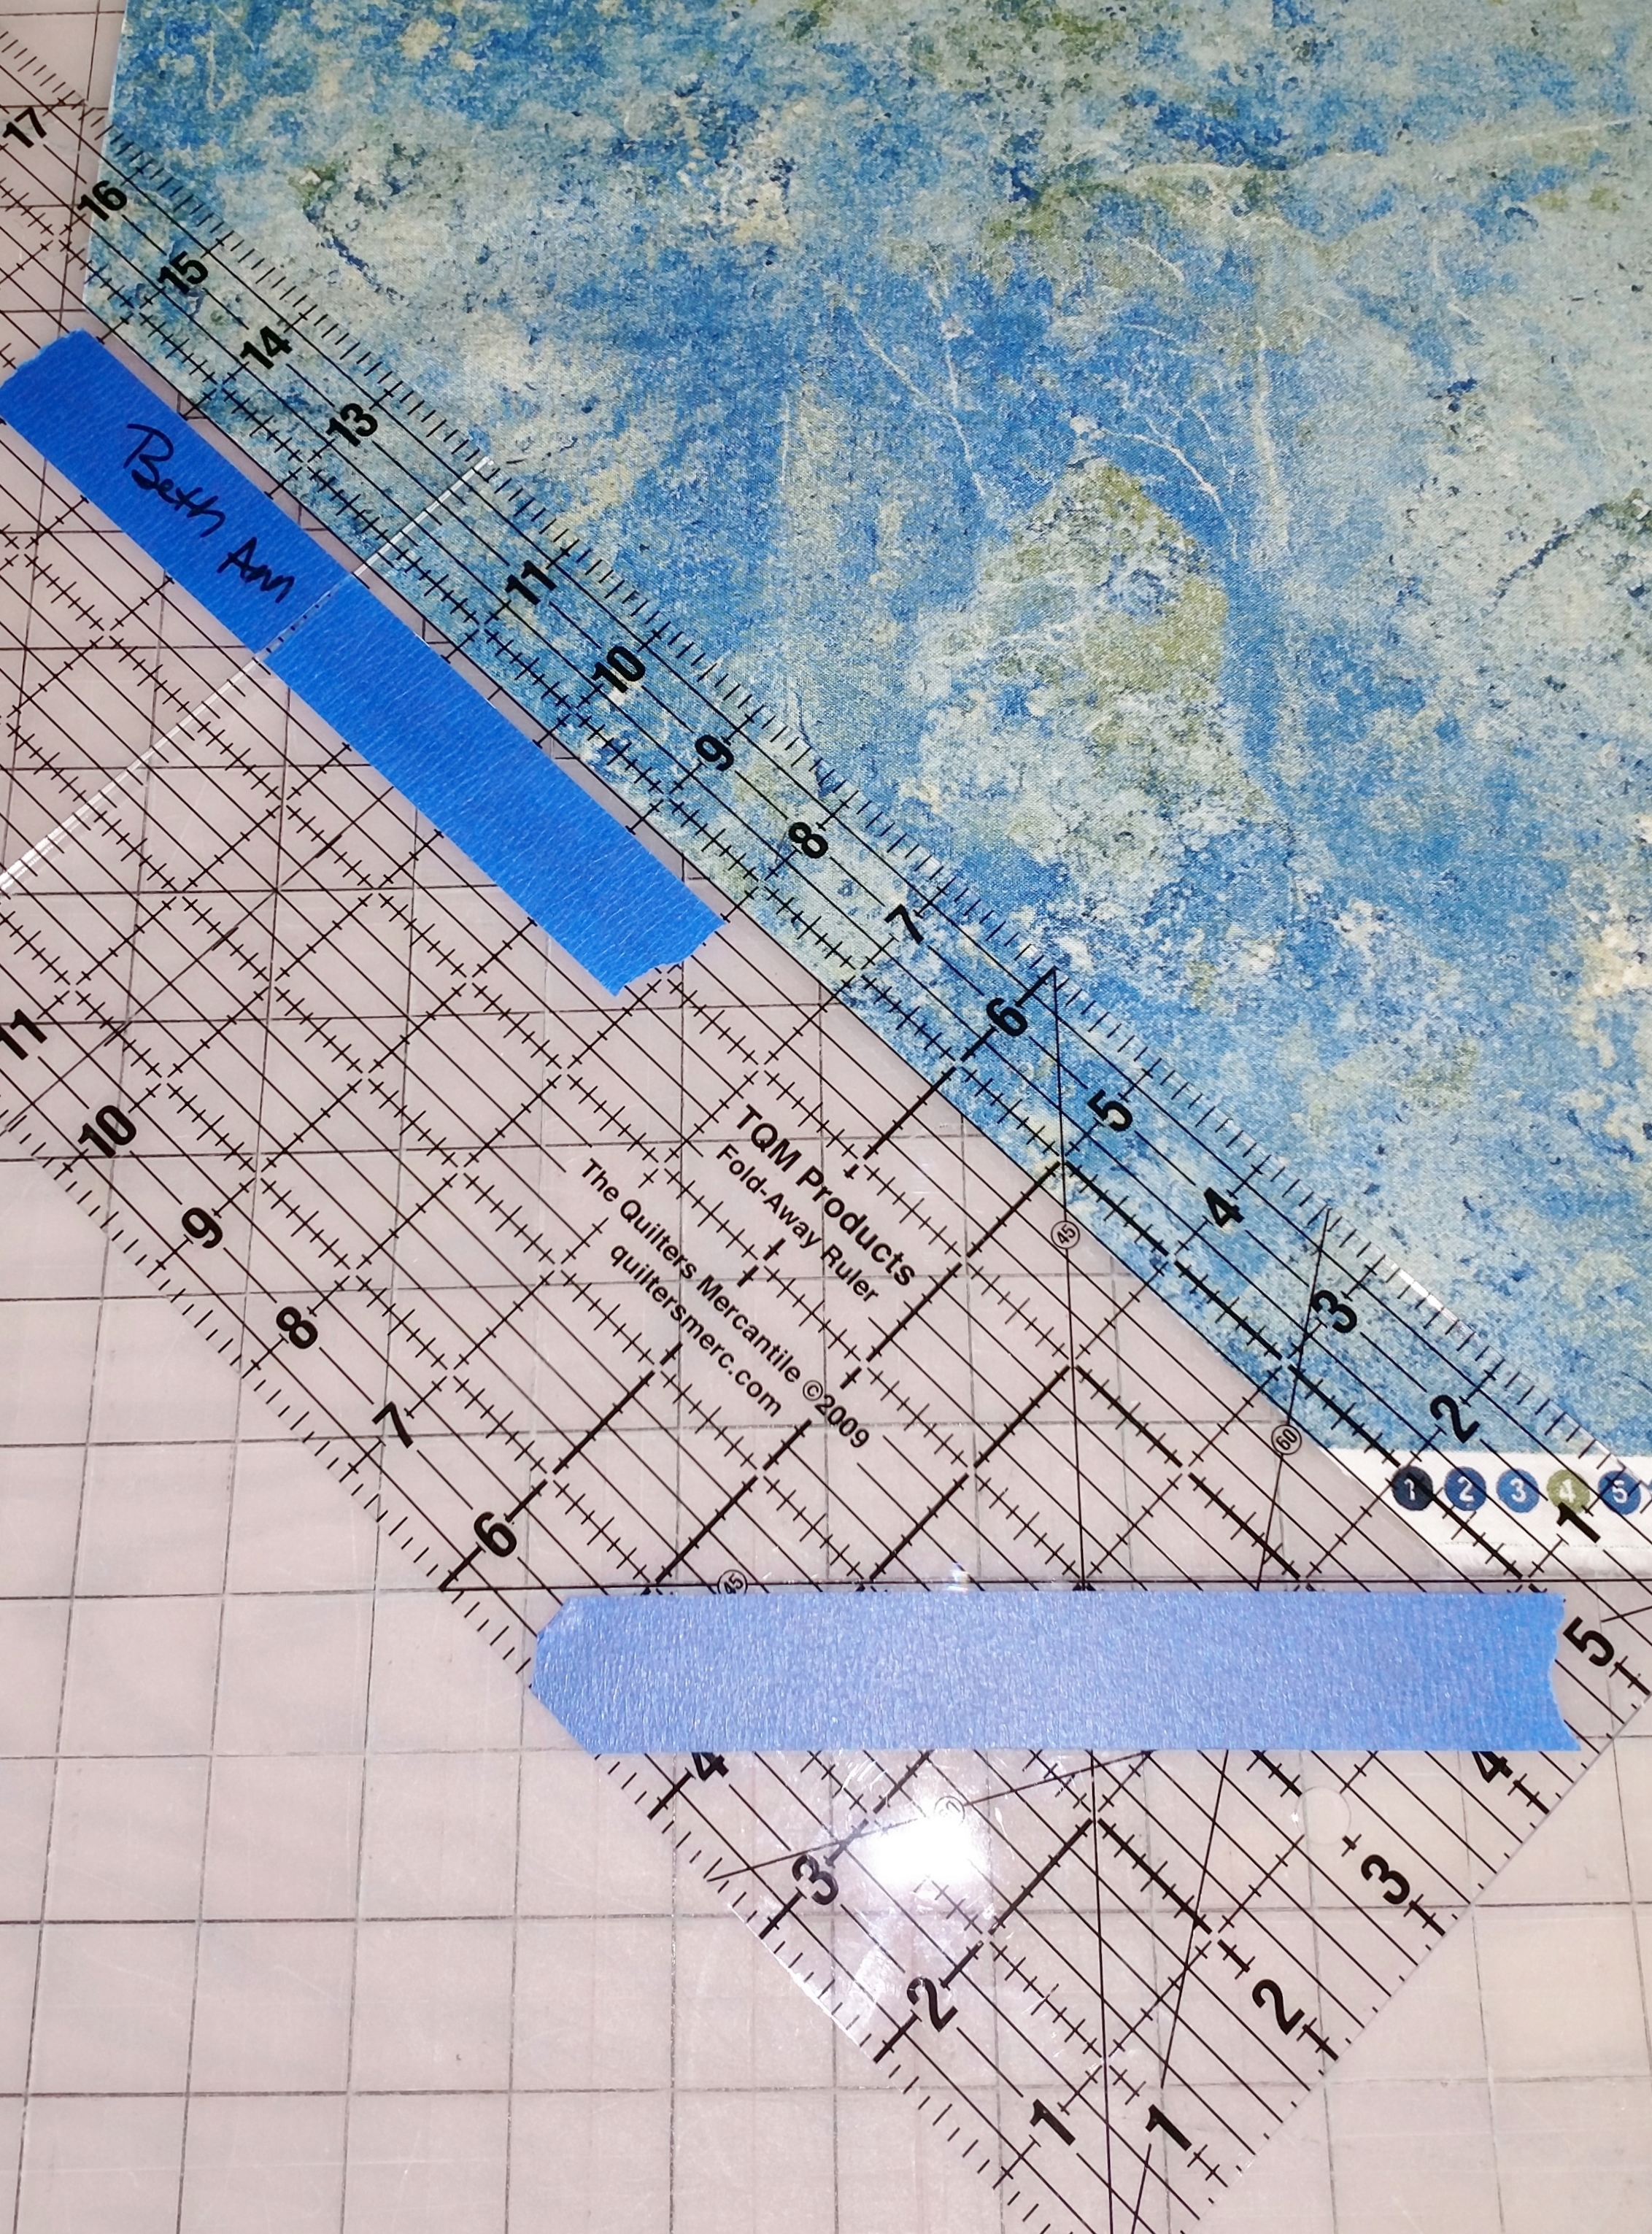
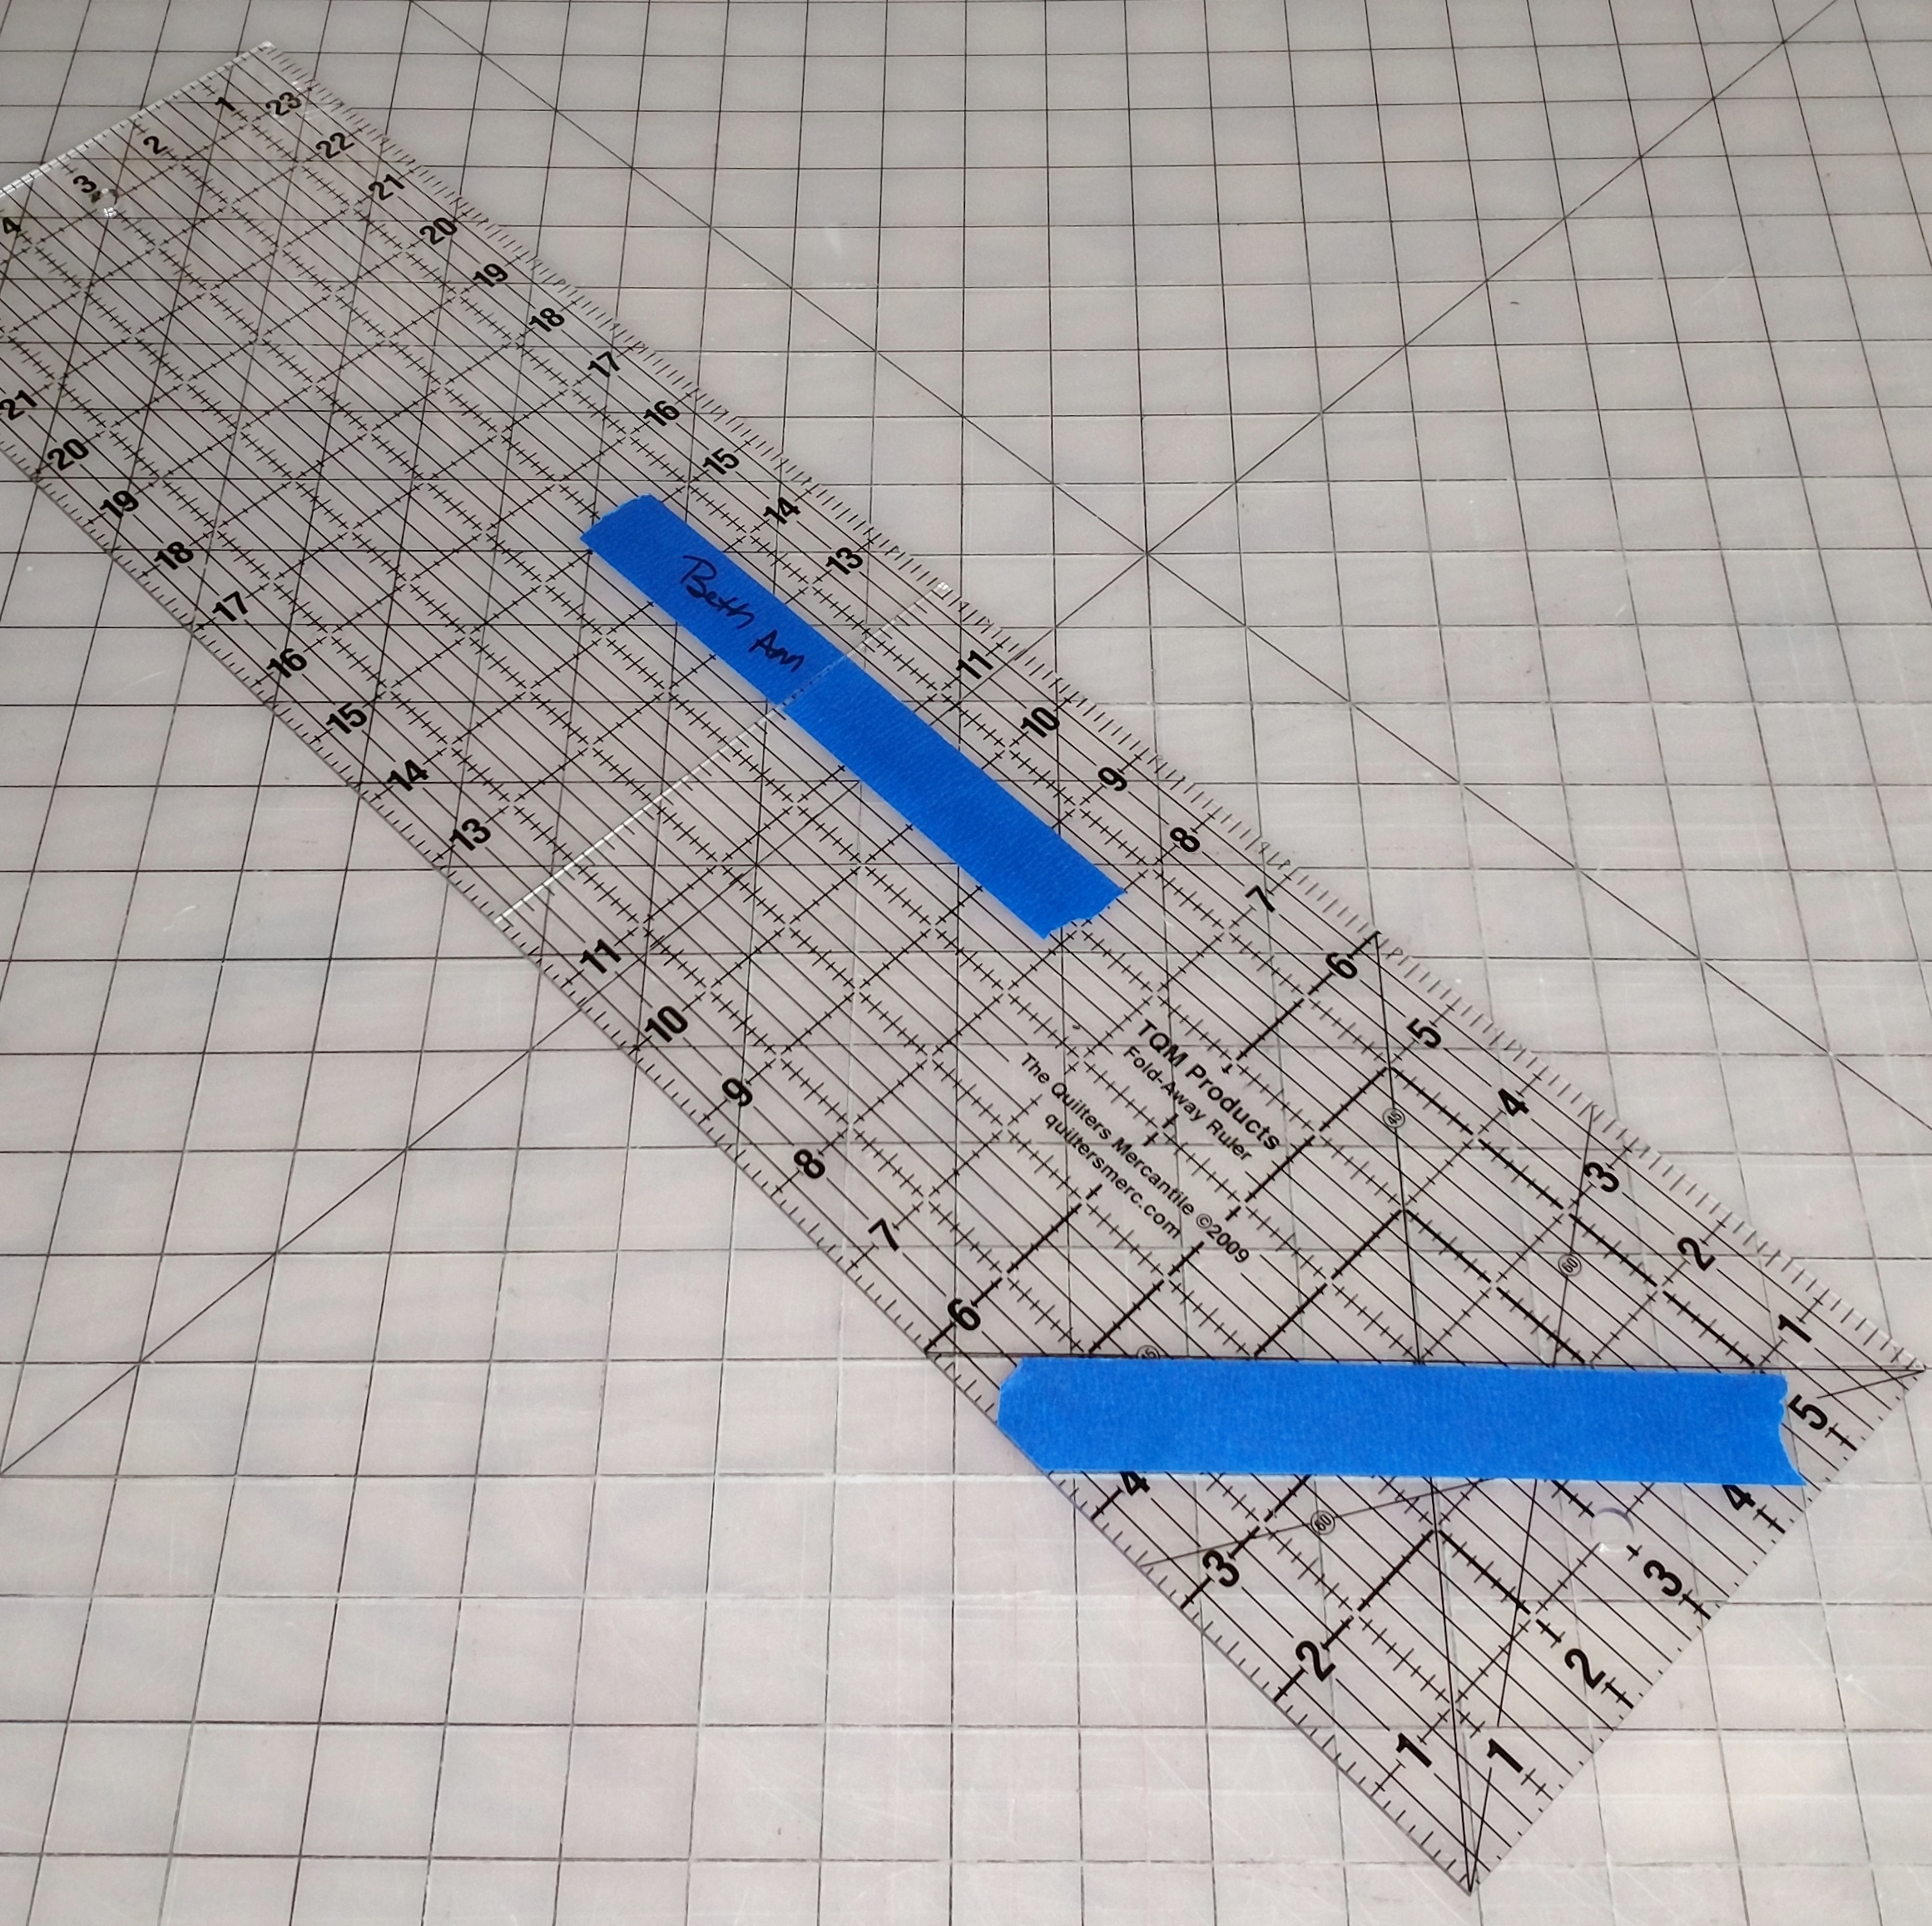
I find it very helpful to use painter’s tape to mark the relevant lines on my 6″ wide, 24″ long acrylic ruler. I use 1 piece of tape to highlight the 45 degree angle line, and 1 piece of tape to show the desired width of my cut strips.
Bias-cut strips are vital when creating Celtic appliqué – it’s the only way the tubes will have the flexibility needed to go smoothly around curves.
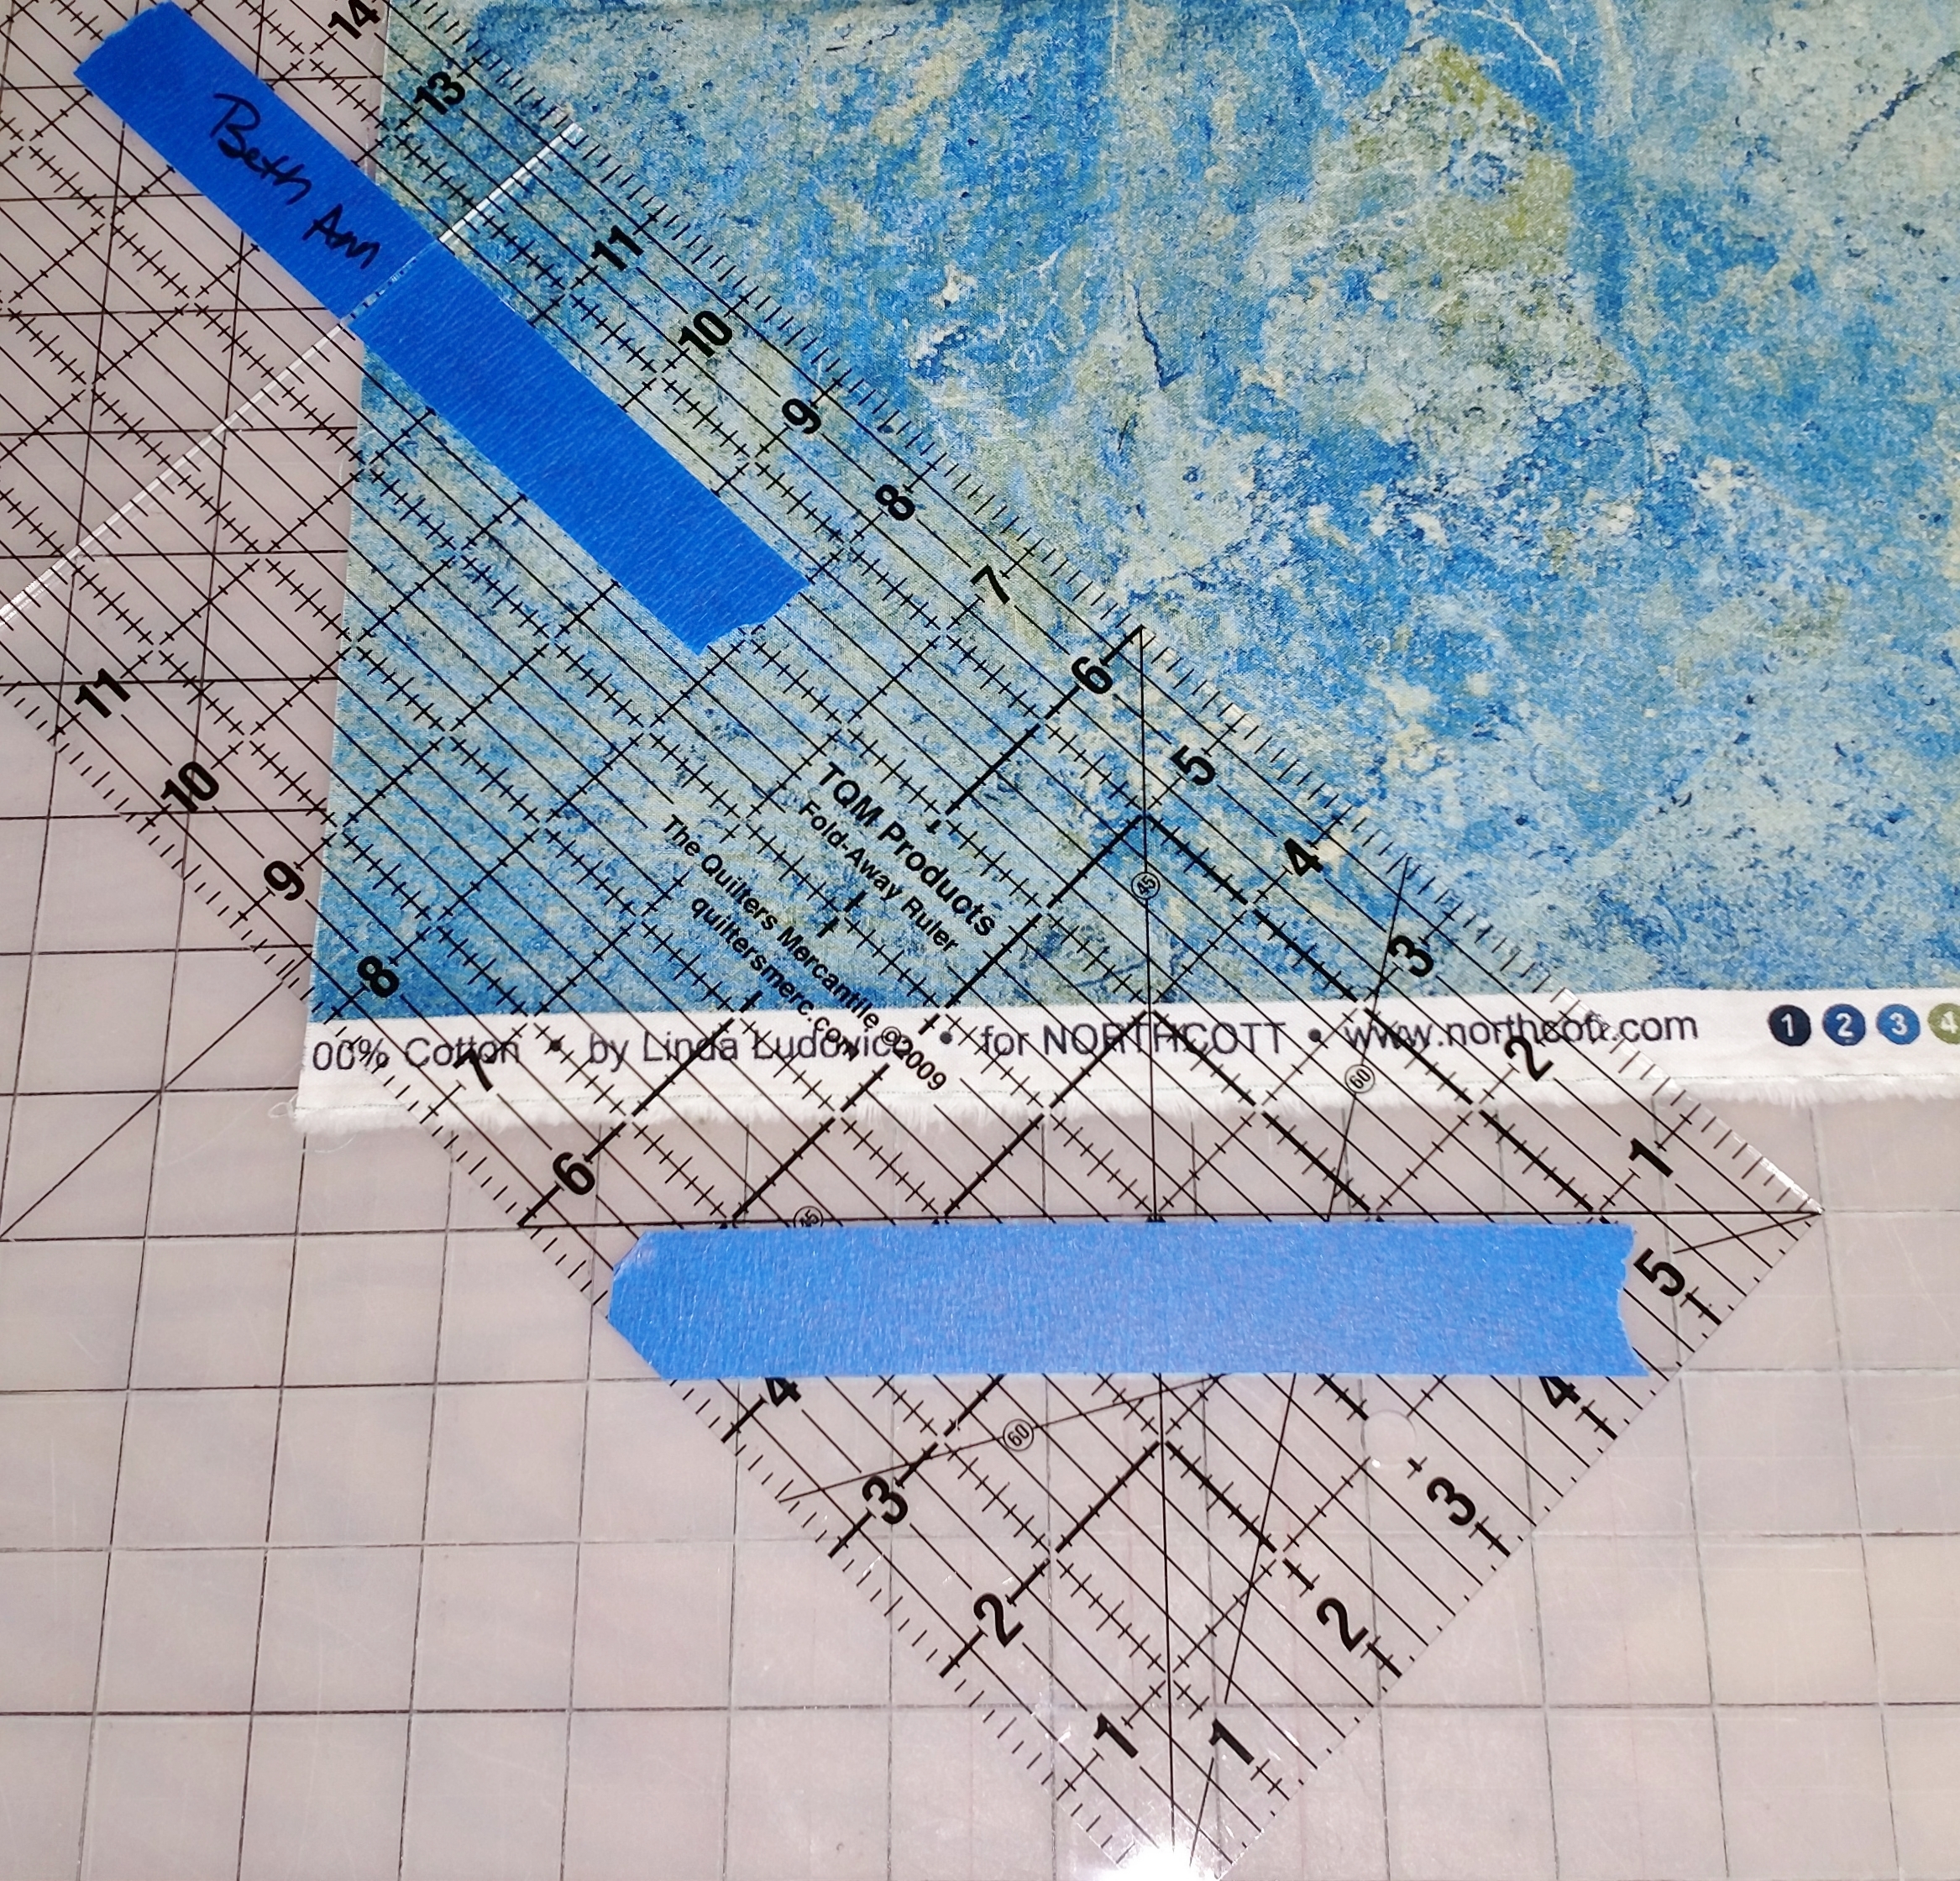
Step 2: Make sure your fabric is perfectly smooth – no wrinkles or creases. Lay the fabric on your cutting mat. I recommend working with fat quarters (18″ x 22″) or half-yards of fabric. Position the fabric so that the 18″ sides are along the top and bottom of the fabric.
Step 3: Count over at least 8″ from the left side edge* (I generally prefer about 10″). Position the lower edge of the ruler at that point, ruler angled so that you are cutting on the bias. (The 45 degree line should line up with one of the horizontal lines on your cutting mat.) This cut will create a “waste” triangle – any strips cut from this area will be too short to be really useful, so set it aside.
*If you are left-handed, you may find it makes more sense to work from the righthand edge.
Make sure your rotary cutter has a sharp blade (preferably new) – any nicks in the blade will leave pesky uncut threads along the cutting line.
Step 4: While maintaining that all-important 45 degree angle, move the ruler over to cut the first strip, lining up the edge of the strip with the desired width marked on the ruler.
Hint: Don’t plant your hand in the middle of the ruler while cutting – the ruler is likely to slip or pivot. Instead, I recommend “walking” your hand up the ruler parallel with your rotary cutter as you cut.
Step 5: Continue cutting strips until you have what you need. A good way to “guesstimate” this number is to lay the strips loosely on top of the design, overlapping the ends. Count how many strips it takes to cover the design. Add another strip or two for security.
Before you cut each strip, double-check to make sure you are still cutting at a perfect 45 degree angle!

The True Lover’s Knot we’ll be making usually takes 8-10 strips, depending on the width of the fabric. This includes extra practice strips for fine-tuning the appliqué stitch.
I hope you are finding these posts helpful, Stephanie! I’m sorry there was such a long break – I had to take some time off for medical and family reasons, and restarted the tutorial earlier this month. I wish you all the best!