Do you know what Matchstitck Quilting is? I didn’t until a few months ago when my friends Ruth and Michele told me about it. Yes, apparently I’ve been hiding under a rock… LOL
I had difficulty wrapping my brain around it at first; quilting lines only the width of a matchstick apart? Why on earth would you quilt so densely? But the more I thought about it, the more intrigued I became. So I did a little research and then let the idea simmer a while.
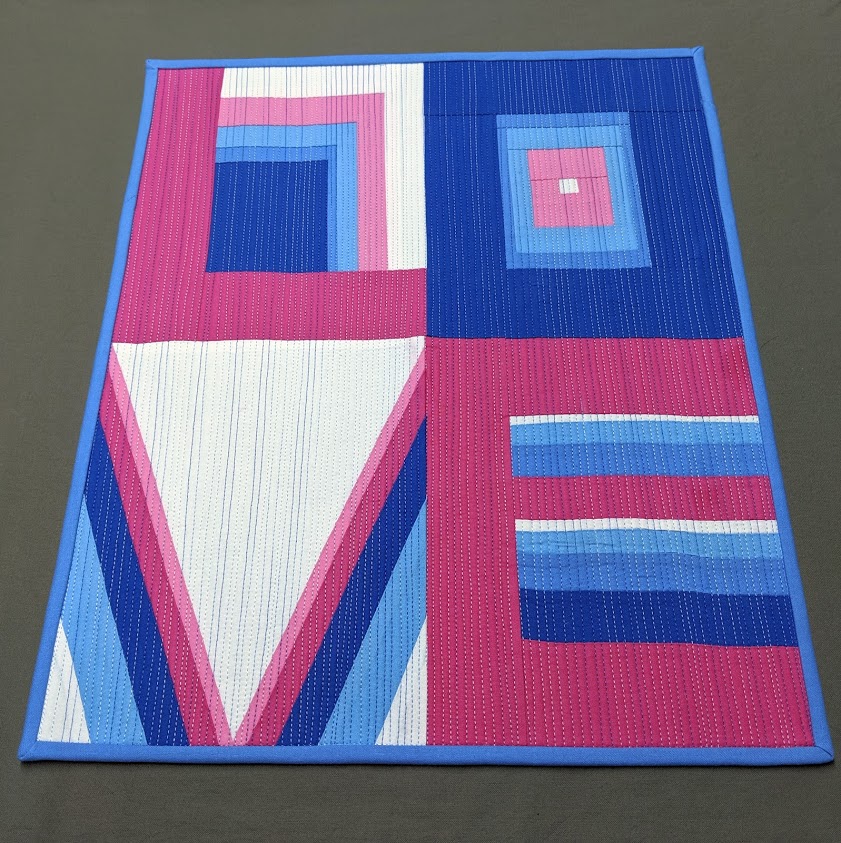
Meanwhile, my son Jack almost never asks me to make anything for him; so on the rare occasion that he does, I tend to drop everything else and make it. That was the case for this project. I fell in love with the Colorblock Love pattern by Sam Hunter of Hunter’s Design Studio when Mr. Domestic adapted it to make a Pride Pillow and featured it on his Instagram page to promote his fundraiser for the Trevor Project. When I told my family I was planning to make the rainbow version, Jack asked me why I didn’t make a Trans Pride wall hanging instead. So I did!
Although I usually love the extra patterning free-motion quilting brings to a quilt, I felt that it would be more distracting than complementary to the graphic nature of this quilt. Then I remembered Matchstick Quilting!
There are many different approaches to matchstick quilting. Here is what I did for this particular quilt:
- I selected Sew-In Thermolam for my batting instead of the cotton or cotton-blend batting that I usually choose, as I wanted to keep the surface nice and crisp instead of soft and crinkly. I would have used fusible Thermolam Plus, but I didn’t have any on hand.
- I used 505 Spray and Fix to hold my layers together.
- Although I usually reach for Rainbows or Fanstastico from Superior Threads when I want variegated thread, I opted for Sulky 40 wt. rayon embroidery thread this time, as the color shifts are farther apart – which was the look I wanted.
- I used 60 wt. Bottom Line poly thread from Superior Threads in my bobbin. (Depending on your machine, 60 wt. cotton might work better for you.)
- Because rayon thread is more prone to fraying and breakage, I used a Schmetz Embroidery Needle, size 75/11 instead of a quilting needle. The groove in the embroidery needle reduces friction on the thread, which reduces fraying and breakage. I had no issues with either 🙂
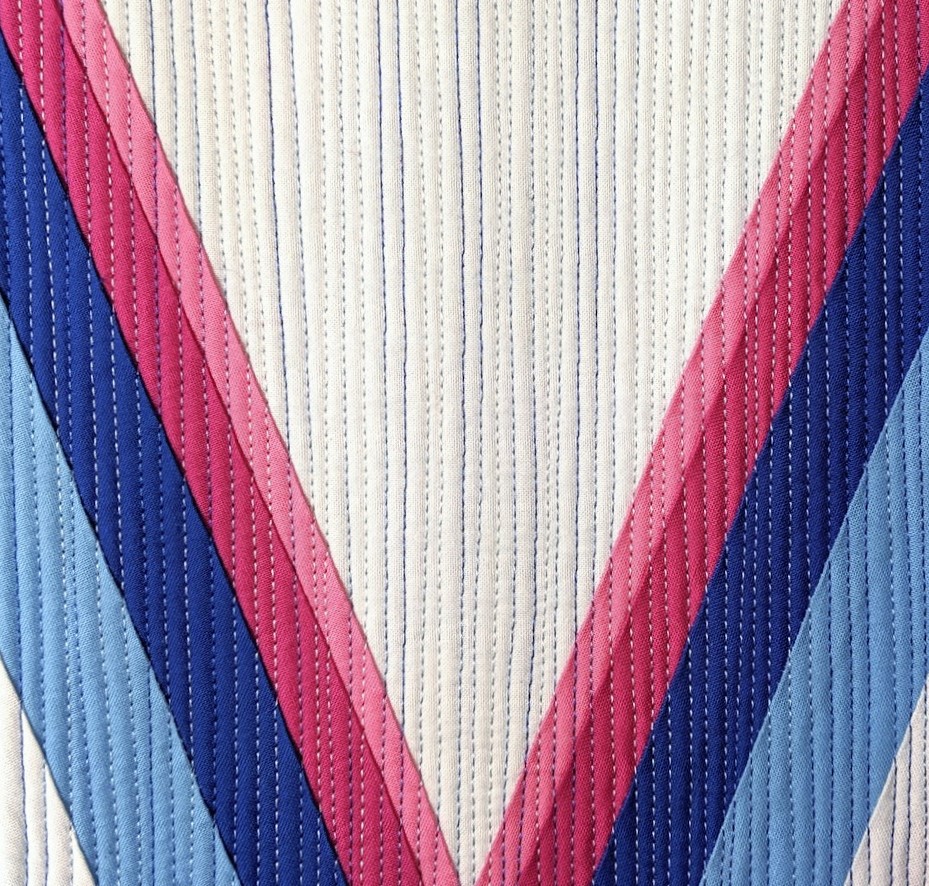
- I strongly recommend using a walking foot – although I didn’t here, as mine needs to be replaced. Because of this, I had some minor issues with fabric distortion or drag, especially on the white and blue stripes inside the E.
The articles I found recommended starting by marking and quilting evenly spaced lines across the quilt to use as guide lines, and then quilting in between those lines, and then between those lines, etc., dividing up the spaces until the lines are only a matchstitck’s width apart. But even with marking, almost everyone remarked that it was impossible (short of ruler work) to keep the lines perfectly straight.
Since I chose to make a small wallhanging instead of a throw, I opted to start (without marking) in the middle and then work my way to first one side and then to the other, eyeballing the distances between the lines. I tried to keep my lines straight and even, but decided to embrace the imperfections of wobbliness as it happened.
I’m planning a post comparing binding methods, so I’ll save that discussion for later… 😉