2025 UPDATE: My Celtic patterns can now be found in my online shop.
This is the second of a series of posts that will take you step-by-step through the process of creating a Celtic Quilt.
One of the first things you need to do is finalize your design choice and fine-tune it, if necessary. If you are using an original design or using a design from a source other than my book, you need to be sure it will be easily adaptable for sewing.
Here are the elements common to historic Celtic knotwork and interlace – rules that I follow when developing my own original Celtic-style patterns as well as when adapting ancient designs.
- All lines are continuous, having neither beginning nor end.
- All lines cross each other in an alternating under-over-under pattern.
- No more than two lines cross at any given point.
When it comes to creating or adapting Celtic-style design for appliqué, I add a few more considerations:
- The lines creating the designs measure no more than 1/4″ wide.
- The lines are spaced sufficiently far apart that when covered with 3/8″ wide bias-cut tubes, the design still looks clean.
- Curves are gentle enough that they can be sewn without having the fabric bunch or buckle.
- Points are not so sharp or skinny that the fabric becomes too bulky.
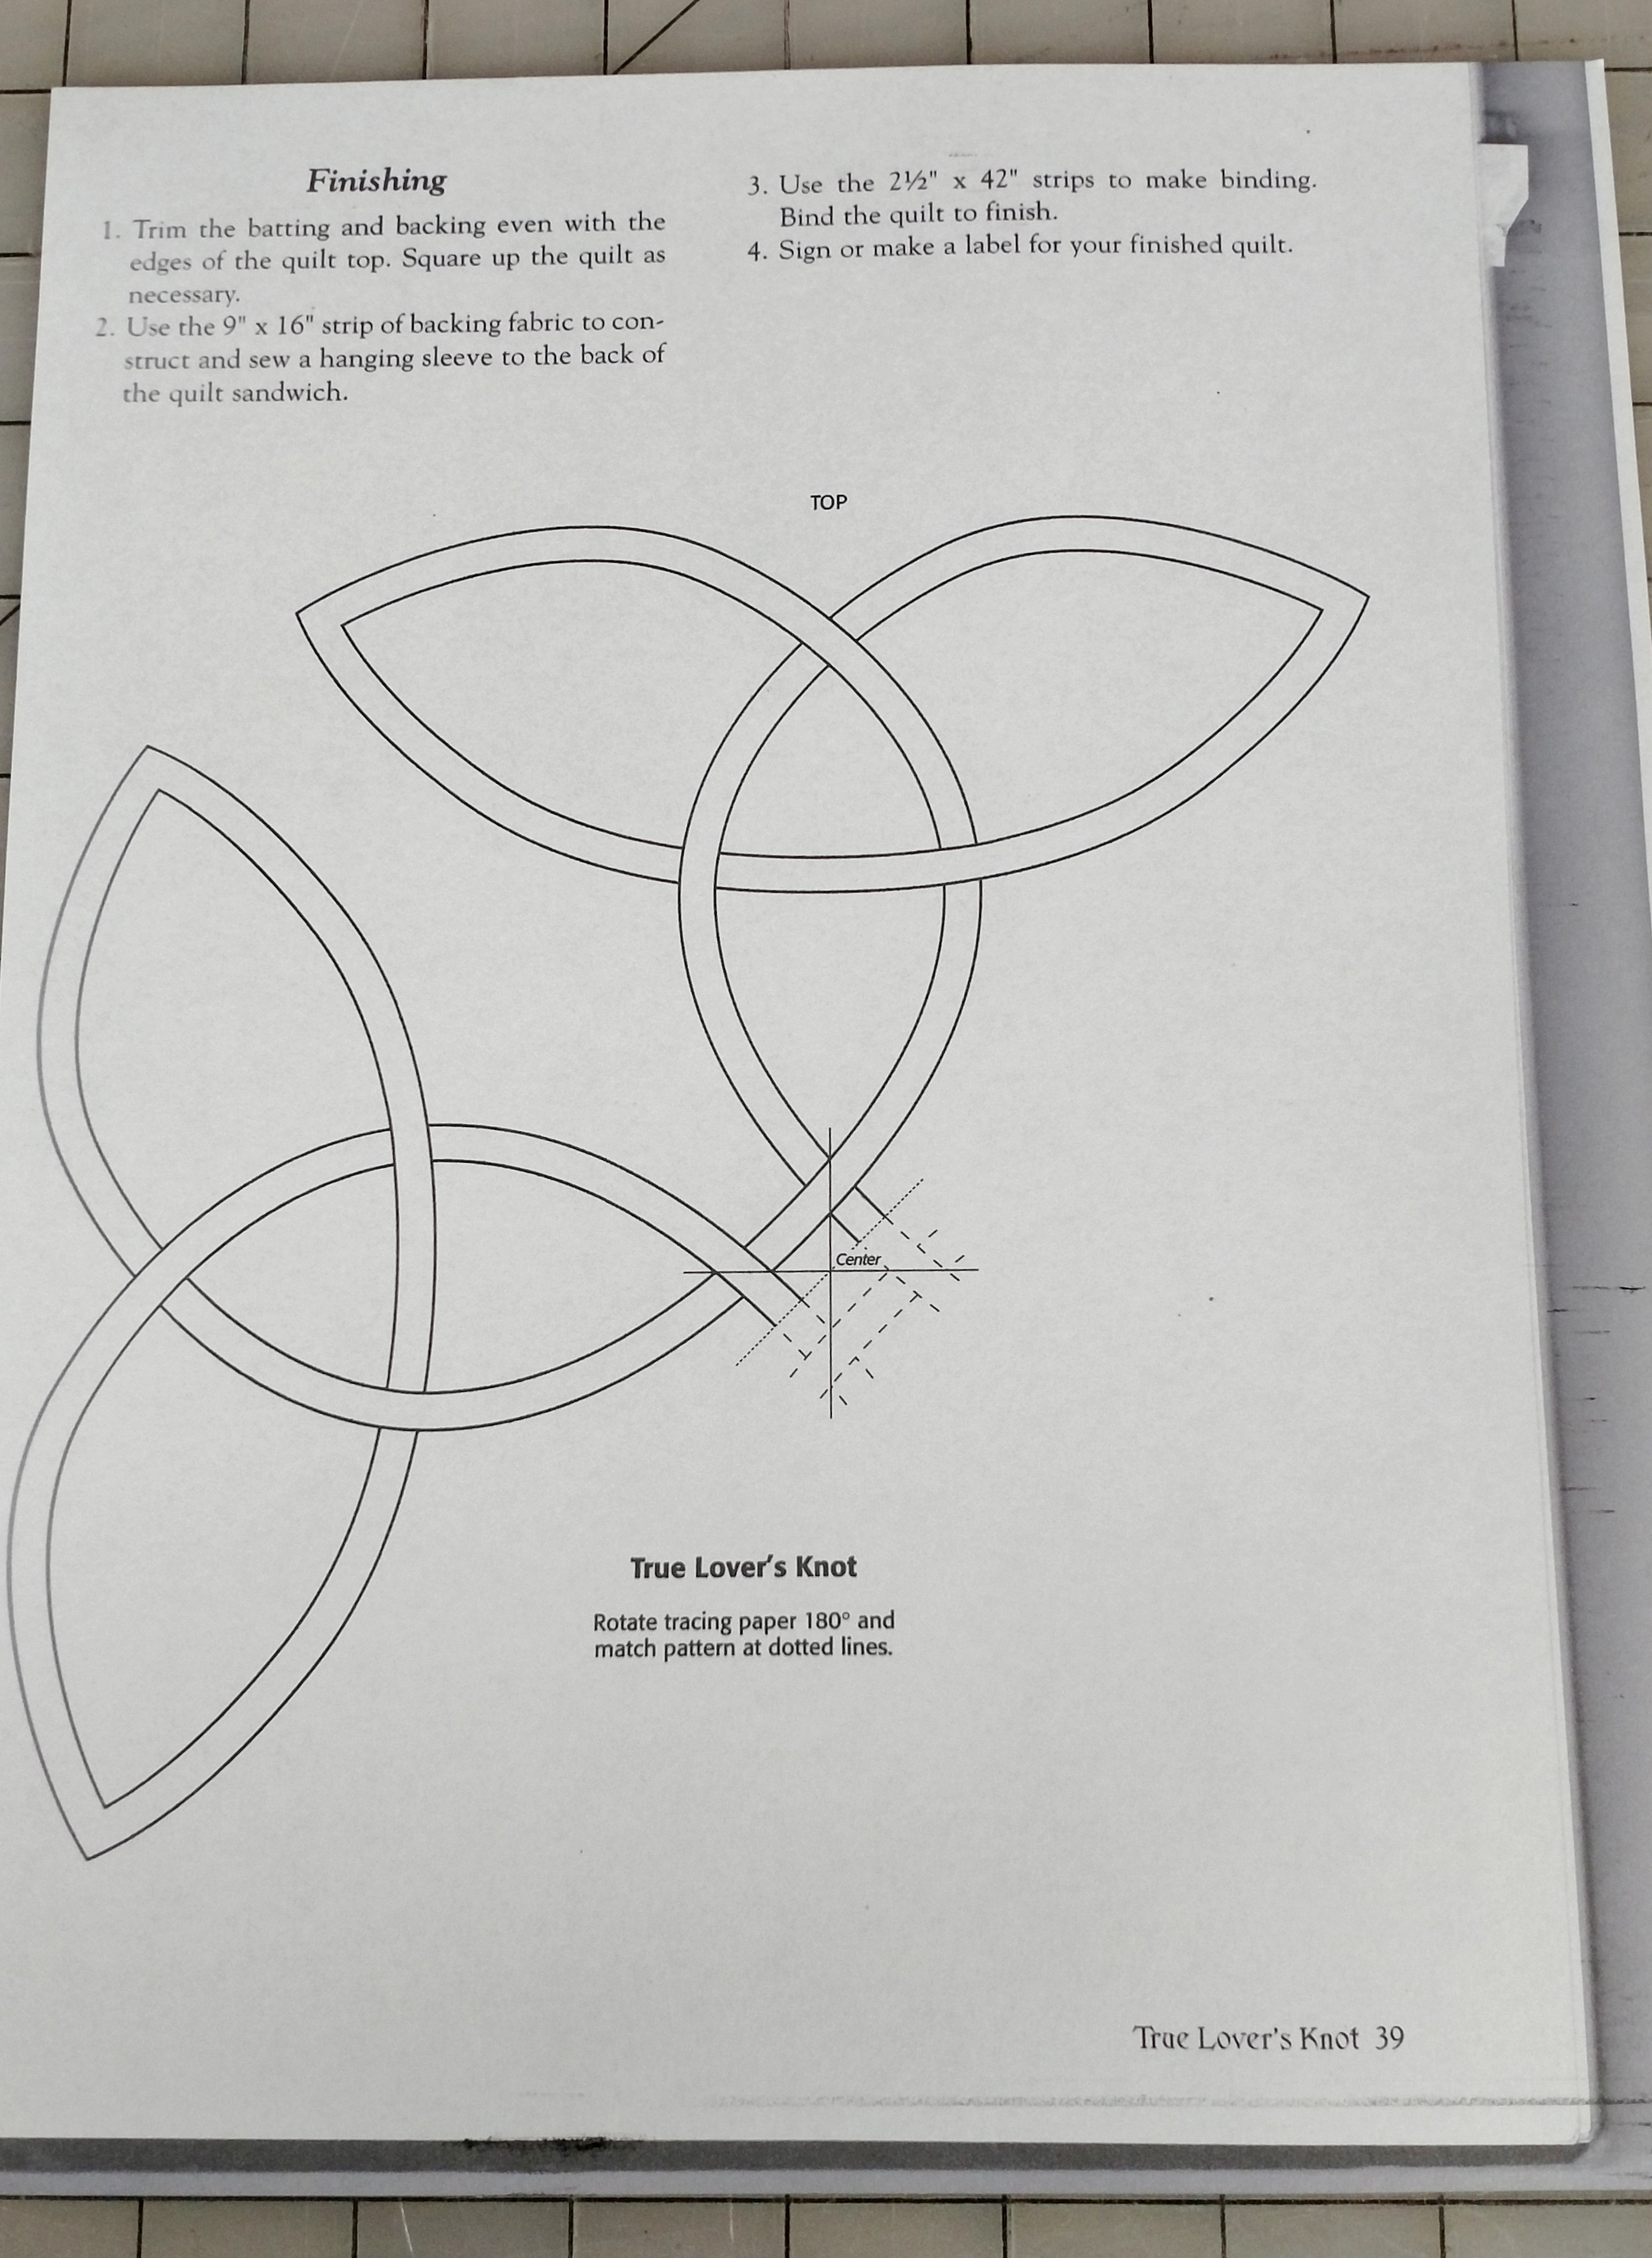
If you are using a design such as the True Lover’s Knot from my book Celtic Quilts: A New Look for Ancient Designs, all these considerations have already been met.
How do you get the pattern from the book or sketchbook to the background fabric?
Here is my favorite method:
- Trace the design onto a sheet of paper (so you don’t have to worry about whatever is printed on the backside obscuring the image or showing through).
OR
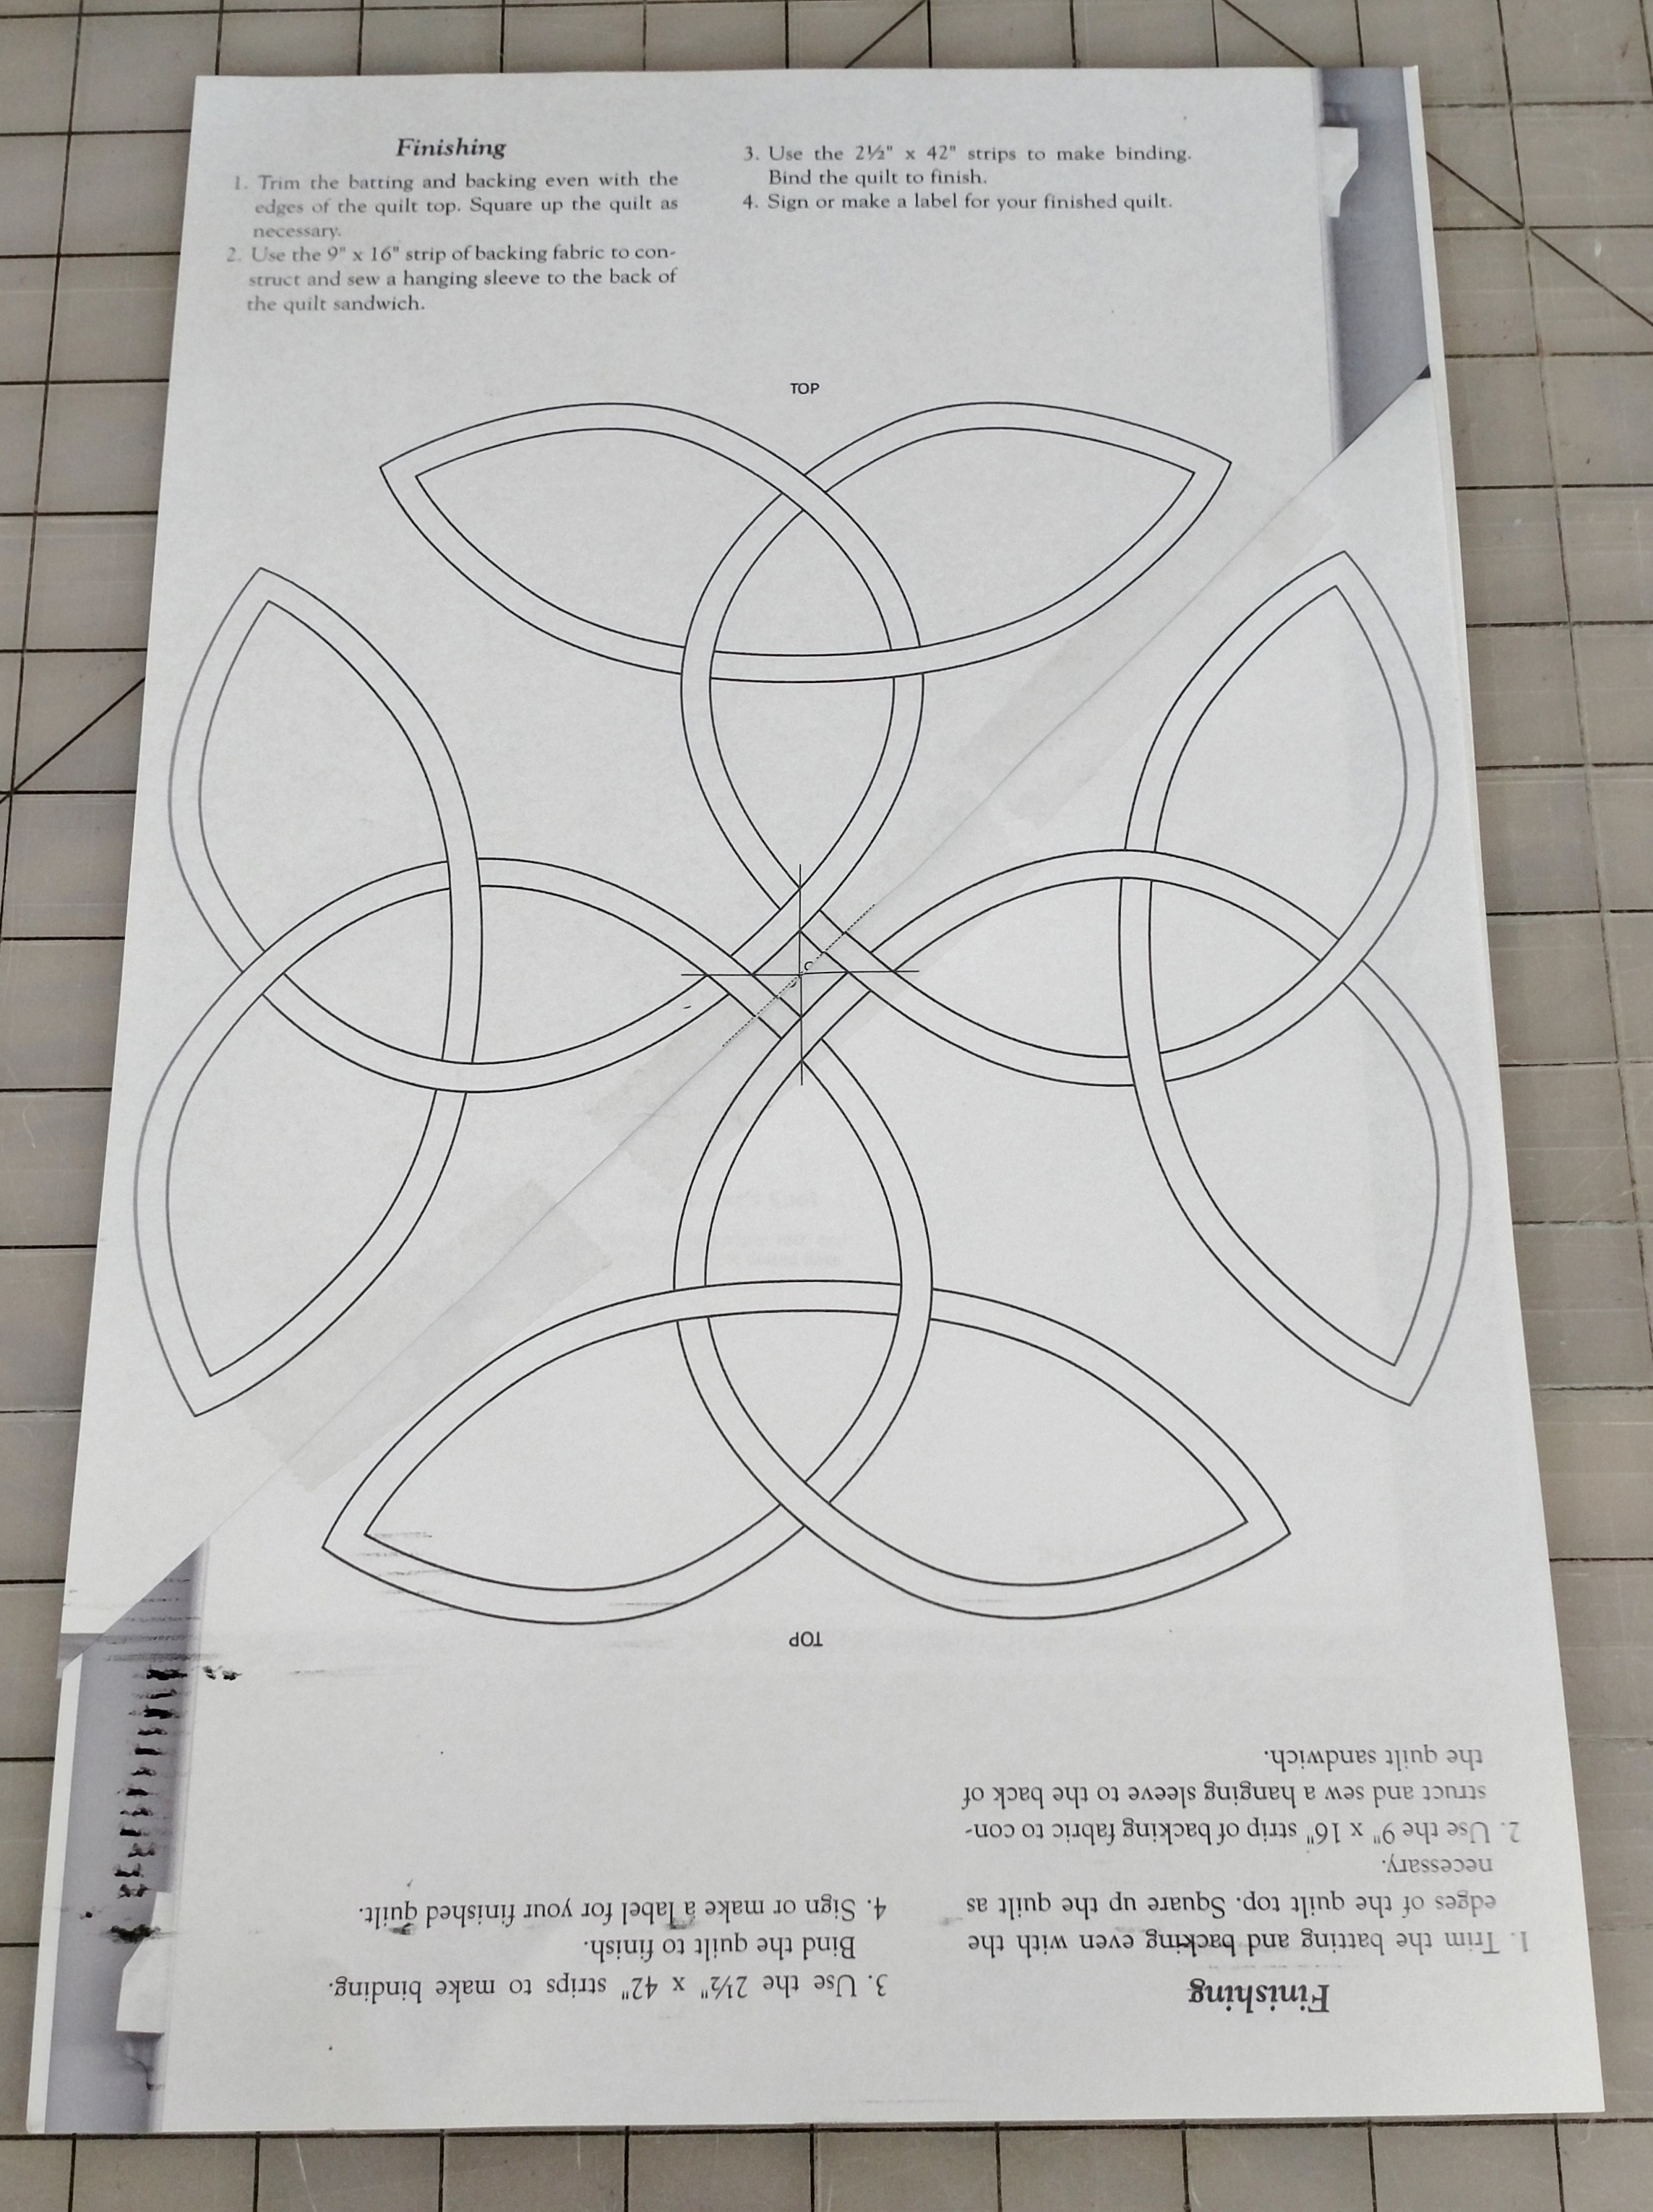
- For the True Lover’s Knot in my book, make two copies of the pattern printed on p. 39. Tape the two copies together as shown, cutting away the excess paper.
Over the years, I’ve tried various methods for tracing the design onto my fabric, including taping my pattern to a sunny window or to a sheet of glass propped up on shoebox-sized containers with a portable flourescent light underneath; but my favorite method is to use a light box.
Note: Light boxes have come a long way – they are thinner, lighter, brighter, and easier to use than ever!
Here are my current top recommendations:
For a working surface a little more than 9″ x 12″:
For a working surface just under 13″ x 17″:
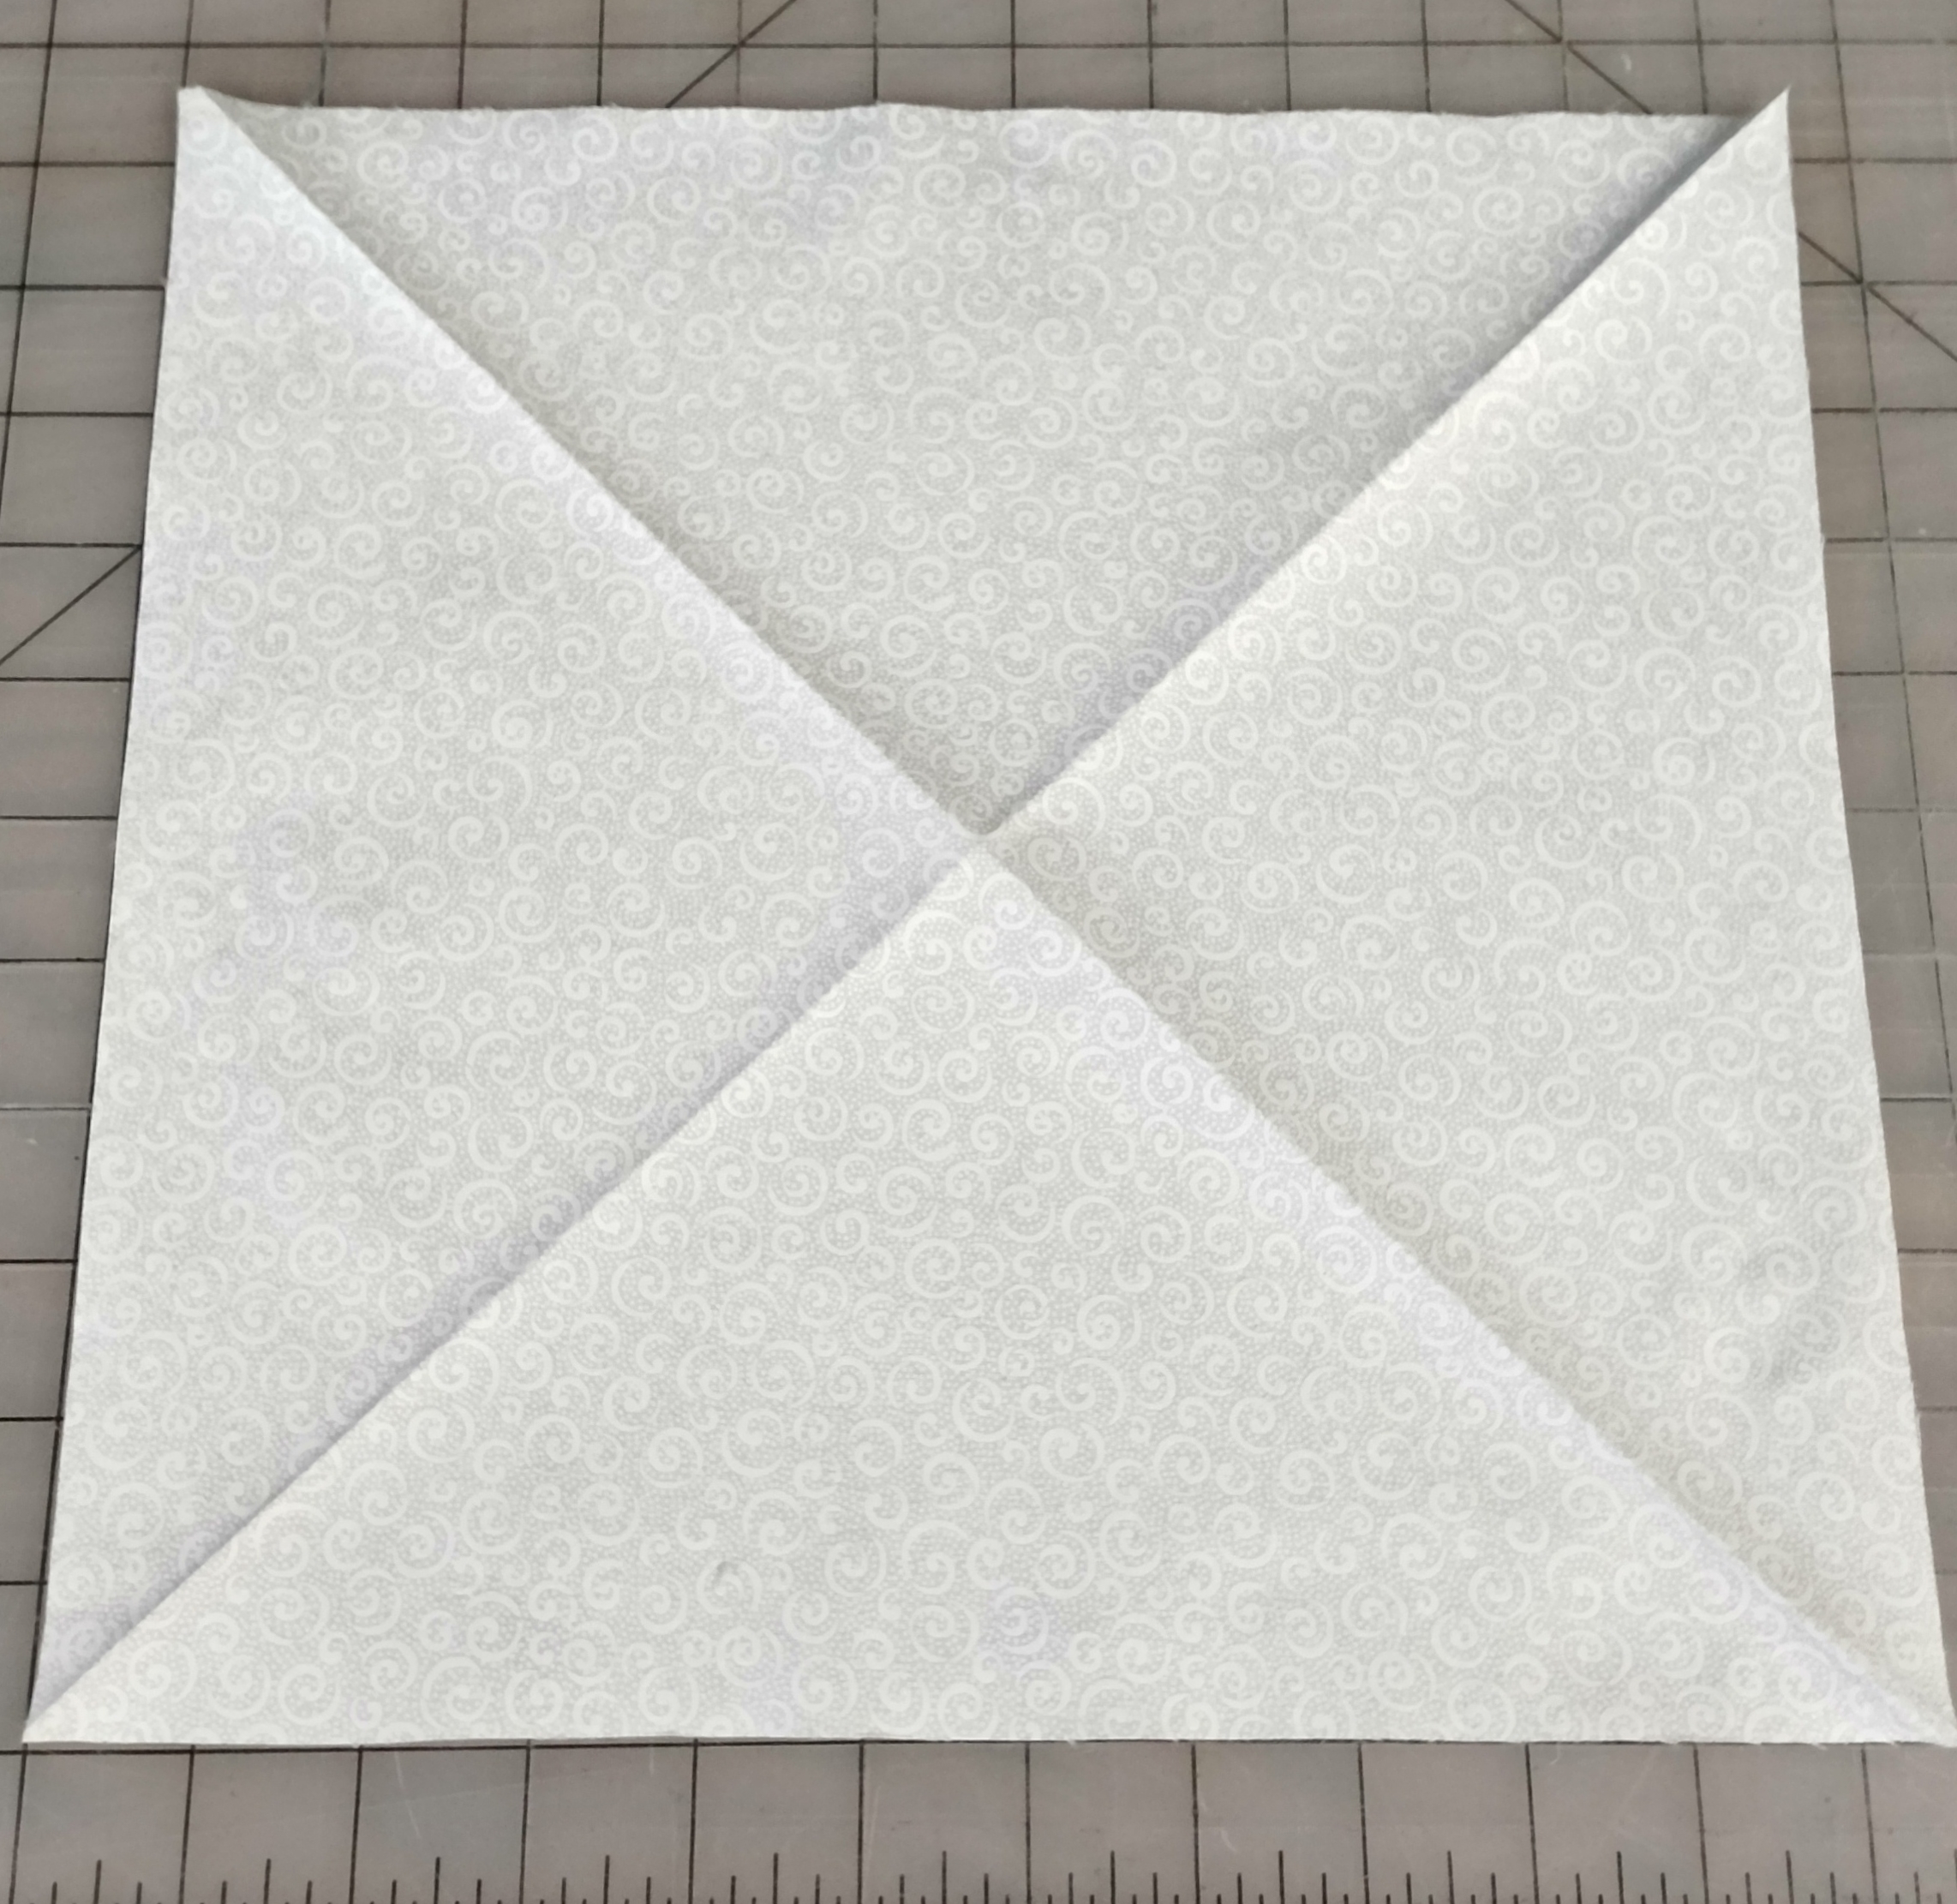
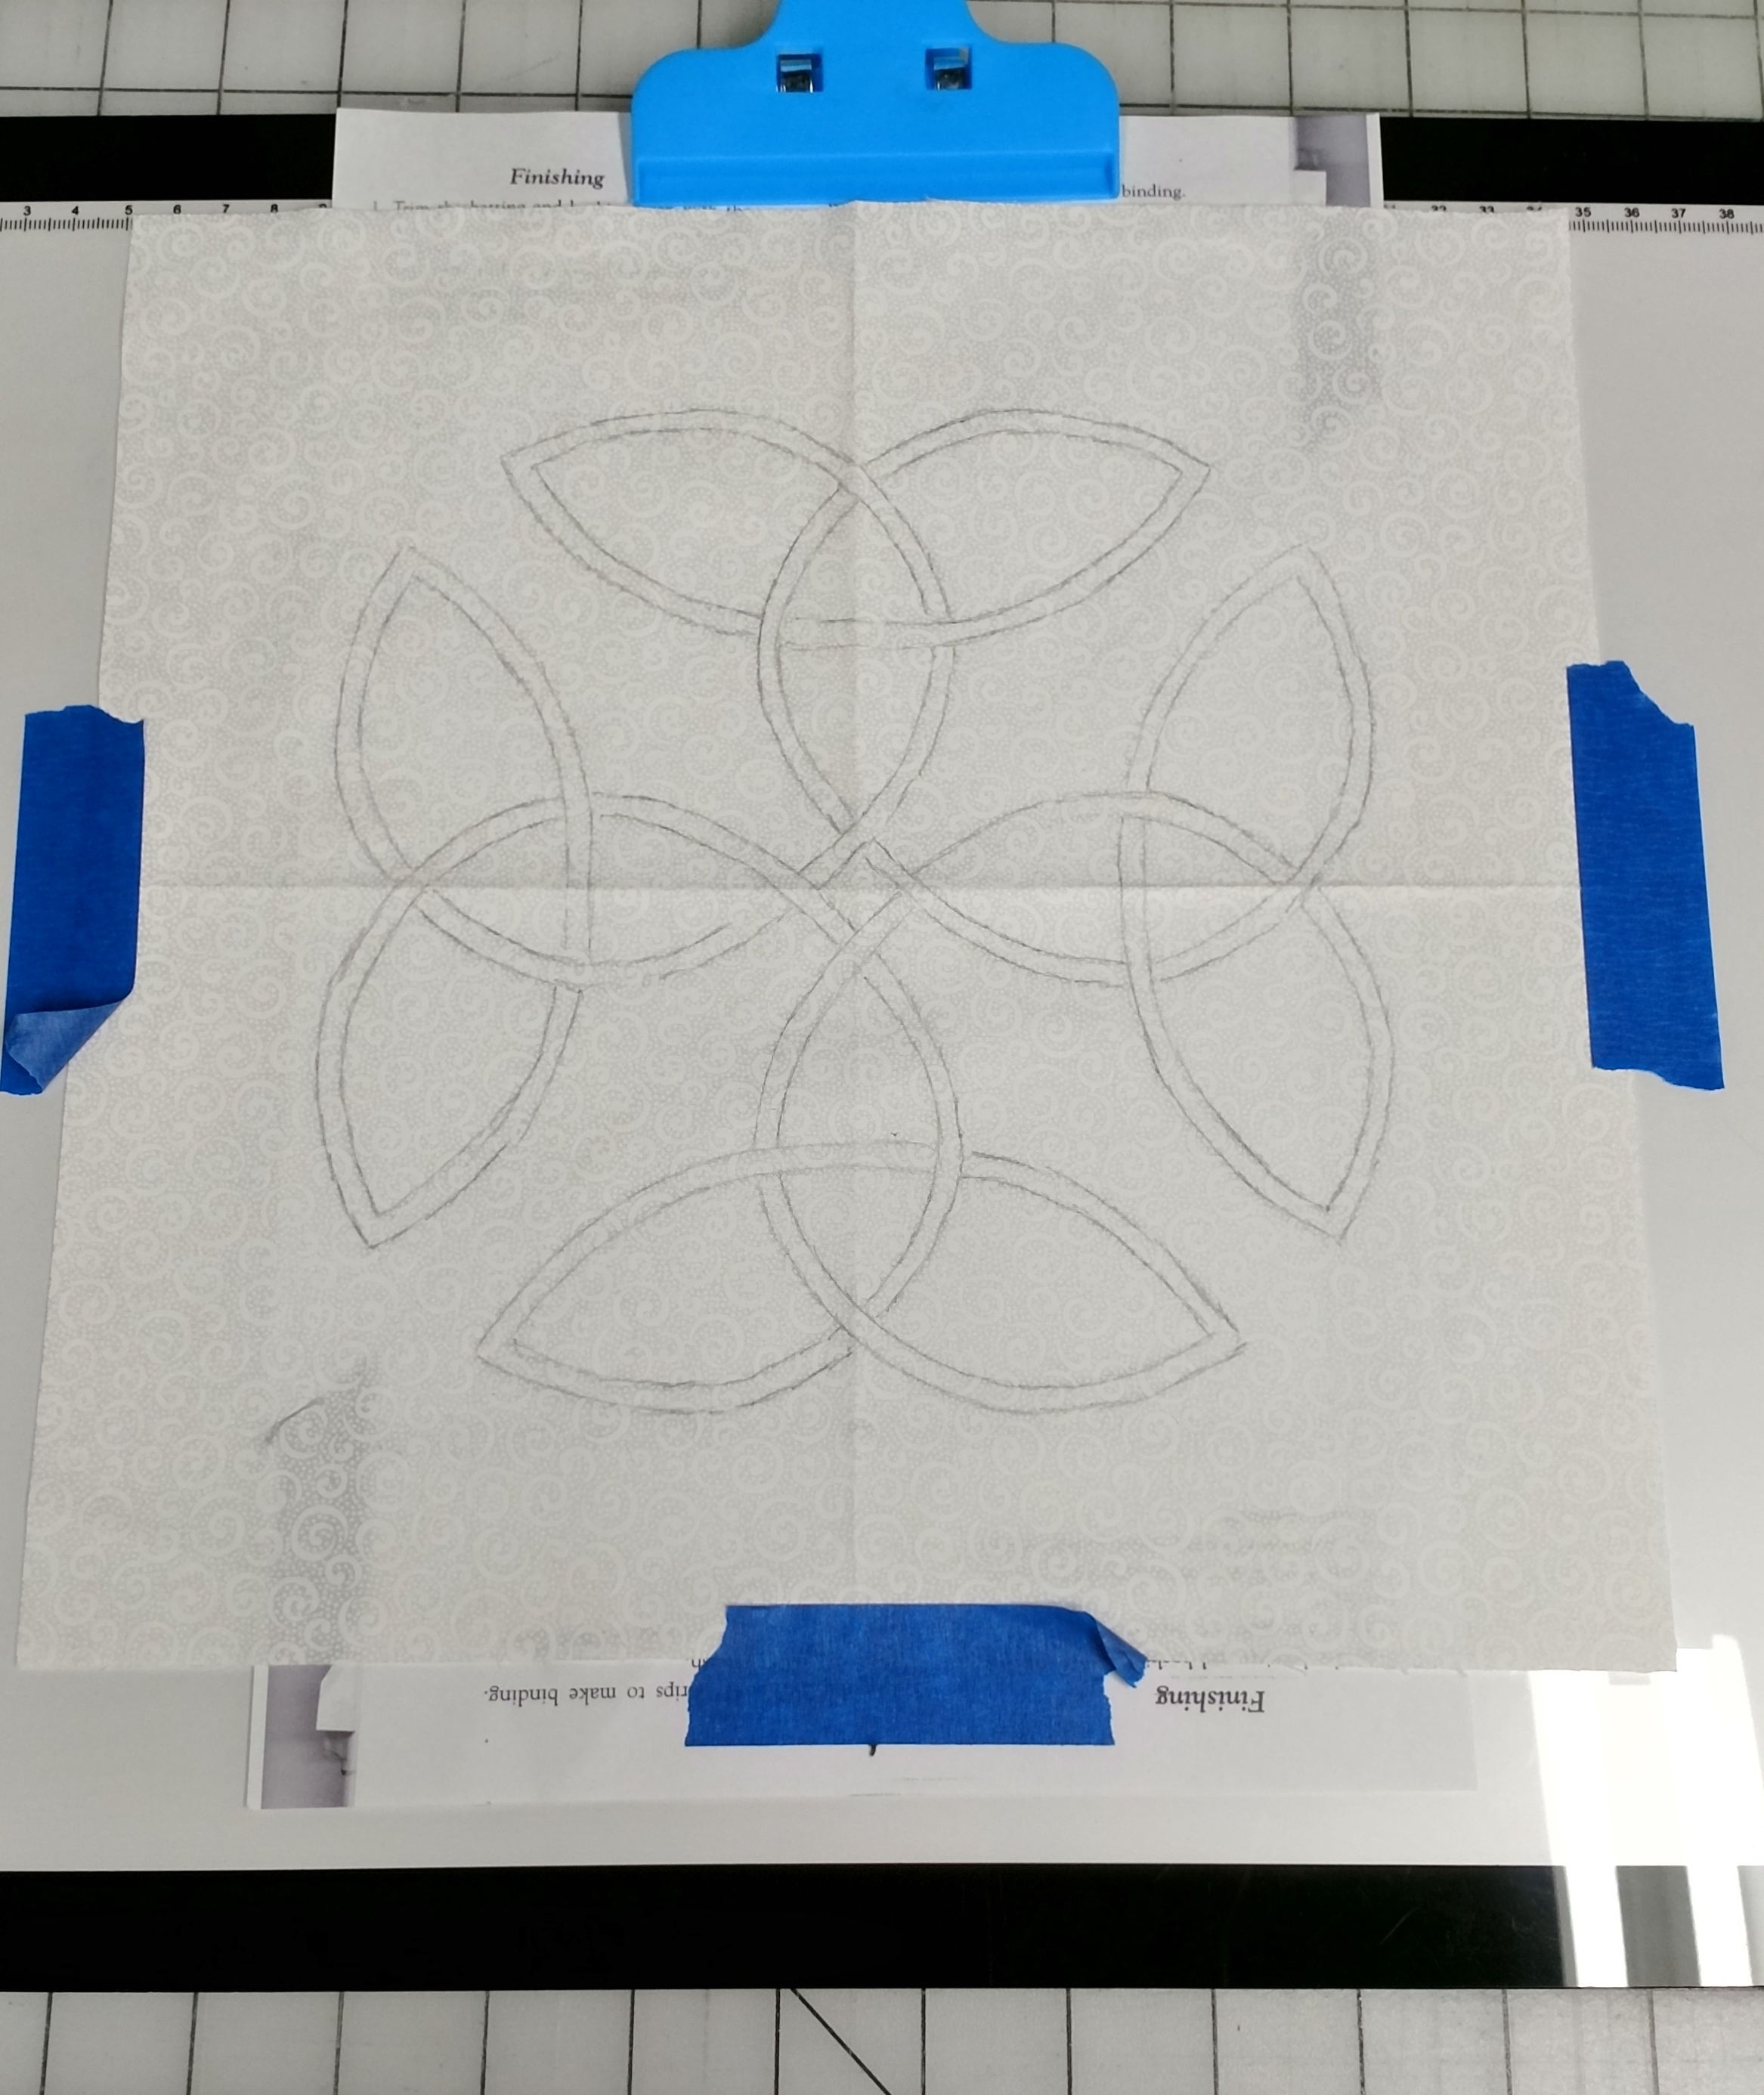
- Depending on the orientation of your design, fold and press your fabric with a hot iron to divide the fabric into equal quadrants. Don’t use steam or Best Press for this – you want these folds to be clearly visible, but not permanent!

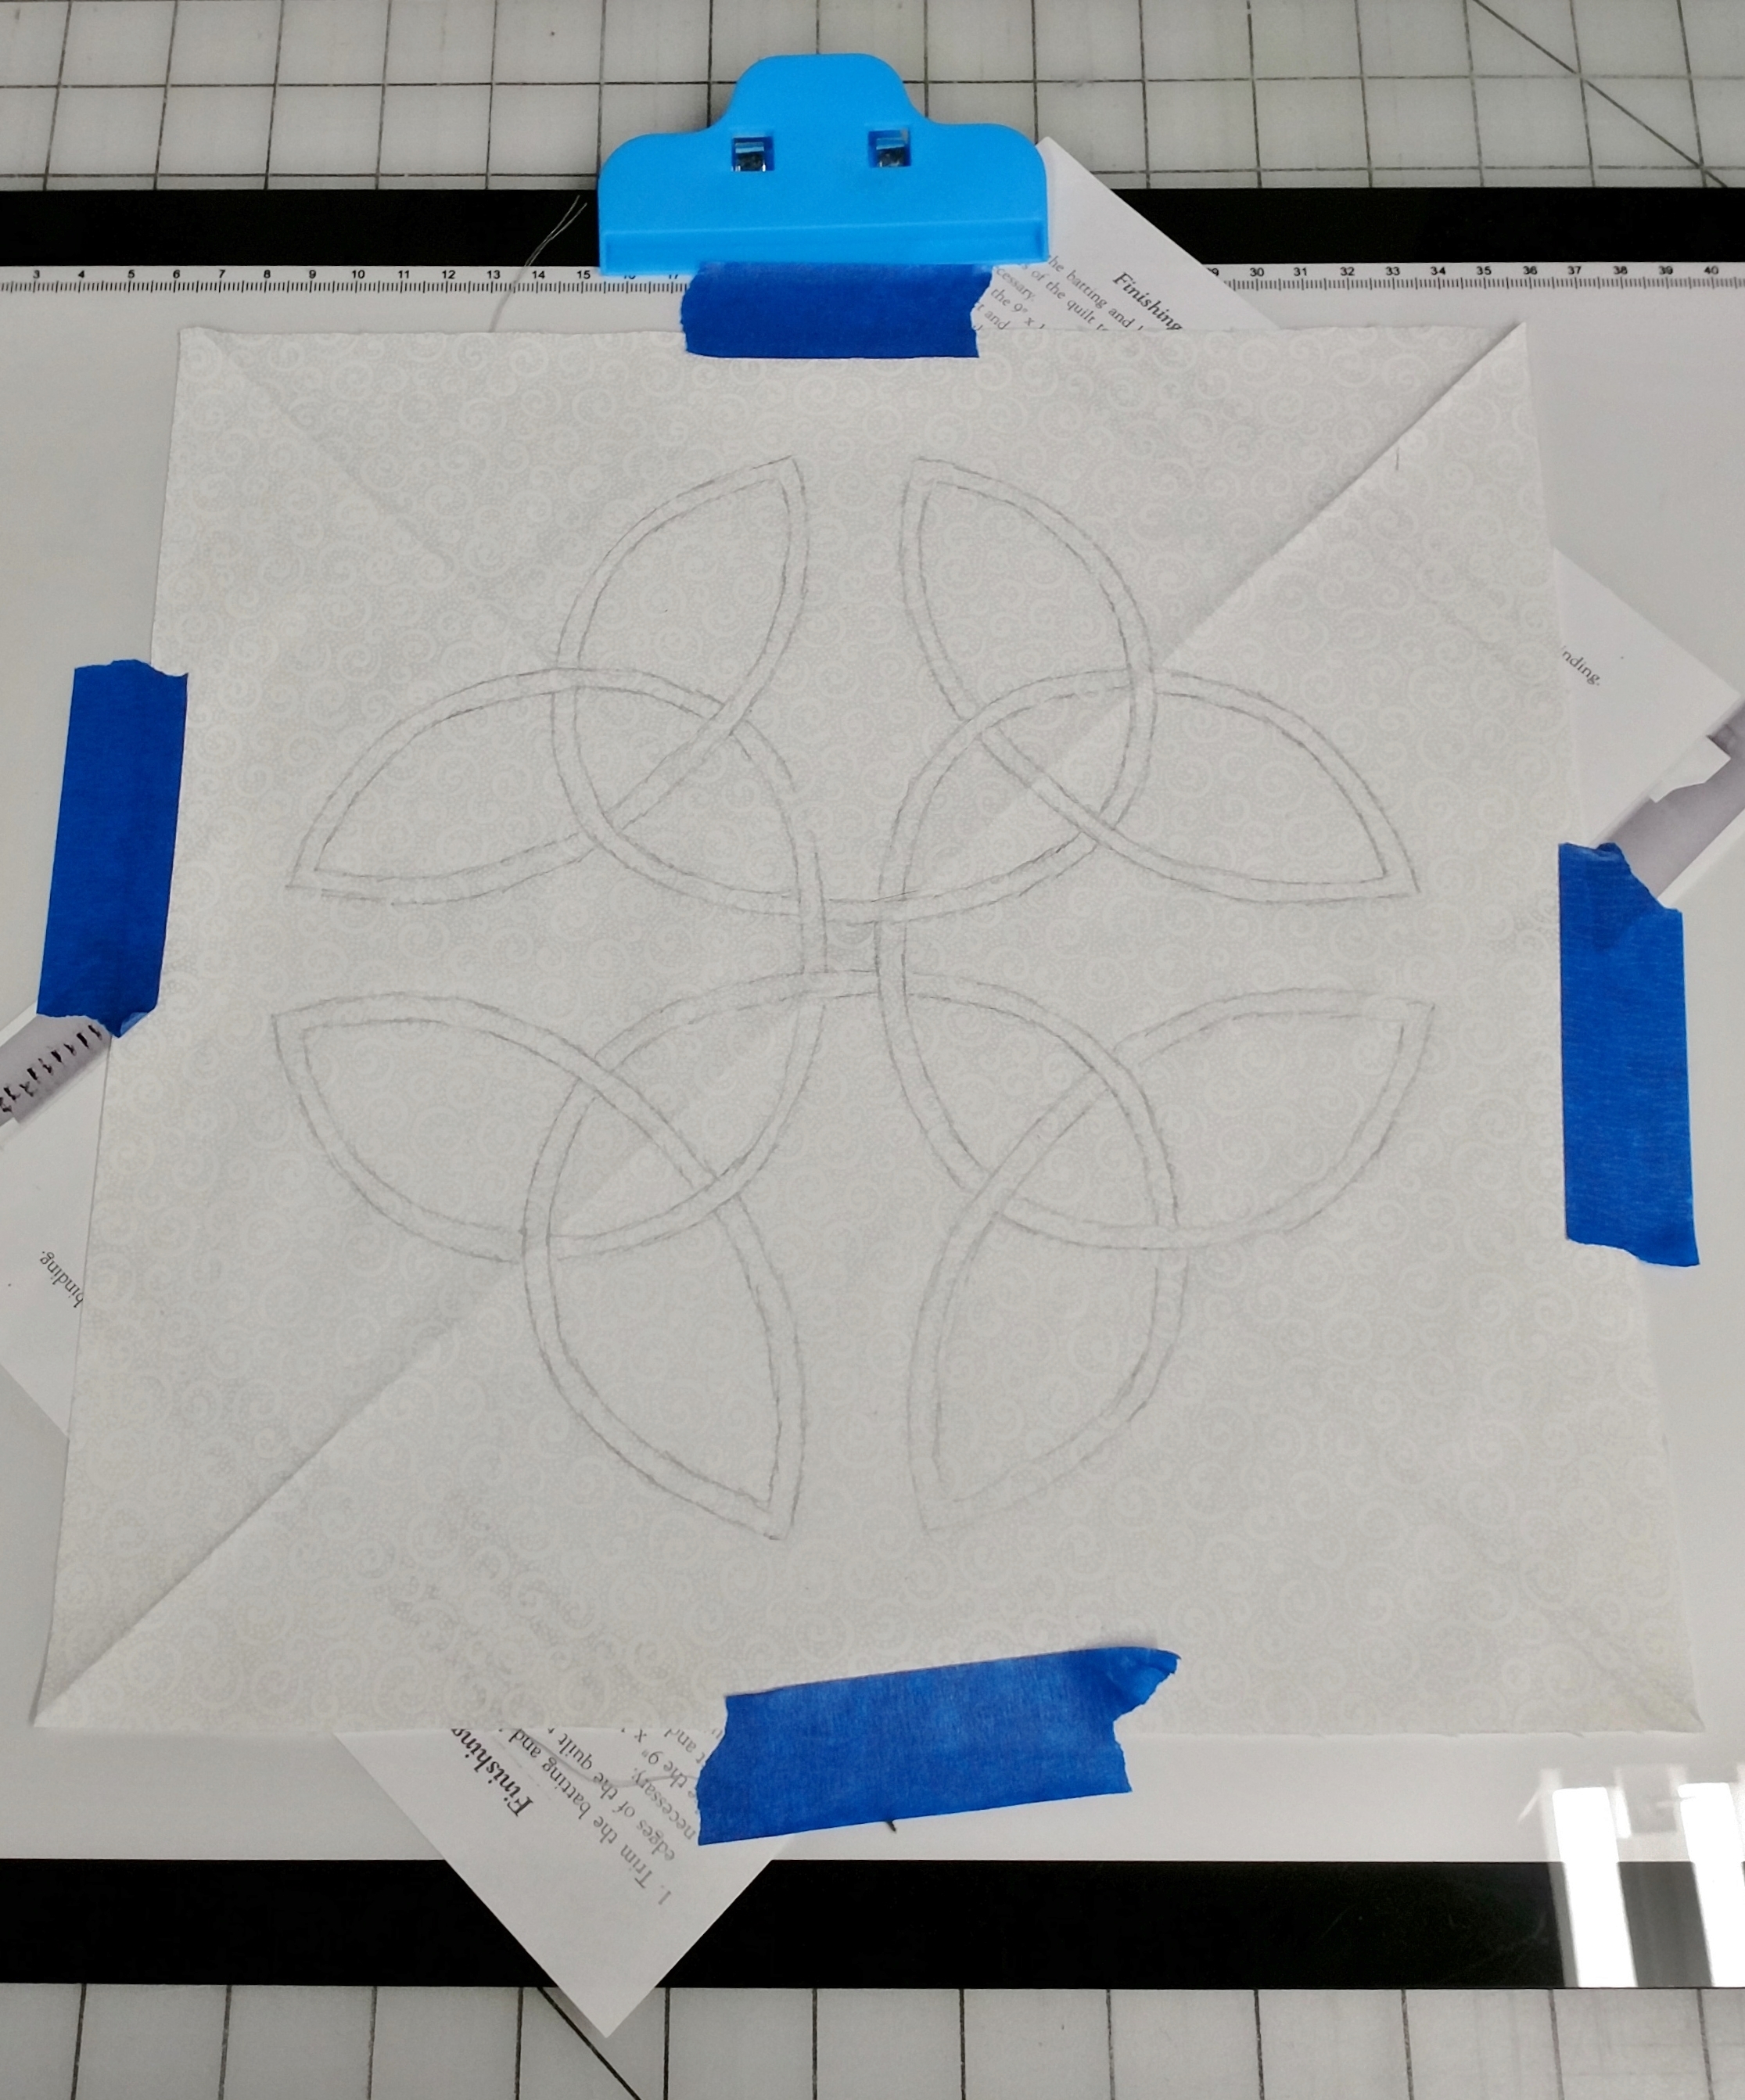
- Use painter’s tape and/or one or more clamps to secure the paper pattern on the light table (or pad) so that it won’t slip while you are tracing the design.
- Lay the fabric on top of the pattern, lining up the creases in the fabric with the cross in the center of the paper pattern. Again, use painter’s tape to keep it from shifting.
- Use the marking tool of your choice; I recommend a simple mechanical pencil.
- Trace just inside the lines to give yourself fudge-room later.
- Peel away all of the painter’s tape.
- Keep the paper pattern handy – you will find it helpful to refer to later!