I’m getting ready to teach my Color Gets the Credit but Value does the Work class at the AQS show in Grand Rapids, Michigan, and I thought it might be helpful to post a quick overview of the methods I recommend for evaluating the relative value of the fabrics in your quilt or other project. (Why you would want to do that is included in the class.)
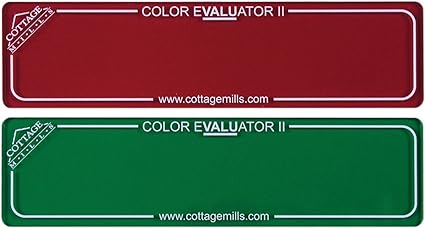
First of all, depending on how long ago you started quilting, you might have been taught to use a Ruby Beholder (red filter) or a Color Evaluator (set of red and green filters – this one is from Cottage Mills).
These filters do work, and they are convenient; but, they are no longer my go-to method.
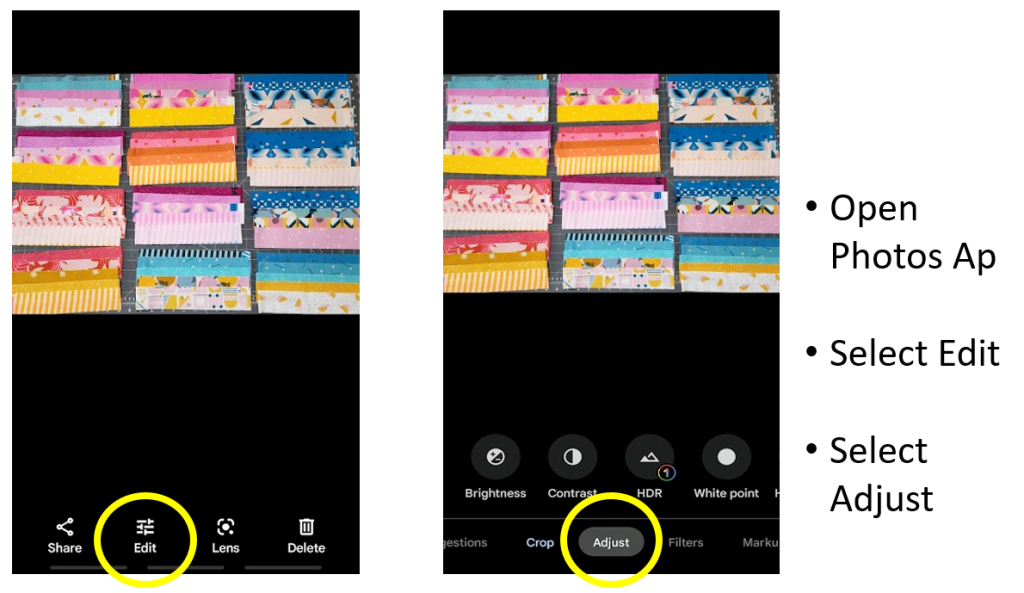
Instead, I now reach for the camera on my phone.
Your camera ap and/or editing ap might be slightly different from mine. However, the general idea will be the same.
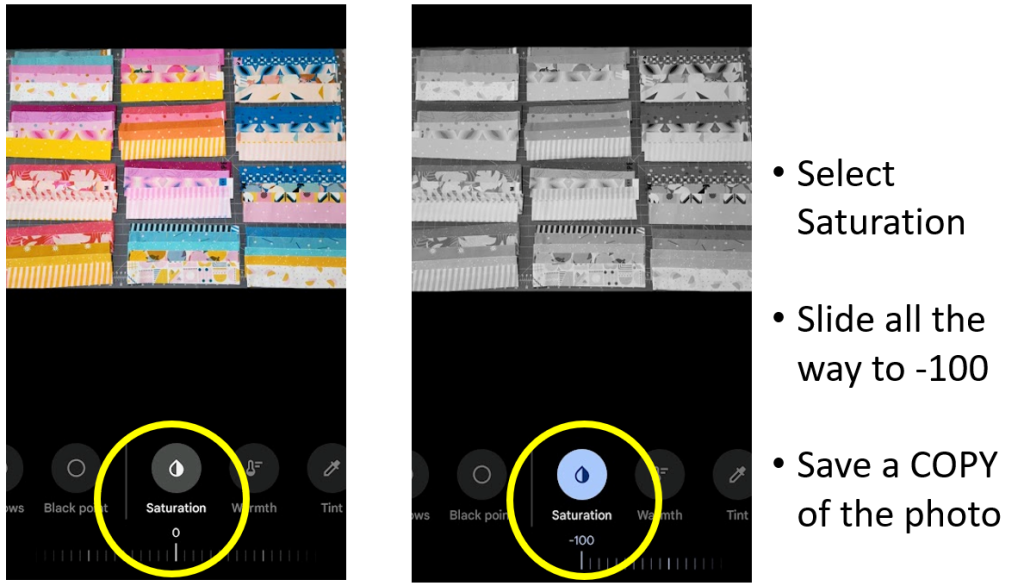
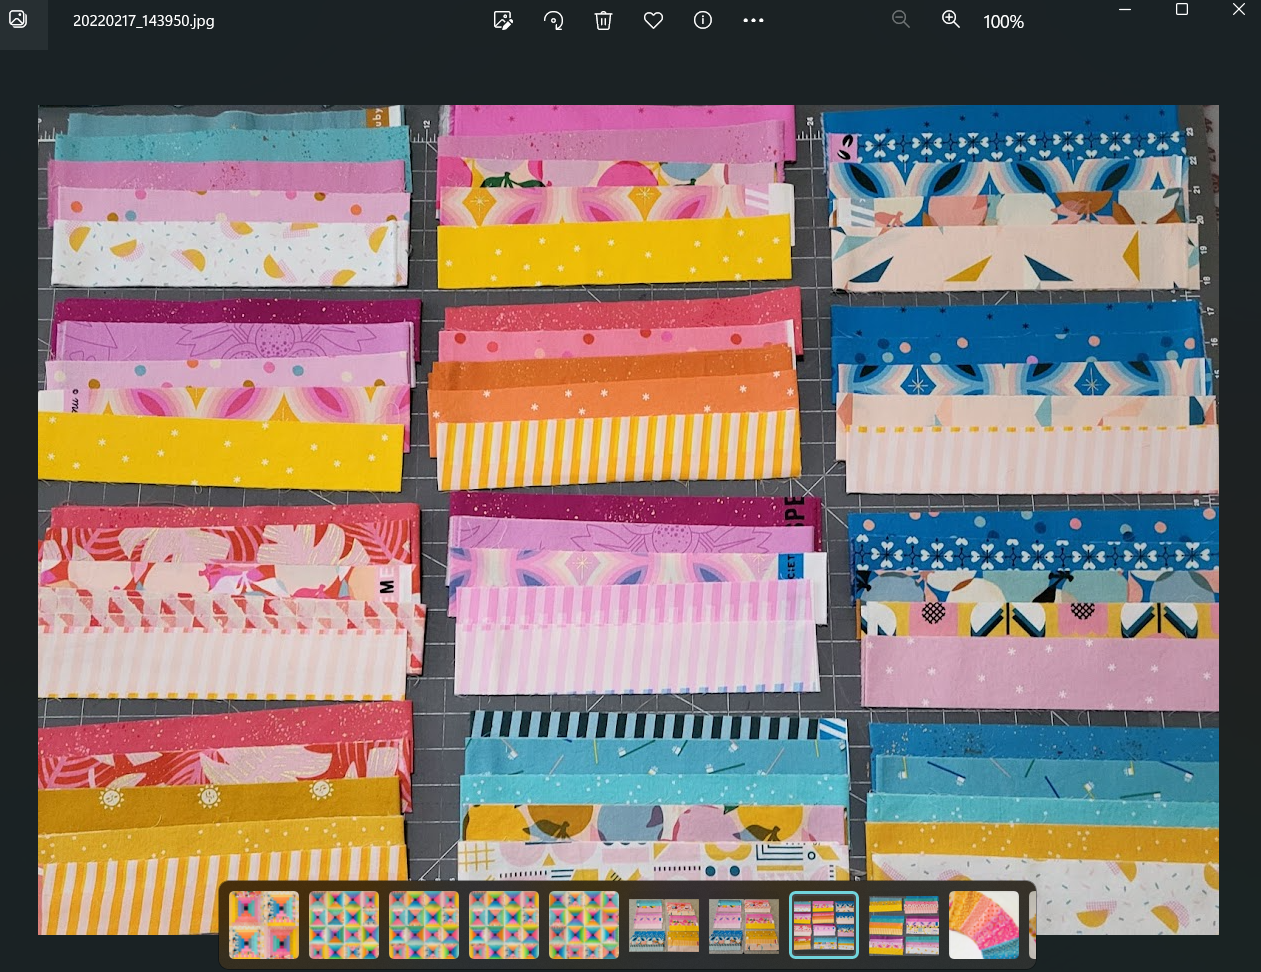
Here’s how I use the photo gallery and editing ap on my phone:
Please note: I took these photos mid-way through my fabric selection process; I tweaked some of the sets quite a bit before sewing them into my quilt.
There you have it!
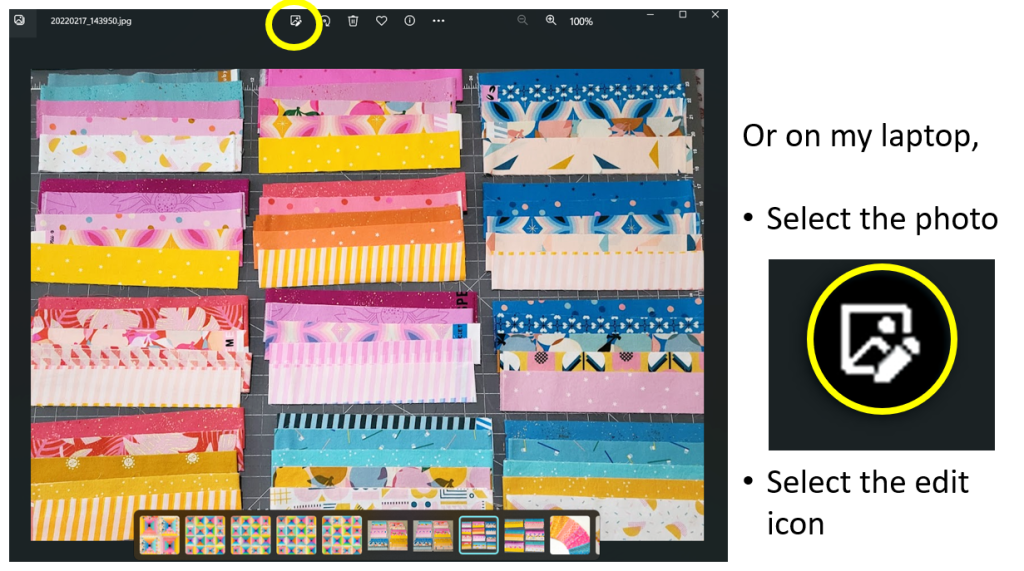
On my laptop, it is a similar process:
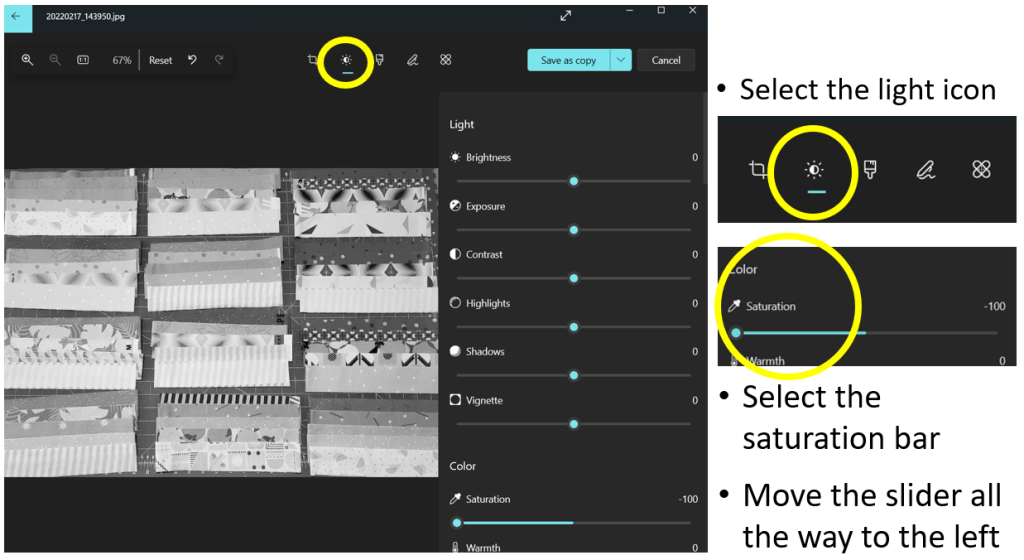
Once, again, don’t forget to save your edited photo AS A COPY so you don’t lose your original full-color photo.
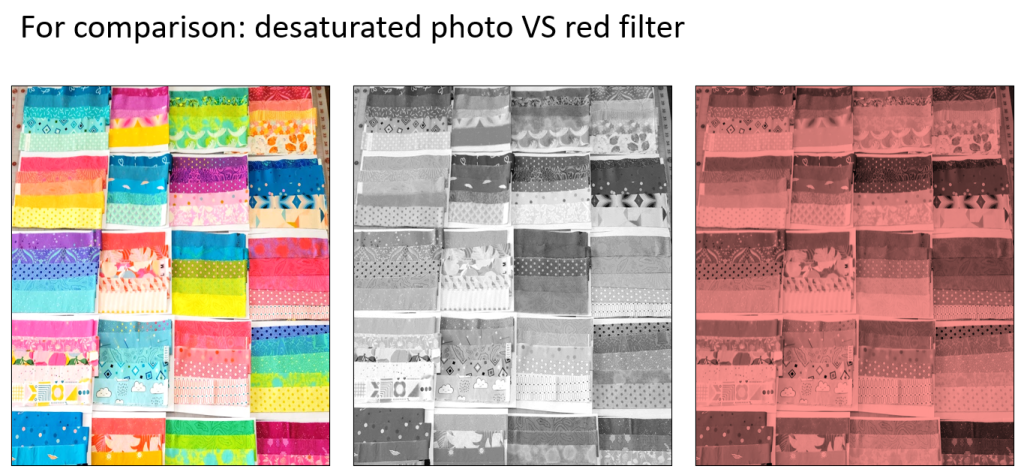
As you can see, both methods work. However, I find that the red filter can make the reds read a bit darker (see the vertical row all the way on the right of the photo). The greens seem a little off, too. Using both the red and the green color evaluators (one at a time) can help compensate for this variance, but I find desaturating the photo (removing the color) is my preferred method. As always, go with whatever works best for you.
I hope this is helpful!
