This is the fifth in a series of sew/quilt-along posts about making a bargello quilt.
Now that my loops are all cut from the strip-pieced tubes (see previous post), I’m ready to open the loops up and lay out the bargello segments that form the vertical rows. This is exciting, as it will be the first chance to see what the finished quilt will look like.
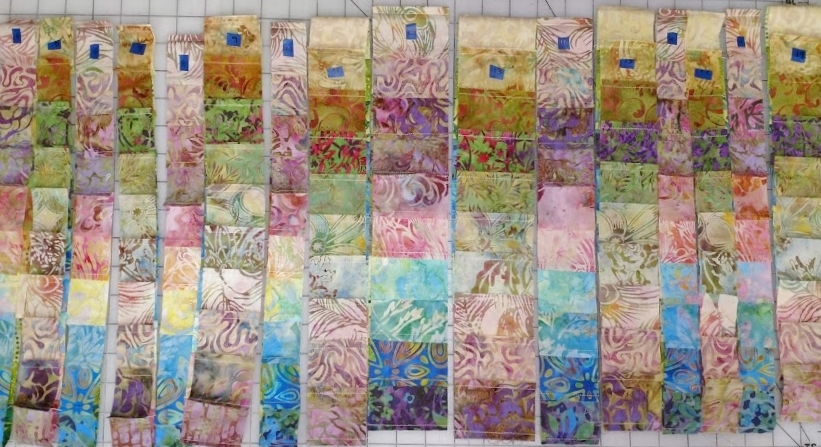
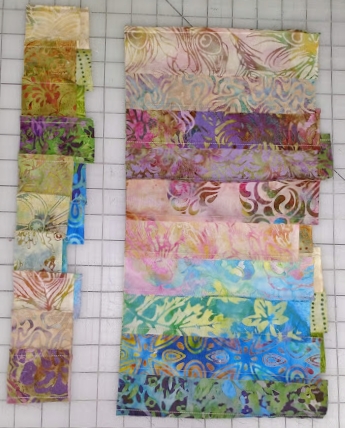
I start by laying all the loops on my worktable in order. Remember – the colors are different in the photo only because the tubes have been rotated differently. All of the odd numbered loops have been cut from one tube, and all of the even numbered loops have been cut from another tube.
Now it’s time to open up the loops!
I like to use an inexpensive foam core board for this. Being able to look at the design vertically helps immensely. As I open each loop, I pin it to the board and transfer the number to the top of the bargello strip.
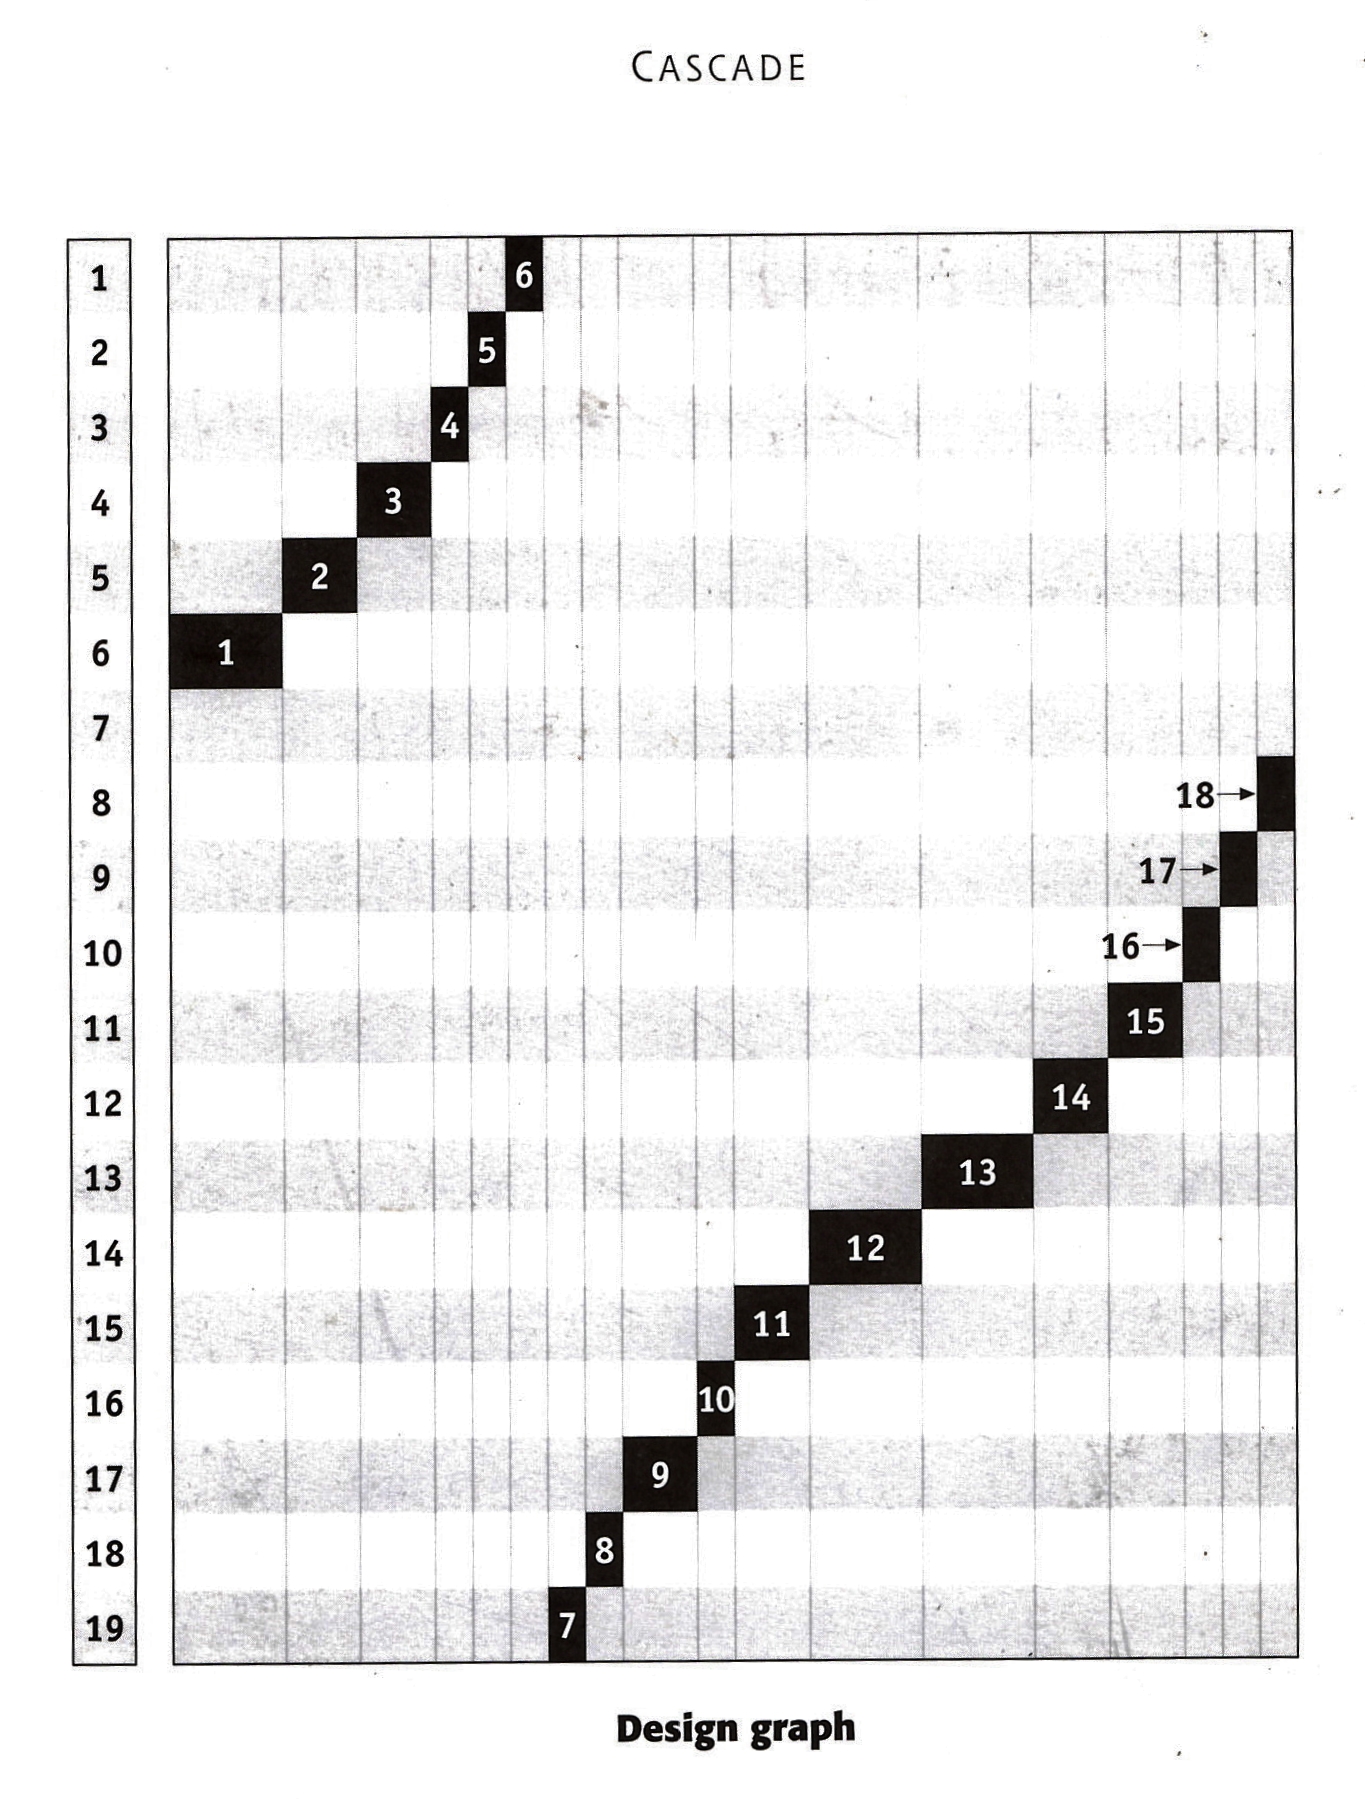
The Colorwash Bargello book shows a design graph for each quilt. This graph shows the movement (up one space or down one space) of the “dominant” fabric.
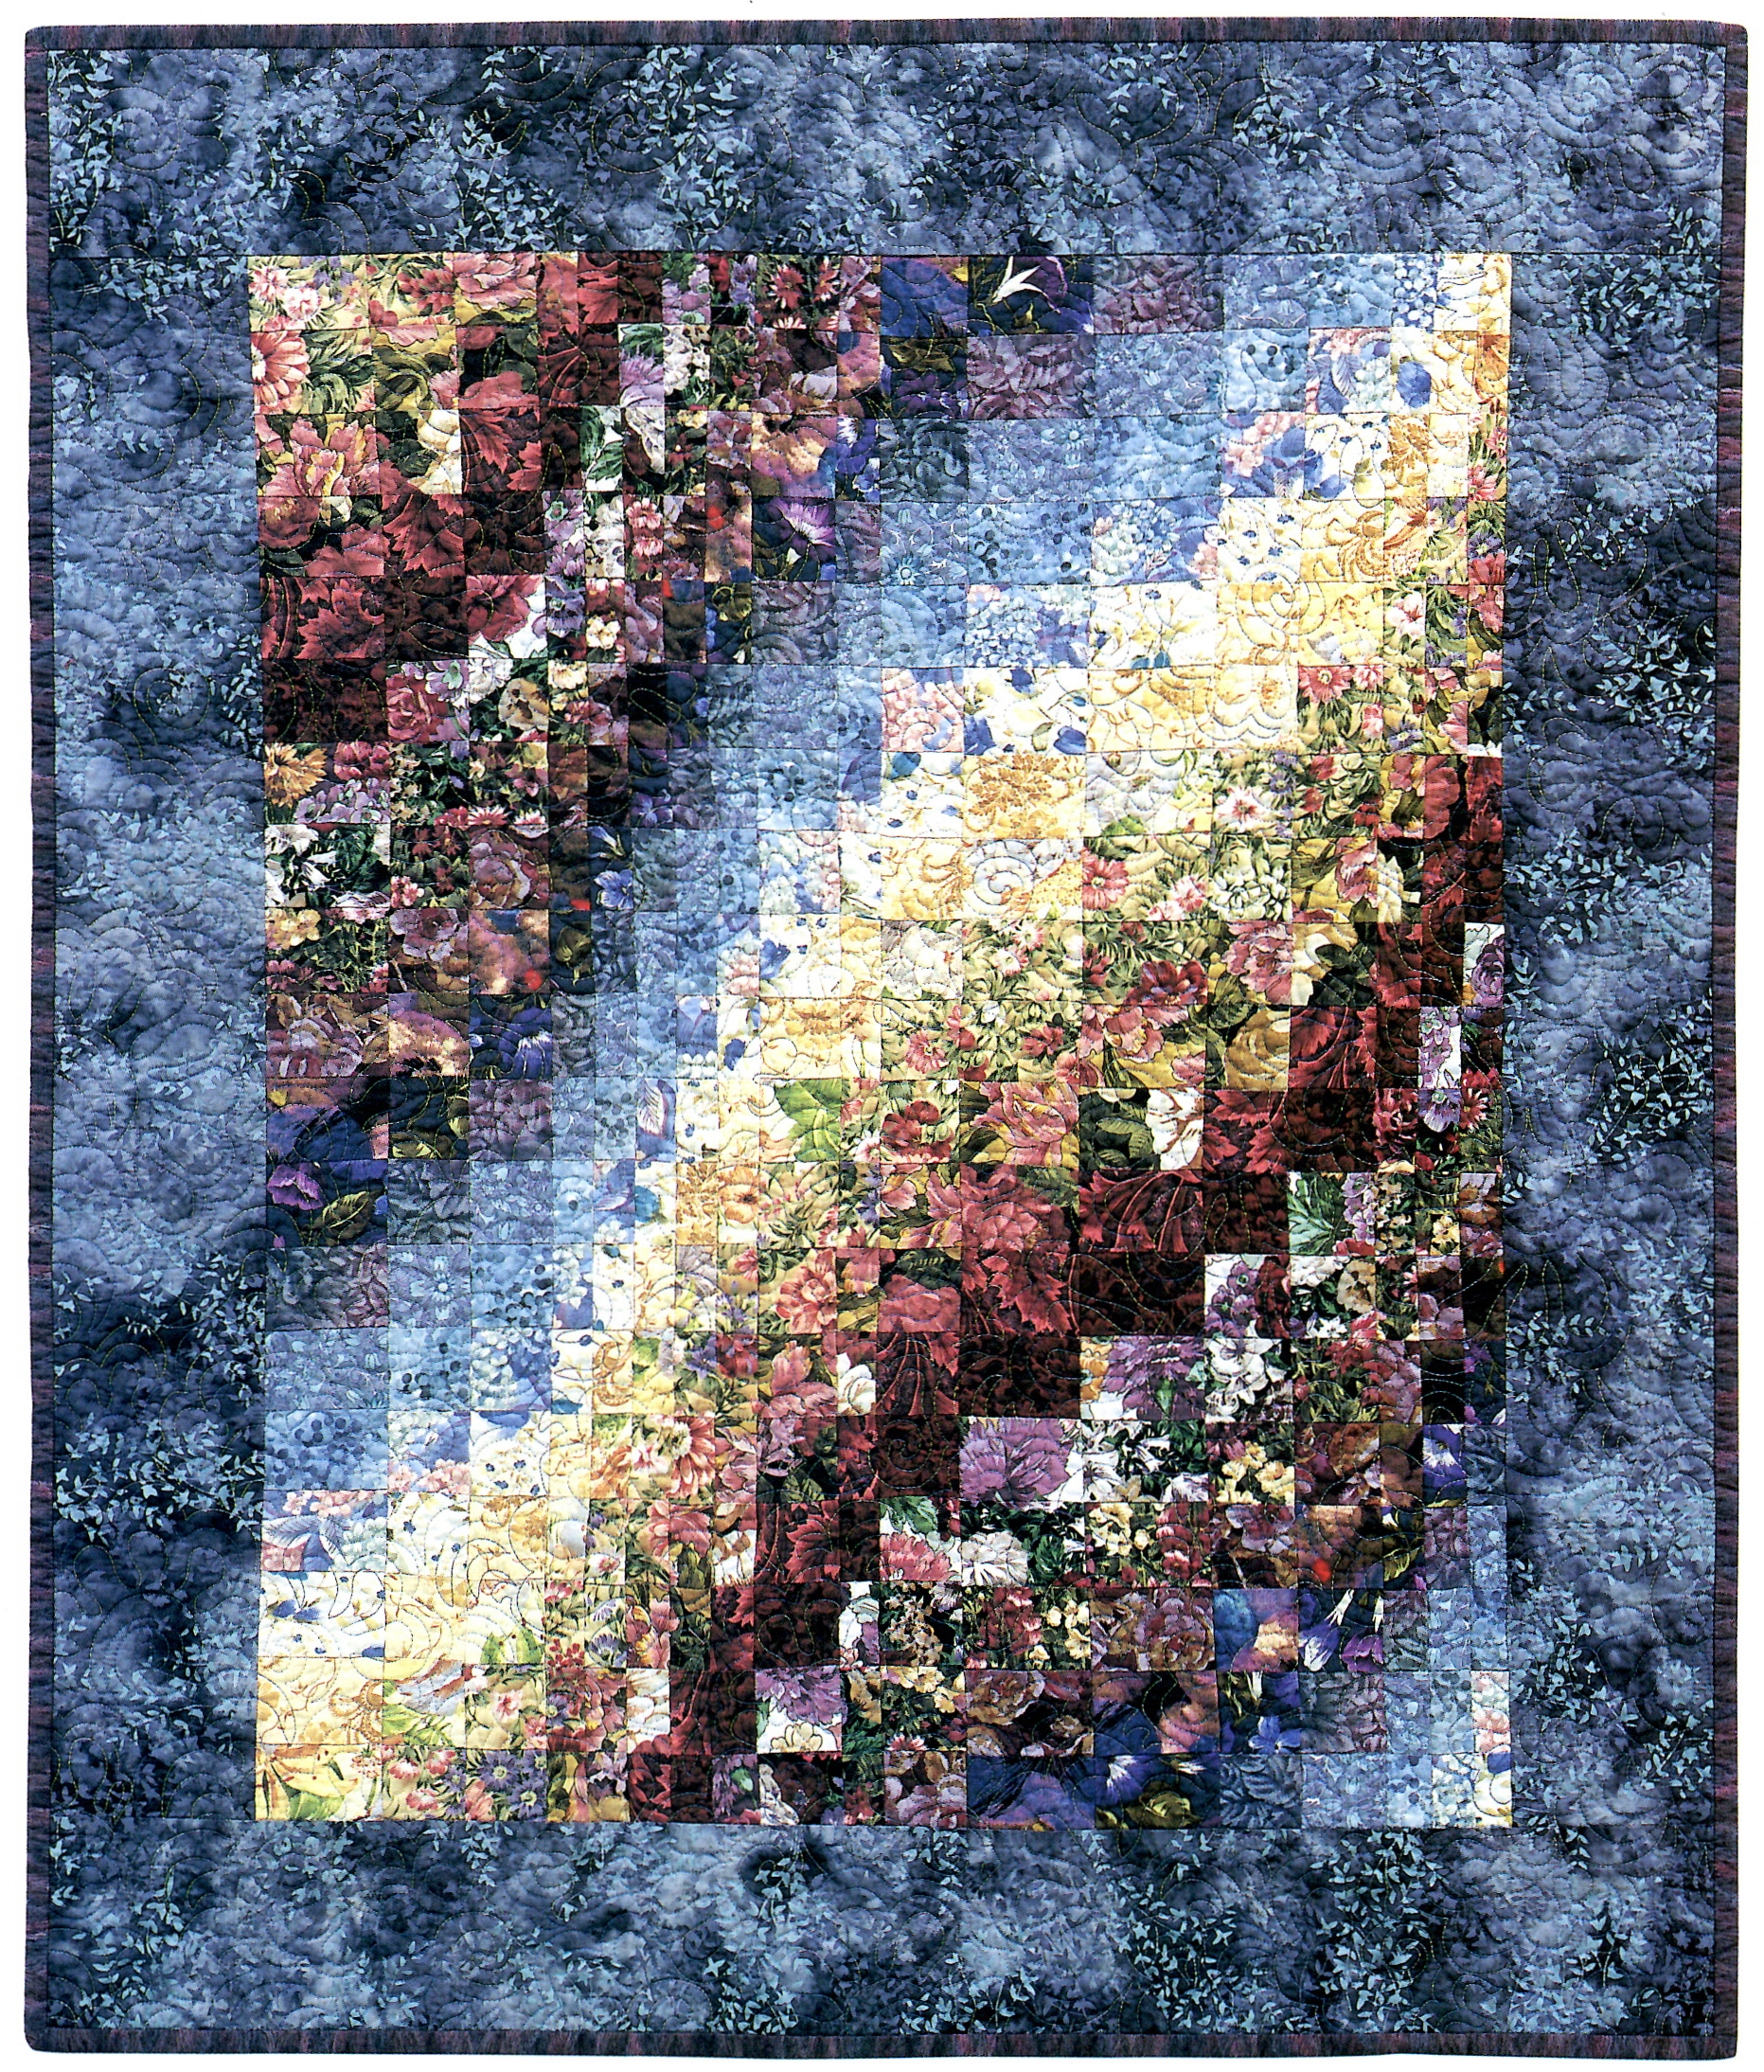
However, for this particular quilt, I think the easiest way to decide where to start opening up the loops is to figure out what you want to happen through the center of the quilt – where the cream runs from the bottom left corner to the upper right corner in the original quilt.
I’ve decided to run the light green/cream/tan through the center of this project, so that’s where I’m going to start opening up the first loop. This will put the bright turquoise fabrics where the burgundy is in the original.
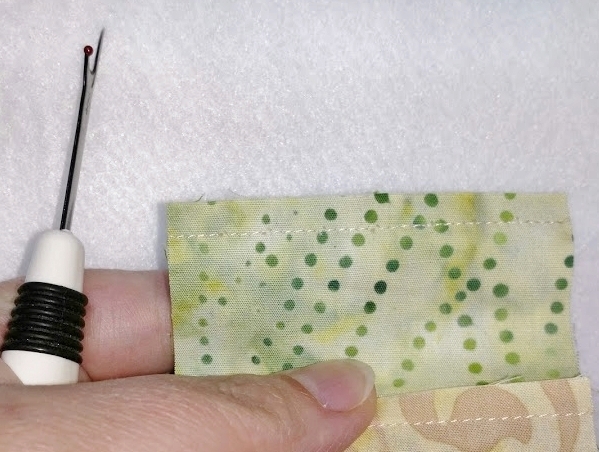
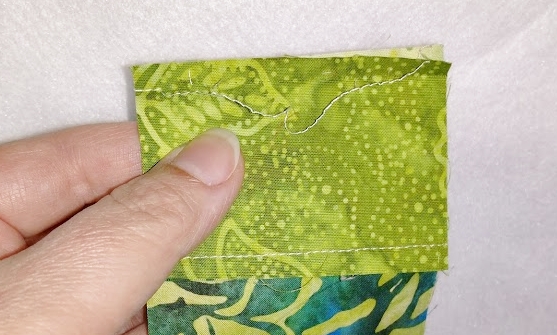
Now you’ll see (if you haven’t already figured it out) why it is so helpful to have two different colors for the bobbin and the top thread! It allows you to immediately identify which side of a seam shows the bobbin thread. Too many times, I’ve seen people pull their fabric out of shape – or even accidentally rip the fabric – when “sewing in reverse” (AKA taking a seam apart). This method will prevent that:
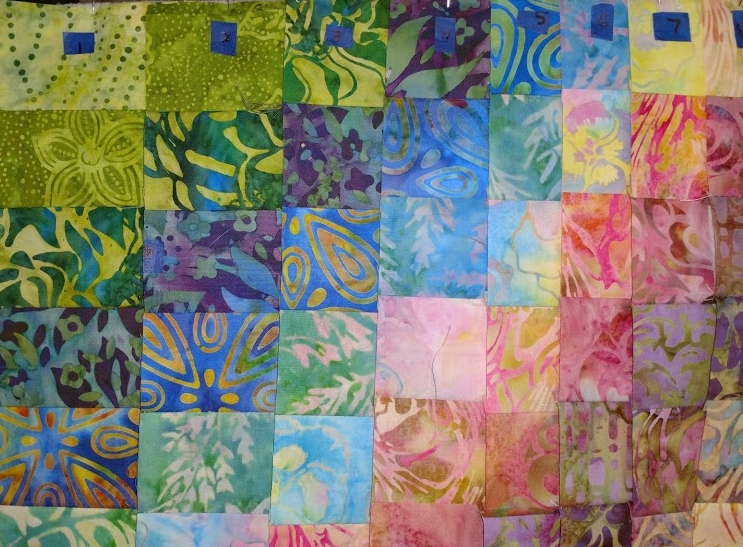
This shows the first few vertical rows pinned to the board:


But since my sew/quilt-alongs are all about variations, I’m going to use my left-over tube sections to make the quilt a little wider.
Note: Adding more vertical rows (bargello segments, or loops that have been opened up) will make the quilt wider. This quilt will also be 1 1/2″ longer than the original Cascade because I am using 20 fabrics instead of the 19 specified in the pattern in Colorwash Bargello Quilts.

Note: I’m happy with how this looks, but if you are laying out your own version of this quilt and decide that you’d rather emphasize a different color by switching things around, it’s no big deal to sew the bargello segments back into loops and start opening up the loops again in a different spot.
Now I’m ready to start sewing again!