
Here’s another post dealing with FAQ – this time specifically related to using a sewing machine for quilting. For the time being, I’m avoiding the topic of which threads I recommend; we’ll save that for another day!
Do you work by hand or by machine?
The short answer is both. I almost always use a sewing machine to piece and/or appliqué my quilt tops, both for speed and for durability.
When adding the quilting, (the stitching that holds the quilt top, batting, and backing layers of a quilt together), I most often use a technique that might be compared to “hand quilting with an electric needle.” I drop the feed dogs, decrease the pressure on the presser foot, and set the stitch length and width to 0. This means that all the sewing machine does is make the needle go up and down. Stitch length and direction are controlled entirely by the way that I physically move the quilt with my hands. I rarely mark my quilting patterns, they are developed “free-hand,” or made up as I go along.
I usually machine sew the binding to the front of the quilt and then wrap it around and hand sew it to the back.
Do you have any tips for quilting by machine?
Sure do! I’ve been teaching machine quilting classes since the 1990s. Of course, I try to always remind people that there is no one way that is best; if something other than what I recommend works better for you, then by all means ignore me!
That said, here are some tips and techniques that work well for me:
- Use low-loft cotton or cotton-blend batting. The low-loft has less bulk, and the cotton in the batting sticks to the cotton in the quilt top and backing, making it less likely to shift than a polyester batting.
- Baste, baste, baste! But NOT with thread. Thread basting generally doesn’t hold the layers securely enough to avoid tucks or slipping of the layers. When using safety pins to hold the layers together, tape or clamp the backing down on all edges (so that it is slightly taut, with no wrinkles or fold lines) and then smooth the batting and top in place. Place pins no more than 2-3″ apart. I also really like the Hobbs fusible Heirloom 80/20 cotton batting — no pins needed at all!
- Try not to have any more than ½ of the quilt under the machine at any given time. In other words, if you are quilting straight lines across the quilt (such as stitching in the ditch along block or sashing seams), don’t start at one end and simply work your way across the quilt. Instead, work from one direction for half of the quilt, then rotate it and work from the other direction for the remaining lines of stitching.
- In order to isolate an area of the quilt for stitching, fold the edges in loosely and secure the fold with 3-4 safety pins. (For me, rolling the quilt tends to create a very stiff, awkward tube, and I find that bicycle clips and other tools meant to secure the roll tend to get hung up on each other or hung up on the needle bar as I try to move the quilt through the machine.)
- With a walking foot, quilt along long straight lines that go either all the way through the quilt or almost all the way through FIRST (between blocks, across major piecing lines, along sashing or borders, etc.). This stabilizes the quilt sandwich, and makes it easier to do any additional “fancy” quilting without causing the layers to shift. Exception: I rarely quilt stabilizing lines on a quilt that will be free-motion quilted in an all-over pattern.
- Particularly on a bed-size quilt, any designs (whether fancy motifs or stitching in the ditch around complicated pieced blocks such as stars) that involve multiple changes in direction are usually better done with a darning (or free-motion) foot. Any time you are rotating a large quilt while it is in your machine you are risking layers sliding or bunching, especially right around the needle.
- Work with your machine either in a cabinet or with an add-on table around it so that you have a flat working surface with plenty of room to support the quilt on either side of the machine. It is important that the weight of the quilt doesn’t create drag (or stretch the quilt top) as it feeds through the machine toward the needle or past the needle.
-
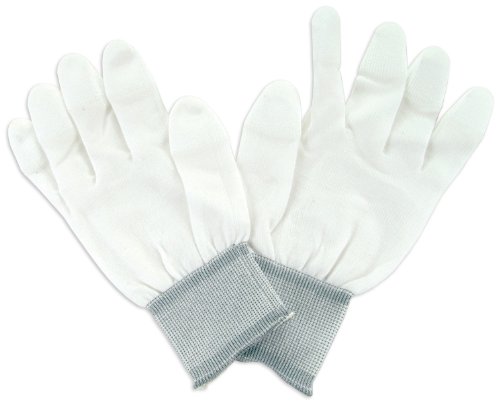
Machingers, cotton quilting gloves available in several different sizes. I swear by my cotton quilting gloves; they allow me to use the whole of my hand to control the fabric (instead of just fingers) and also keep my hands from slipping or skidding on the fabric when I am trying to move it. I find that they greatly reduce the amount of strength it takes to control the quilt, which in turn reduces strain and fatigue. The gloves also allow me to apply a gentle tension on the quilt, making it easier to flatten out any excess fullness in the area as I am quilting. Some kinds of garden gloves, bell ringer gloves, etc., are good alternatives. Some quilters favor rubber office fingers (especially if their hands get too hot in the gloves), but I have a hard time keeping them from flying off…
- Clean your machine out and replace your needle at least at the beginning of each new project. I change my needle and clean out under the throat plate, around the bobbin, the bobbin case, etc. every 6-8 hours of continuous sewing, or at least every other time I change my bobbin.
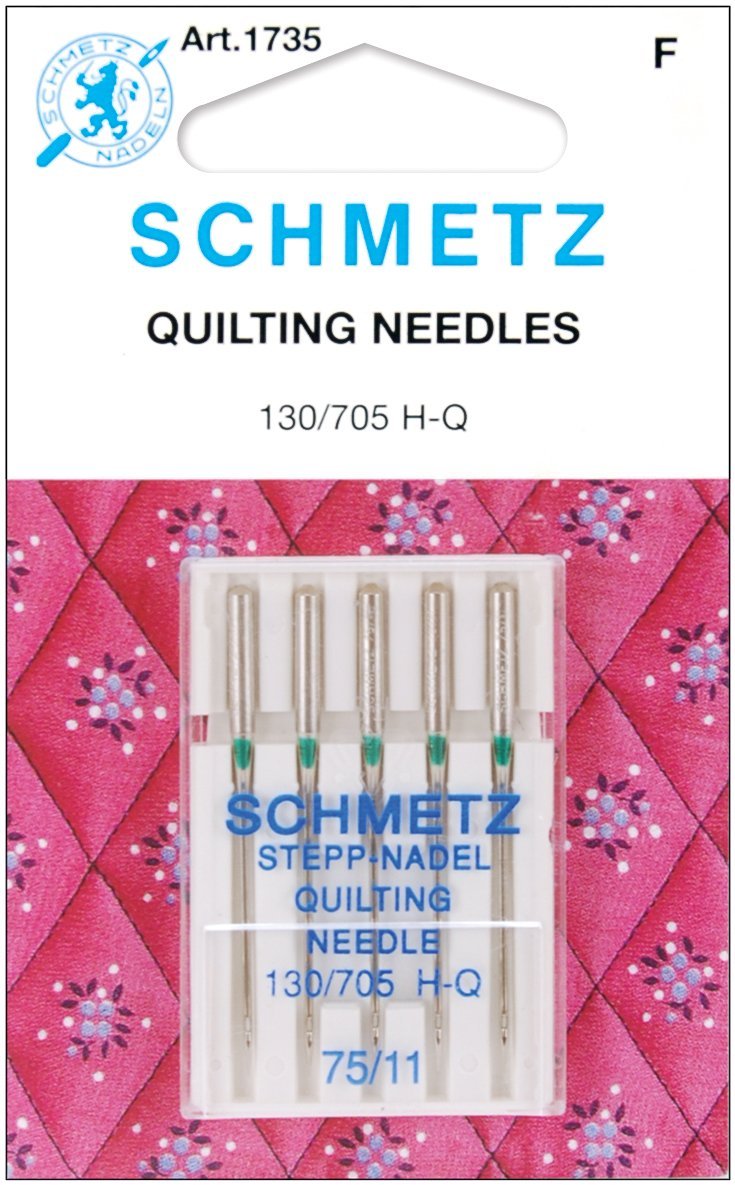
- Speaking of needles: I think Schmetz Quilting needles, size 75 are one of the best general choices for machine
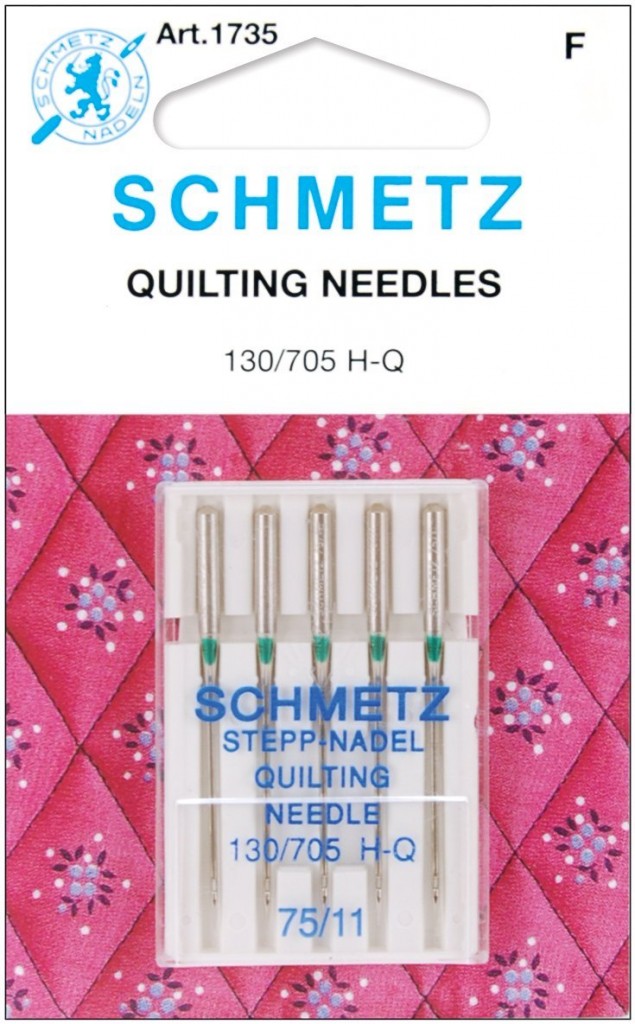
Schmetz Quilting Needles, size 75/11 quilting. They have a reinforced shaft and a very fine, tapered point that allows them to pierce cleanly without snagging, pulling or having the needle “punch” through the quilt sandwich. Schmetz Microtex Sharps, Embroidery, or Topstitch needles may also be helpful when working with various types of thread. Generally speaking, you should use the smallest size needle that will do the job.
- If your bobbin thread is visible on the top side of your work, then your upper thread tension is too high and should usually be turned to a lower number. If your top thread is visible on the backside of your work, and/or the bobbin thread feels very loose, then the upper thread tension is too low and should usually be turned to a higher number. However, if you adjust your upper thread tension and your stitch does not improve, the issue is more likely that the machine should be unthreaded and rethreaded, and/or cleaned thoroughly. Winding your bobbin too quickly or at an uneven speed can also contribute to problems with thread tension.
- Whatever style of quilting you do, remember to distribute the quilting evenly across the quilt; if one area is heavily quilted and another is not, it is unlikely that your finished quilt will lie flat.
- Unless you are starting at the outermost edge of the quilt, it’s usually a good idea to bring up the bobbin thread through ALL the layers at the beginning of each line of stitching. (This will help prevent a messy “bird’s nest” of thread on the back side of your quilt.) Hold tightly to both the top and bobbin threads until after the stitching has been secured by using a locking stitch or by 1/4″ or so of very tiny stitches. (Secure the stitches at the end of a line of stitching in the same manner.)
- When trimming the threads at the end of a line of stitching, first clip the top thread as close as you can to the surface of the quilt; then turn the quilt over and tug on the bobbing thread to pull the whisker of top thread into the batting. Hold the bobbin thread taut and clip it as close to the back of the quilt as possible. When the thread relaxes, it too will be drawn back into the batting.
- As you stitch, remember to look ahead to where you are going next, not at the needle. (This may take some practice to build confidence in your hand-eye coordination, but consider how far you’d get driving a car if you spent the whole time staring at your hood ornament!)
Finally, BREATHE! And take LOTS of breaks — your arms, neck & shoulders can get VERY sore, and the going gets really tough when you’re in pain…
Remember, this is supposed to be FUN!
Added June 2018 – a couple of current machine quilting books that I particularly recommend:


2 thoughts on “Machine Quilting FAQ & Top Tips”